How to Create Users the Manual Way
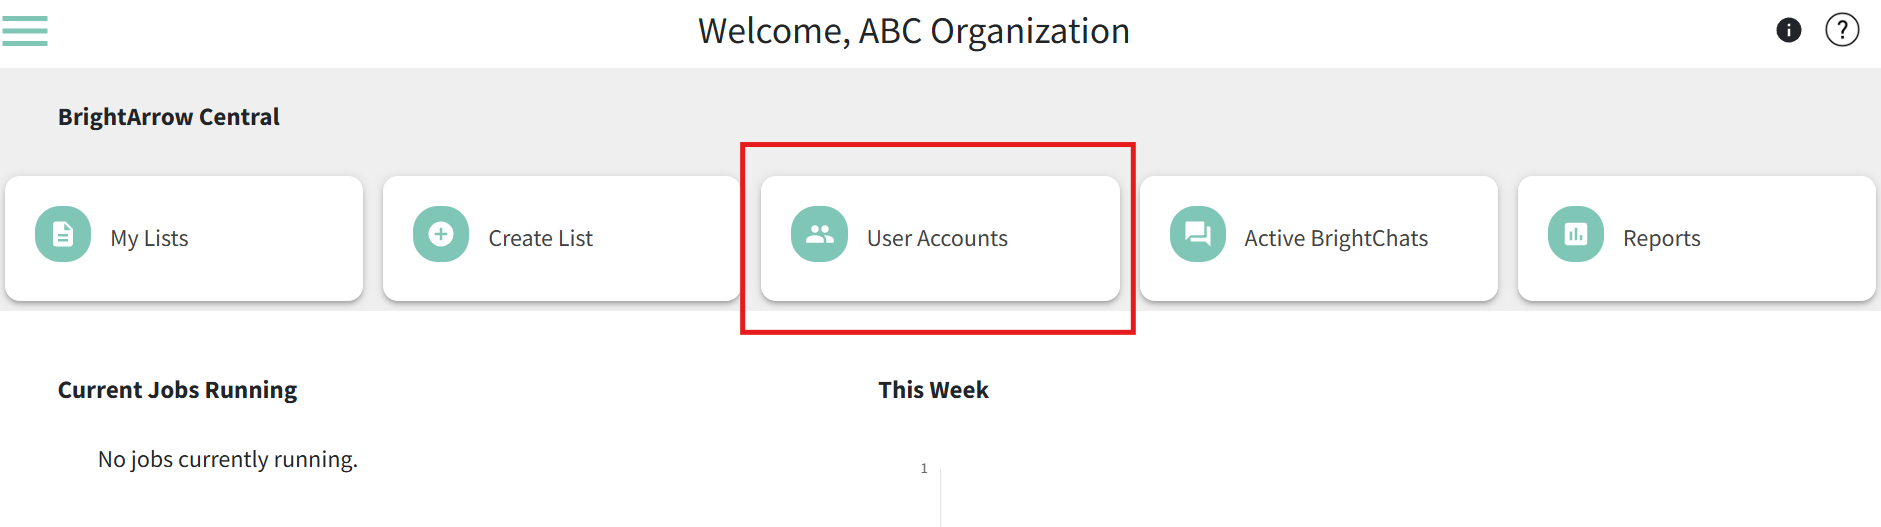
The BrightArrow superadmin will have a User Accounts button on their BrightArrow central home screen. The User Accounts section is used to create new users and manage the permissions for existing BrightArrow users. Once a user or user group is created by following the steps below, all system administrators will be able to view the new user's lists by clicking on the respective folder from the My Lists page. Administrators will also be able to see the message summary reports for the new user/user group on the Reports page.
Types of users
There are 2 types of users:
- Individual Users: These users only see lists that are specifically shared with them or that they make themselves.
Ex: Teachers at a school shouldn't see every student, only their own. - User Groups: These users all share lists. When one member makes a list, the other members of the group can see and use that list as well.
Ex: Administrative staff at a school. They should be able to see all contacts for that school and sharing lists does not share data to people who don't normally have access to it.
**Note: At this point users can only be in 1 group at a time.
Here are some common scenarios to help you decide which type of user to create:
- If a user needs access to a whole group's lists and is associated with only ONE group, adding them as an Alternate User Login to that group is ideal. Ex: Your organization has multiple user groups or campuses but the new user should only have access to all lists for the specific campus they work at.
- If a user should have access to all lists for the entire organization, they should be added as an Alternate User Login to the main/primary group. Ex: An administrator who needs access to all lists and reports for the entire organization, covering all campuses.
- If the user should have access to only specific lists and not the entire campus/group, they should be added as an individual user. Ex: An employee will need to send messages to only a select list of contacts and shouldn't have access to other lists for the building they work in.
- If the user should have access to all the lists for more than one campus/group but not full district access, they should be added as an individual user and each group that they need access to can be shared with them. Ex: An employee works at one campus some days and another campus other days so they need access to only those two groups.
Who can manage users?
Only the primary group account (superadmin) can manage users. There may be many users who are members of the primary group (admins) but only the group login itself can manage users. Everyone else will be prompted to change their password from the same link.
How to create an individual user
"Individual users" can only see lists that are shared to them or that they've created themselves. This is commonly used for teachers or staff members who should only have access to a small portion of lists and contacts.
- Log in to the primary (superadmin) account
- Select User Accounts
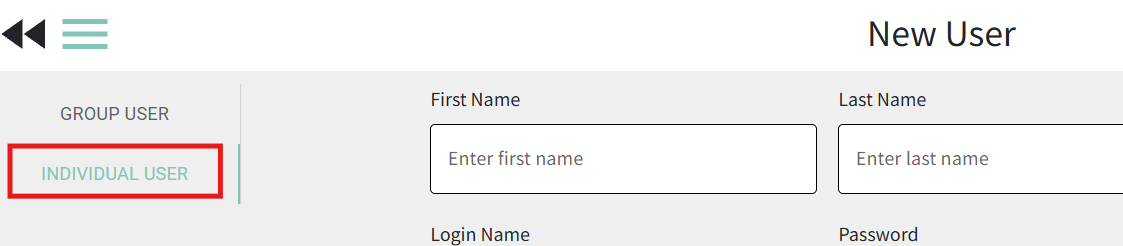
- Click on Add User
- Click on the "Individual User" tab on the left
- Fill in the information for the new user:
- Enter the user's first and last name.
- For the User Login Name enter their full email address.
- Assign them a password. Passwords must be at least 8 characters in length and contain at least one digit.
- If you want their phone calls to have their number as the caller ID, contact us to set that up.
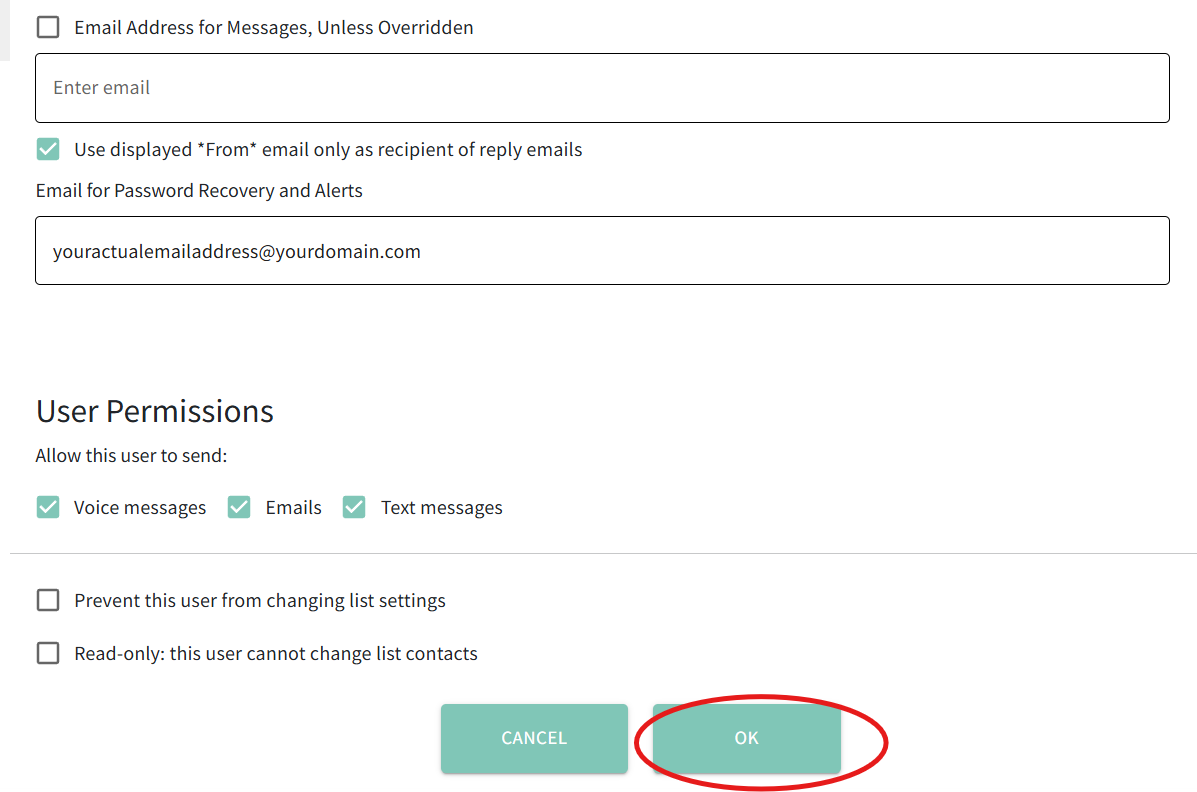
- Unless you know for sure you've set up SPF and DKIM for us, check the box for Use Displayed "From" Email only as Recipient of Reply Emails and enter the user's email address in the box. SPF and DKIM set up is required for messages to send from the email address.
- Enter the users email in the Email Address for Password Recovery box so that they can use the "forgot my password" function.
- If you do not wish the user to be able to send voice, text, or email uncheck the corresponding box(es). By default they are all enabled for new users.
- Click OK.
- Notify the users of the login credentials you set up for them so they can login.


How to create an alternate user to a group
"Alternate User Logins" are used to grant access to all lists in the user group they're added to. This is commonly used for office staff or administrators who should have access to a larger selection of lists and contacts, like for a whole campus, building, or the entire organization.
- Login to the primary (superadmin) account.
- Click the "User Accounts" button.
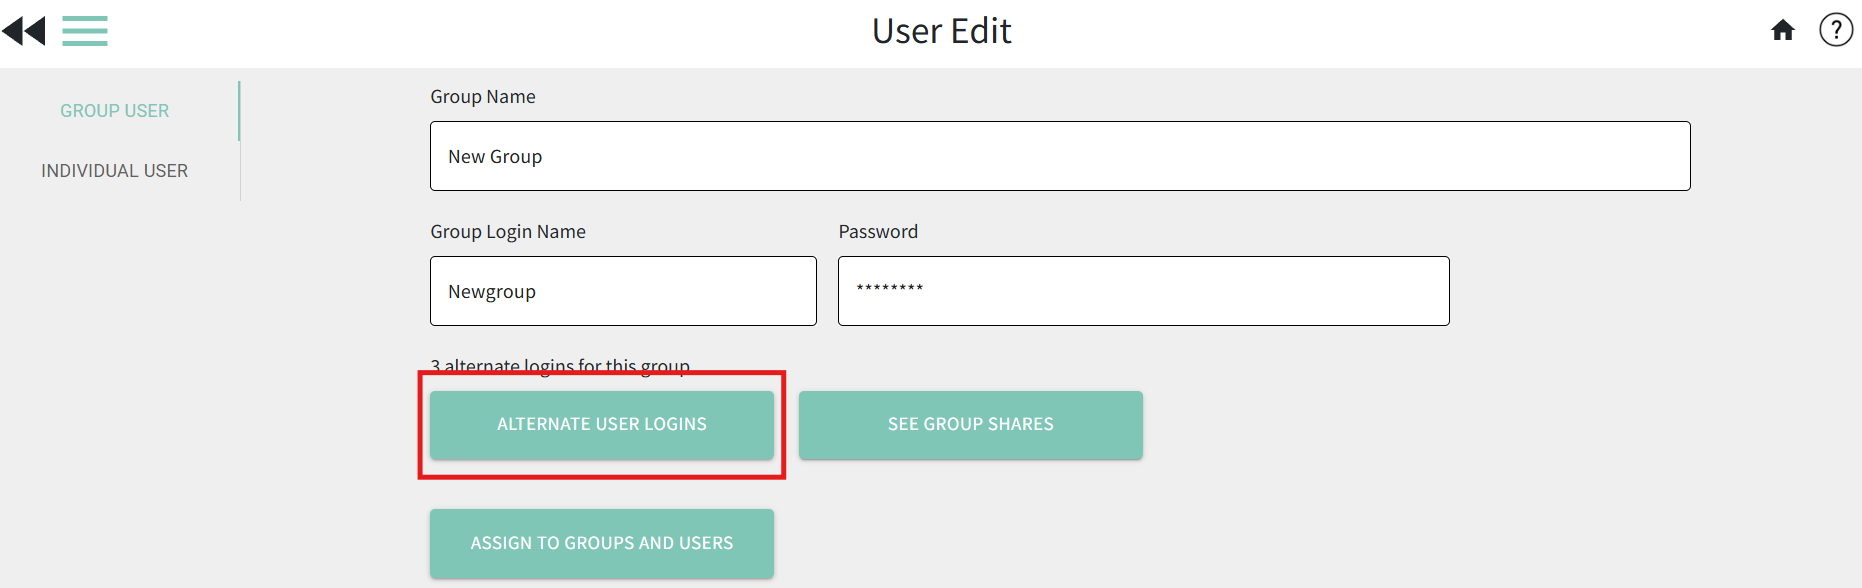
- Click on the group you want to add them to. If you're creating a brand new group, click Add User then click the Group User tab on the left.
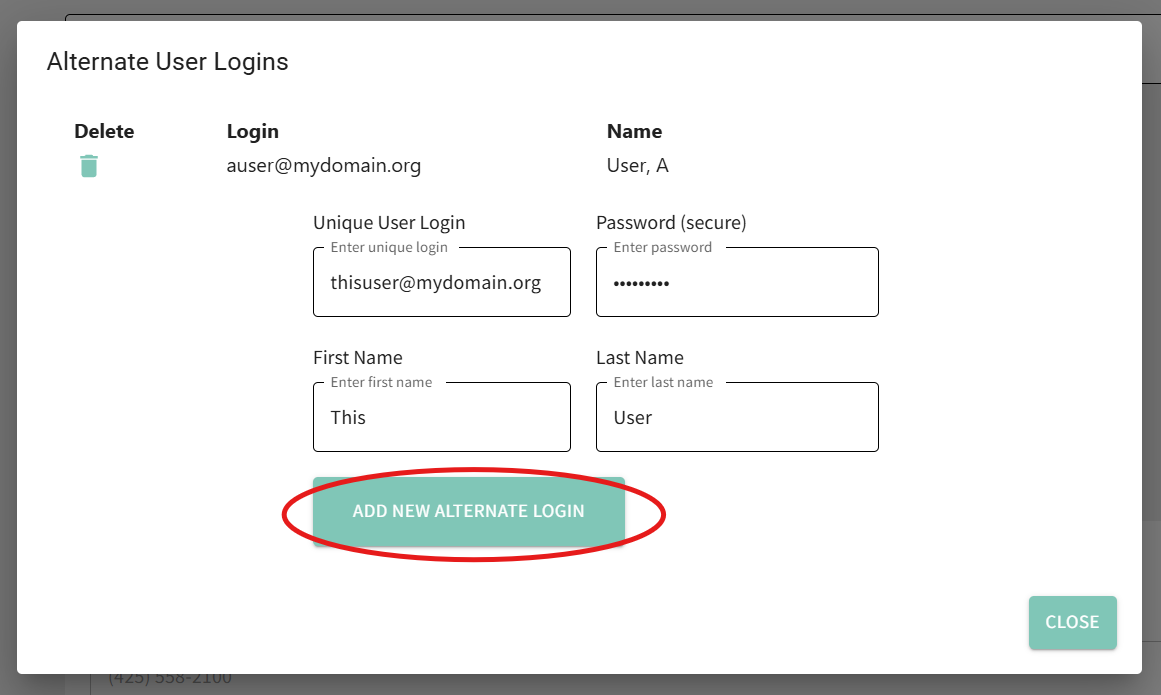
- Click the "Alternate User Logins" button.
- Enter the information for your new user.
- For the User Login enter their full email address.
- Assign them a password. Passwords must be at least 8 characters in length and contain at least one digit.
- Add their first and last name.
- Click the "Add New Alternate Login" button.
- Repeat A, B, C, and D until all new group users are added.
- Click "Close."
- NOTE: All members of a group have the same security. Changing any other options affects all members of the group.
- Click OK at the bottom to submit your changes
**Until you click OK the changes are not saved and users have not been created! - Notify the users of the login credentials you set up for them so they can login.