Revere Contact Lists
Revere is BrightArrow's rebuilt messaging center (currently in beta — reachable from the “Try Revere Now” banner on the BrightArrow Central dashboard). This guide walks through the two areas your team will use most: managing Contact Lists and sending a message with Compose.
Video Demo
Watch the video below for a detailed overview of Contact Lists in Revere, including list messages. The video also briefly touches on creating messages in the Compose tab.
Working with Contact Lists
The My Lists tab in BrightView (your BrightArrow Central interface) has been redesigned for Revere. In Revere you will find your contact lists in the Contact Lists tab.
Open Contact Lists
Select Contact Lists in the navigation panel, indicated by the "people" icon. This page shows every list across your organization, organized into folder tabs across the top such as All Lists, personal folders like My Favorites, and user folders that are assigned to you by your administrators.
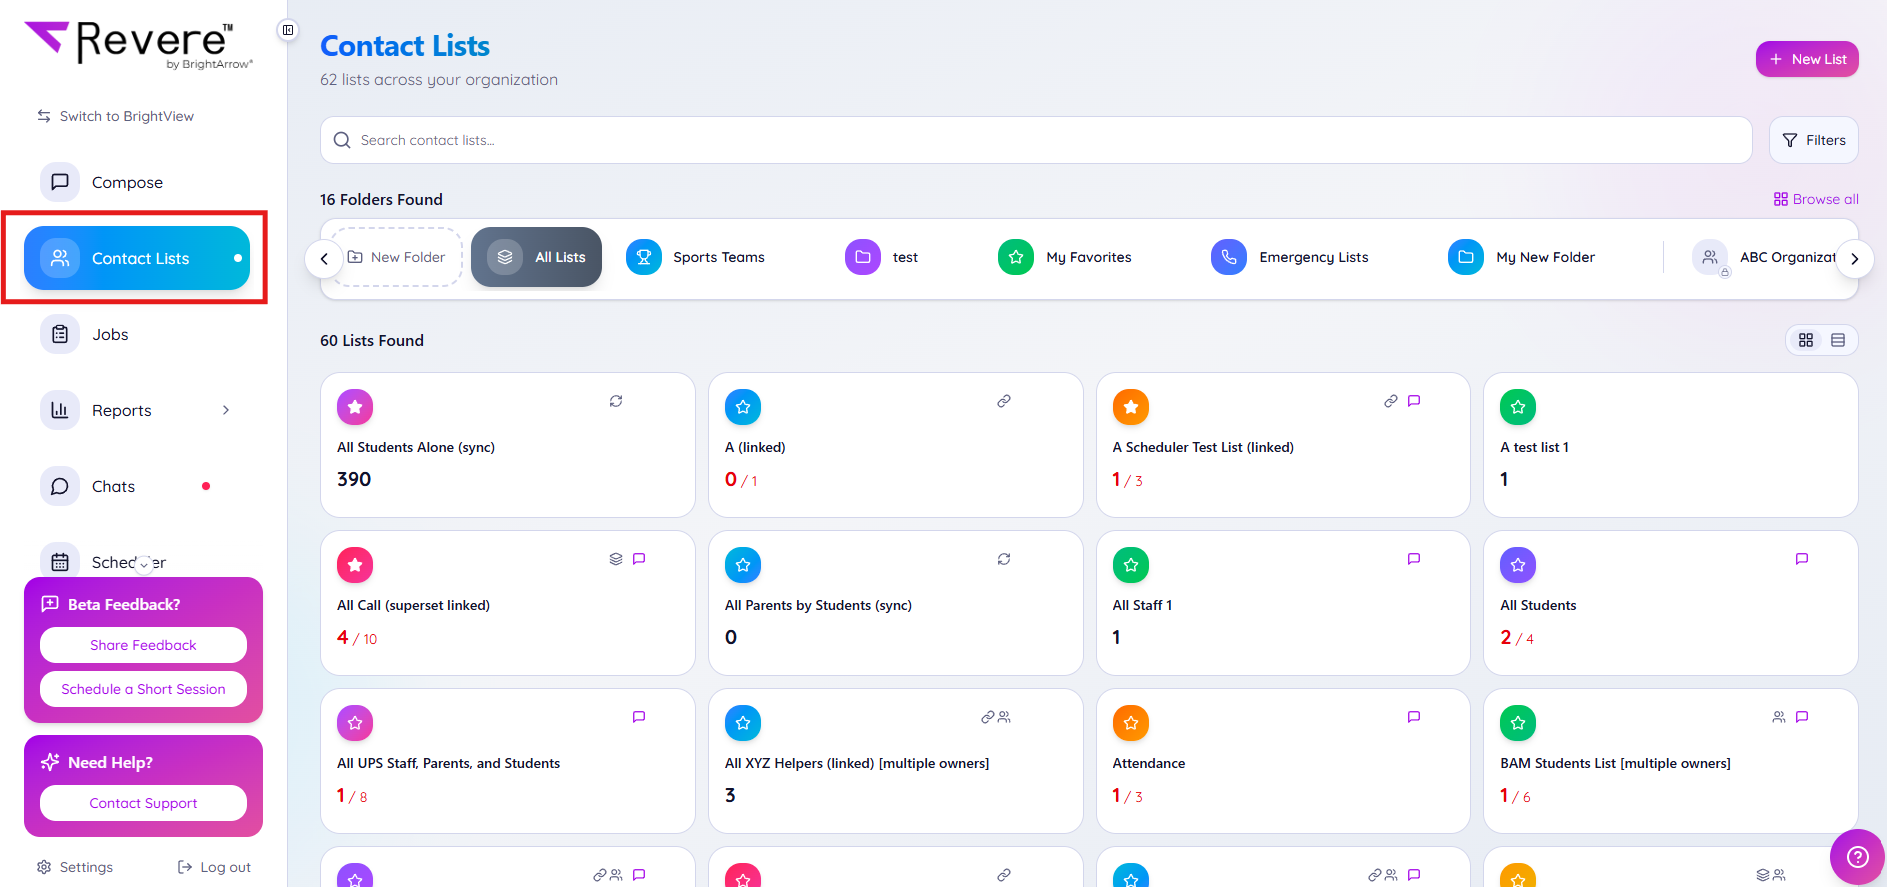
The Contact Lists page, showing folder tabs and lists in grid view.
Switch between grid and list view
Use the two view icons in the top-right corner of the list area to switch between a card-based grid and a compact table view closer to the classic My Lists layout.
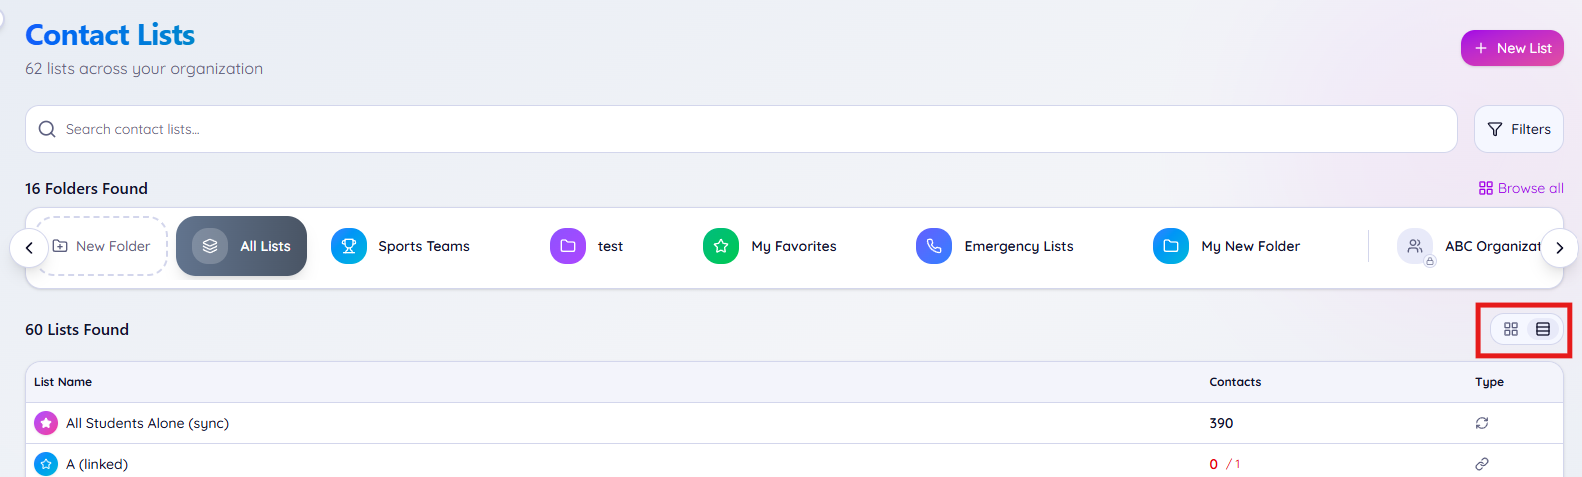
Contact Lists in table/list view, showing List Name, Contacts, and Type columns.
Choose which folders you see
System administrators or other users with access to shared folders can show or hide folders as needed to keep their view clean. Click "Browse All" to search for a particular folder and select “Choose users to view” to control which users' and groups' folders appear on your Contact Lists page. Use Select All Groups, Select All, or Unselect All, or check individual folders, then click OK.
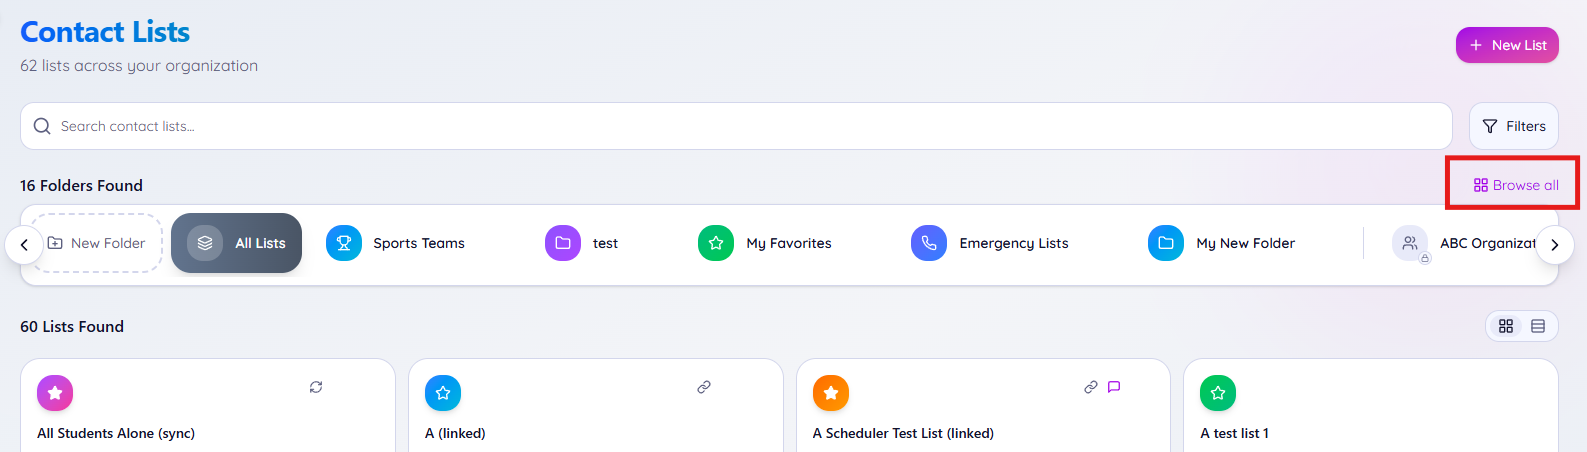
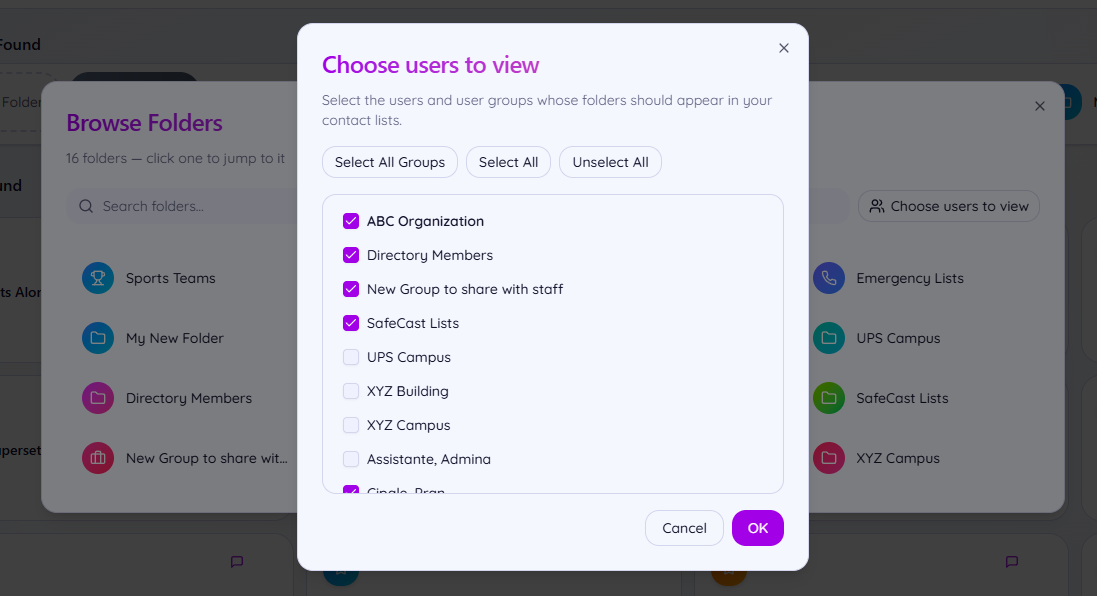
The “Choose users to view” dialog with folder checkboxes.
Open a list to manage its contacts
Click into any list to see its full contact table. From here you can:
- Search by name, email, or phone
- Edit, Delete, or Enable individual contacts from the row-level controls (Note: If your list updates through a nightly sync, contacts you update manually will be overwritten with information from your database or SIS when the list updates overnight)
- Hide disabled contacts
- Enable All or Disable All contacts at once
- Use Filter for Send to narrow down who a message will actually reach
- Add Contacts (Note: If your list updates through a nightly sync, contacts you add manually will be overwritten with information from your database or SIS when the list updates overnight)
 A list's contact table, with per-contact status, edit, and delete controls.
Add or update the list's saved message
In the classic BrightView interface, any message you sent to a list would automatically save in that list. In Revere, you have the option to save a message to the list if you wish.
Hover over a list card and click the message icon. If the list doesn't have a saved message yet, the message bubble icon will only show for the list when you hover over the list and clicking on it shows as Add Message. If it already has a message saved to it, the message bubble icon shows on the list card/in the list row at all times. Clicking on it opens as Manage List Message, Send Now, or Schedule. This message is saved to the list itself and can be sent at any time — sending it does not overwrite anything you're drafting separately in Compose.
Good to know: Messages saved to a list can only be accessed or sent through the options in your Contact Lists tab. If you need to access the message through the Compose tab, save the message as a draft using the My Drafts button in the upper right of the message creation screen.
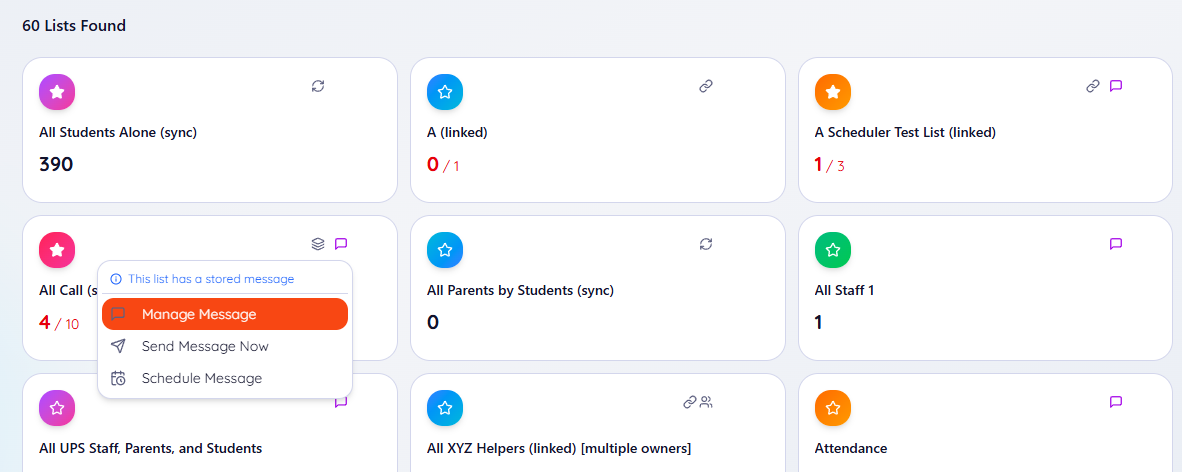
Clicking the message bubble icon on a list card reveals the message management options (shown in grid view above).

Hovering over a list card reveals the message bubble icon; click it to see the Add Message option (shown in table view above).
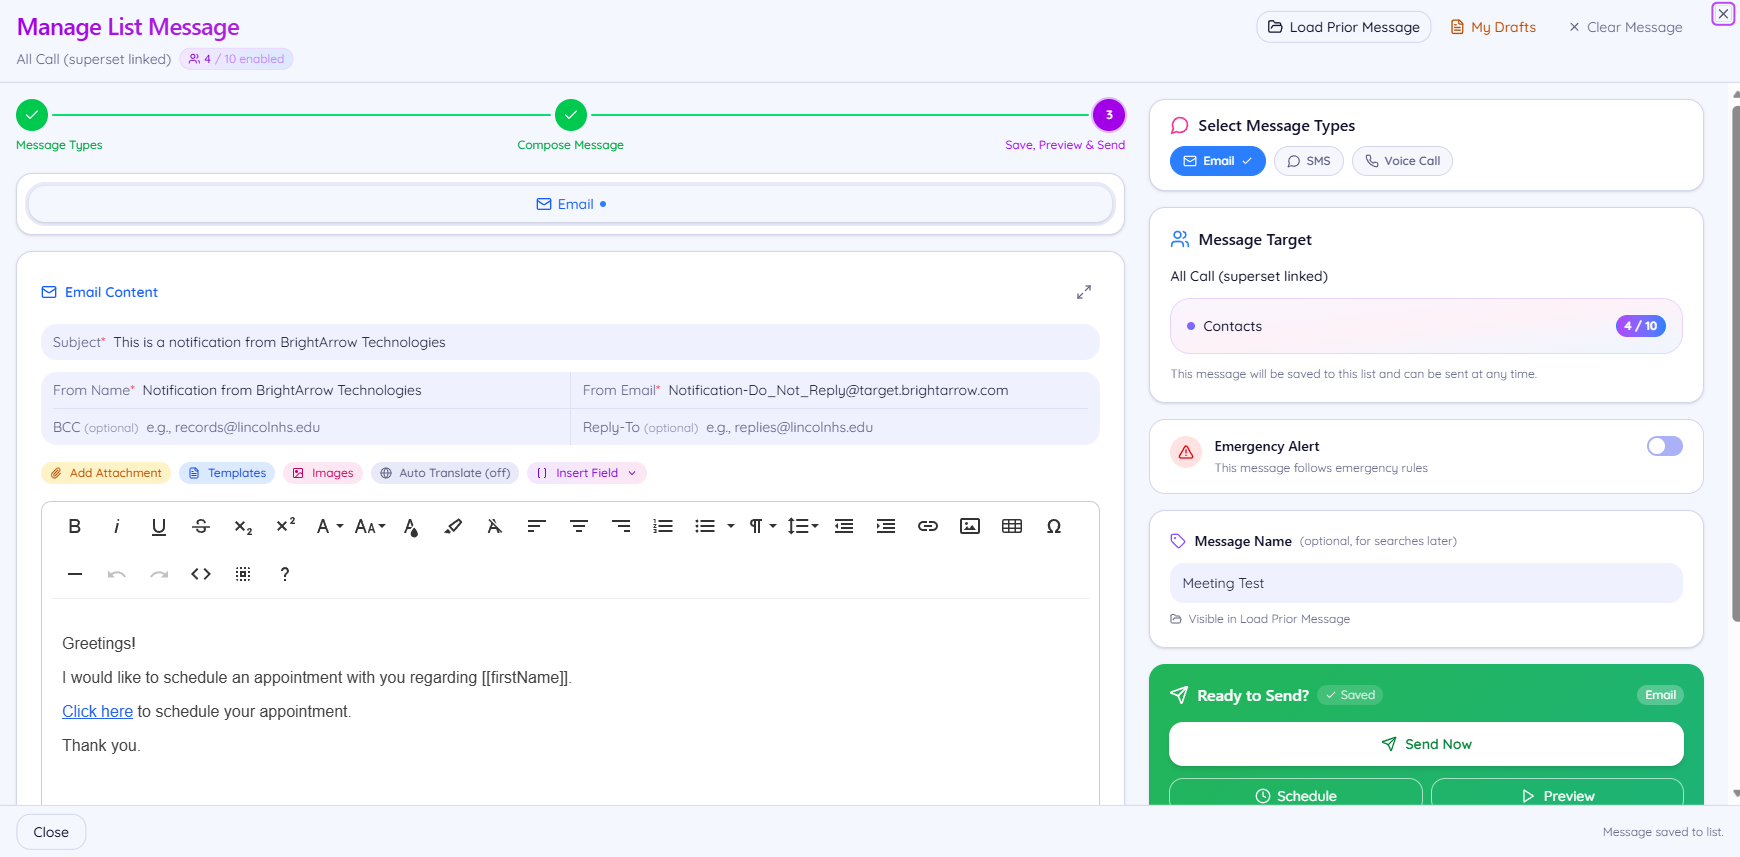
The Manage List Message screen, showing the message saved to a specific list.
Sending a Message with Compose
In the classic "BrightView" interface, all messages were sent directly through a list and saved to your list as well. In Revere, you can create and send messages to your contact lists without saving it to any list, done through the Compose tab.
Start a new message
Select Compose in the navigation panel, indicated by the message bubble icon. Compose walks you through four steps: Selecting message types, composing the message, select your contacts, and preview, schedule, or send.
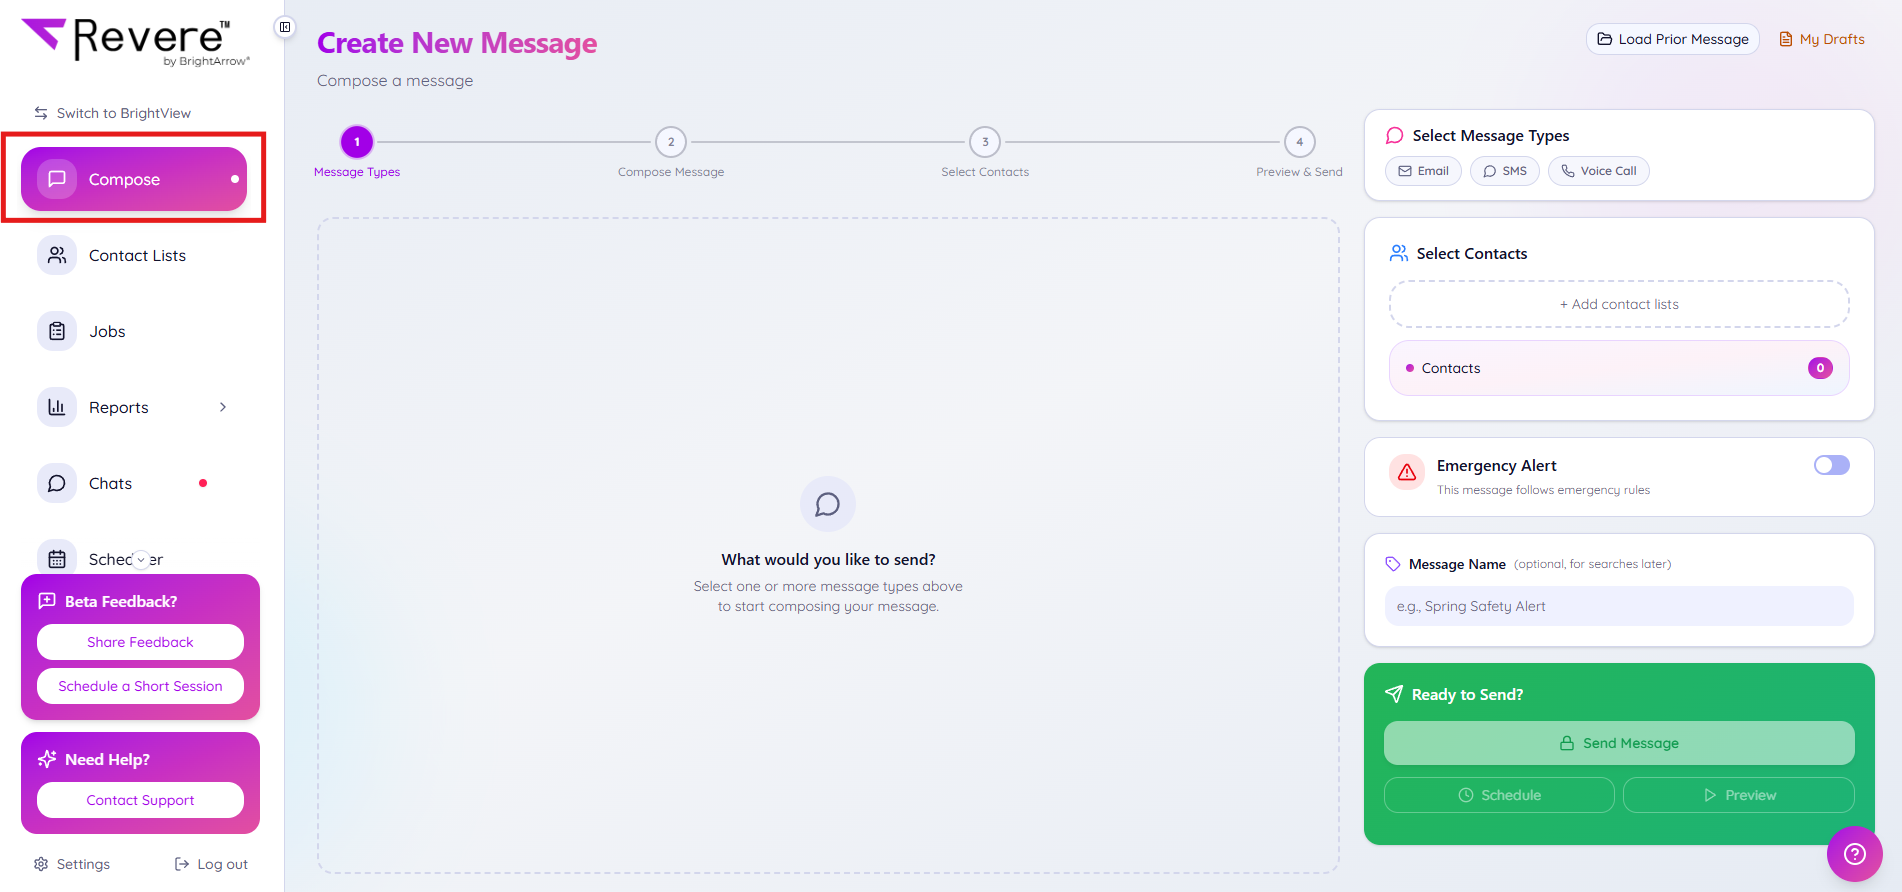
The Compose screen at Step 1: Message Types.
Choose your message types
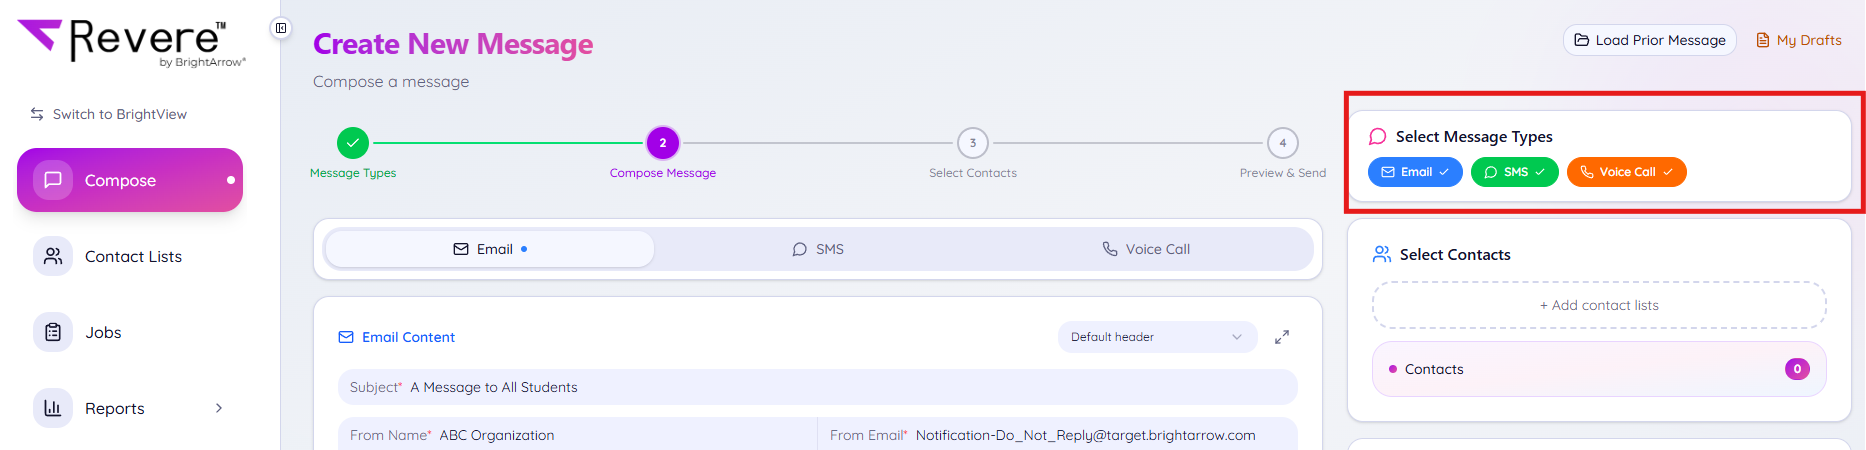
Pick any combination of Email, SMS, and Voice Call. Each one you select gets its own tab so you can tailor the content per channel.
Compose your message content
Start crafting your message. If you selected more than one message type you can toggle between them using the navigation bar located above the message creation window.
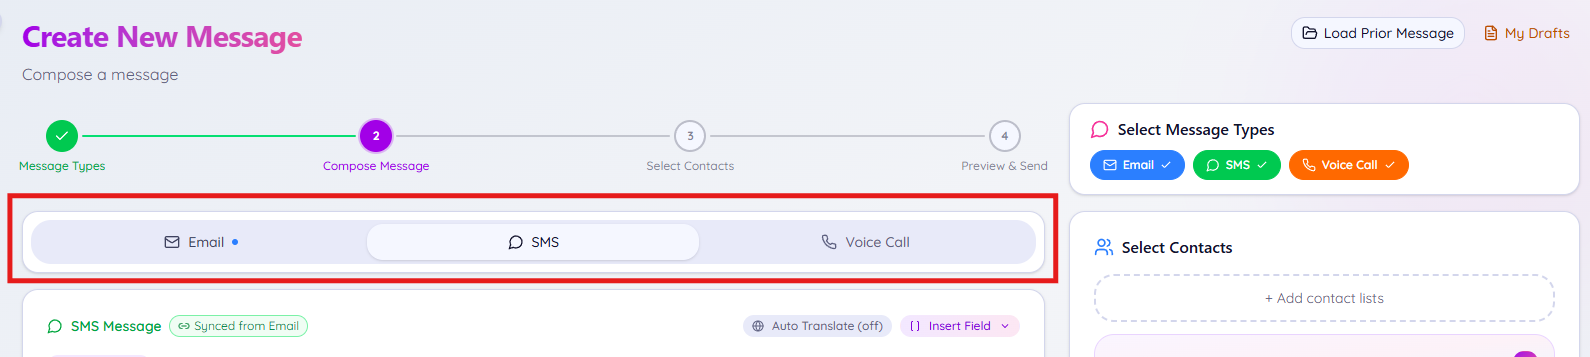
For Email, fill in the Subject, From Name, and From Email, plus optional BCC and Reply-To. Use Add Attachment, Templates, Add a Form, Images, Auto Translate, and Insert Field (merge fields like [[firstName]]) as needed, then write your message in the rich-text editor below.
If you have a designated email header set up through your system defaults or through your contact list's settings, you will have the opportunity to apply the email header once you add your contact lists to the message.
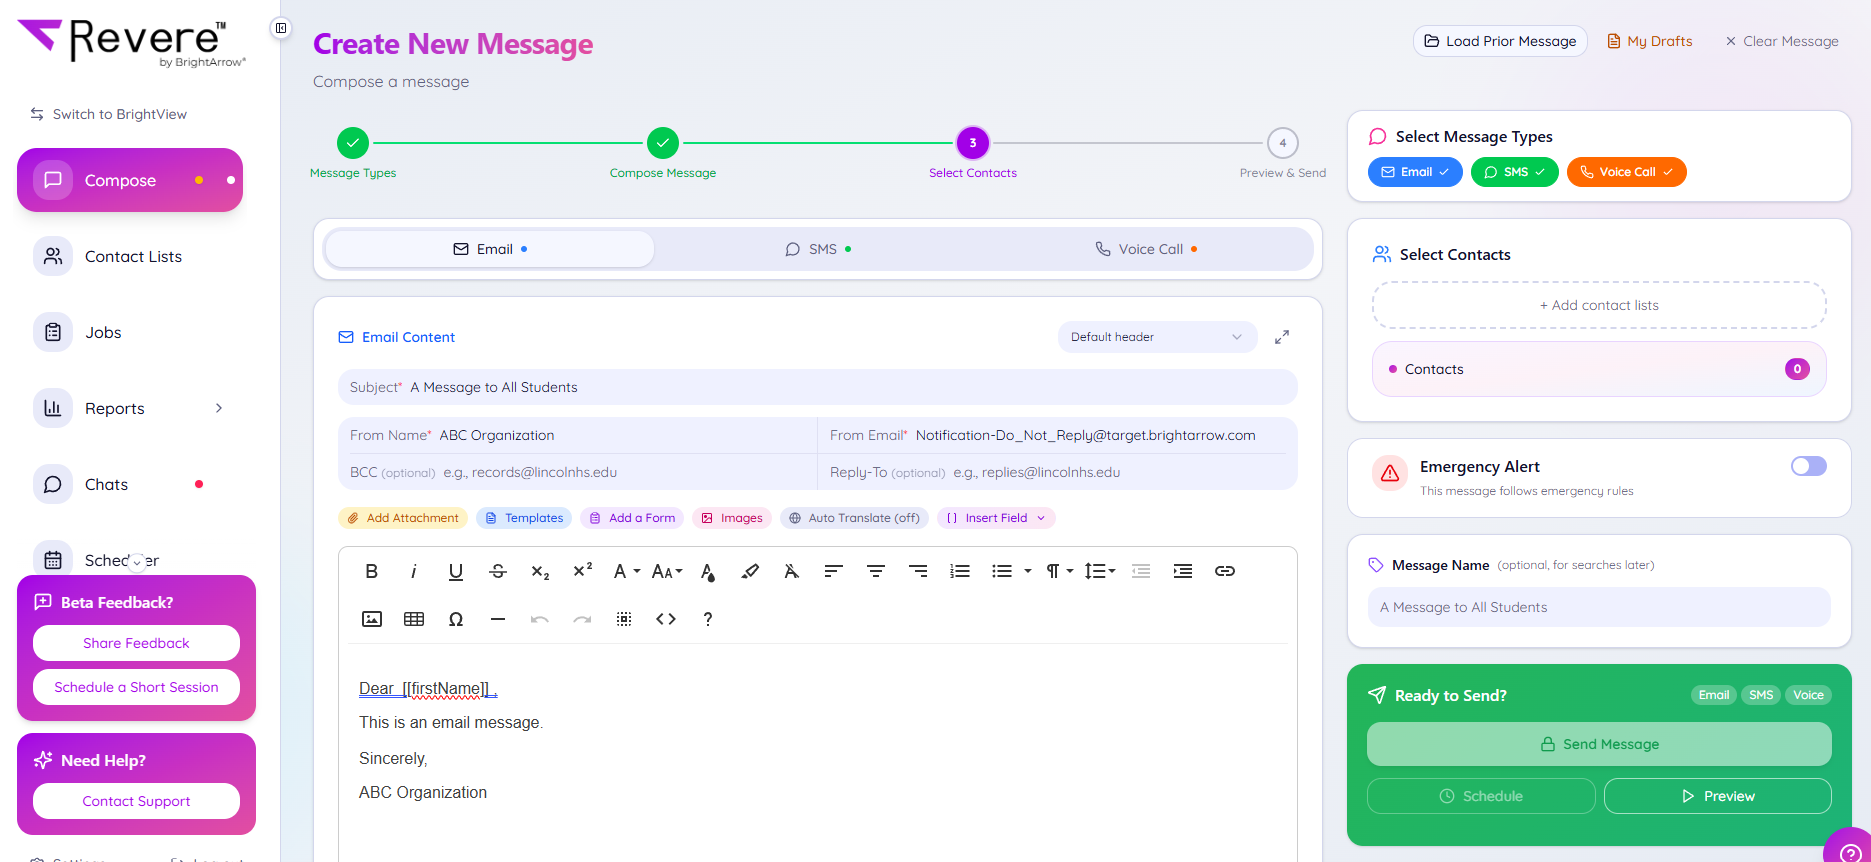
Composing an email with Email, SMS, and Voice Call all selected.
TEXT (SMS)
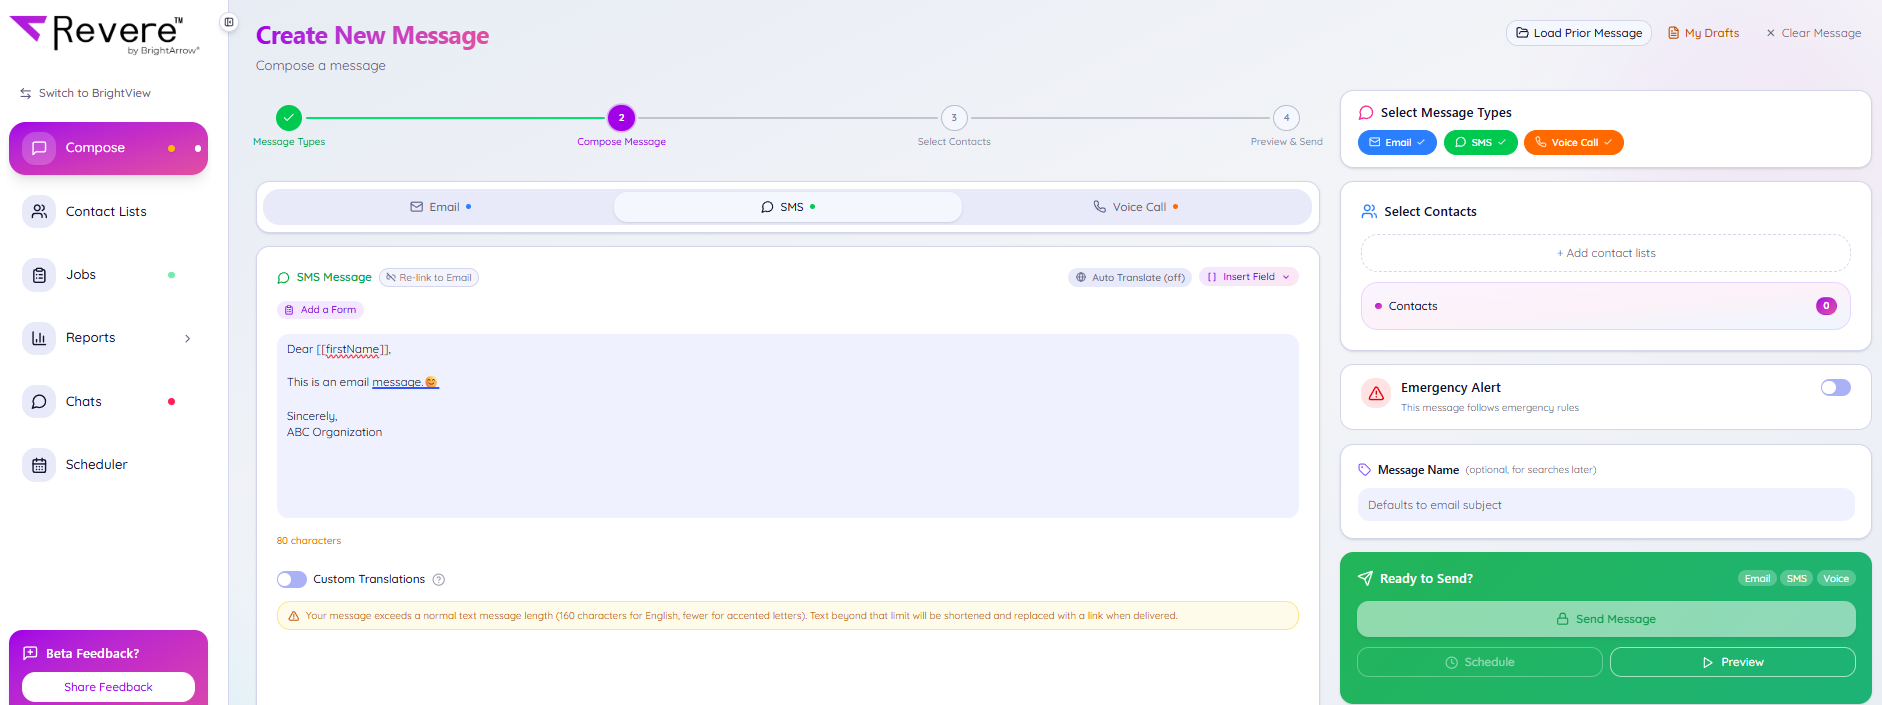
For text messages (SMS), type in your message, Insert Field (mail merge fields like [[firstName]], Auto Translate as needed. If you have also created an email message, the body of your email will automatically be copied into the SMS editor (with all HTML stripped out for SMS sending).
 VOICE CALL
 VOICE CALL
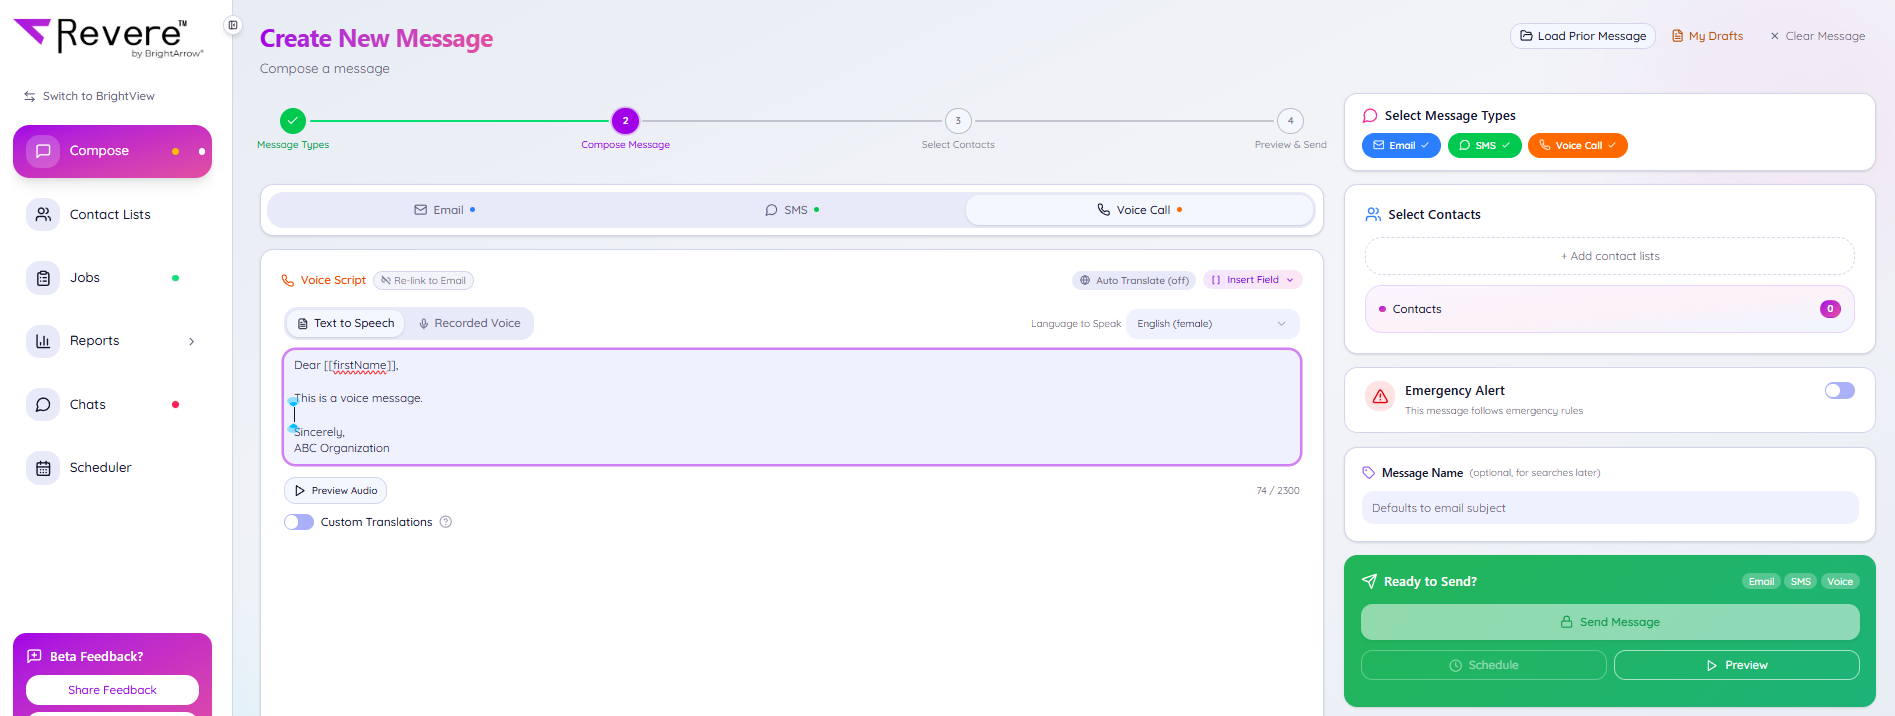
For voice calls, you can type in your message to be read by the computer voice, record your own voice, or upload a recording you have saved on your computer. Calls are limited to 2 minutes in length.
Text-to-Speech (Computer Voice):
Type in your message (or use the email message that automatically copied over), Insert Field (mail merge fields like [[firstName]], Auto Translate as needed. A computer voice will read the message you typed. Choose the voice for the computer to read your message in the "Language to Speak" drop-down. "Language to Speak" is the voice/accent your message will be read in, not a translation tool. If your voice message should be translated, use the Auto Translate and/or Custom Translations option(s).
Recorded Voice:
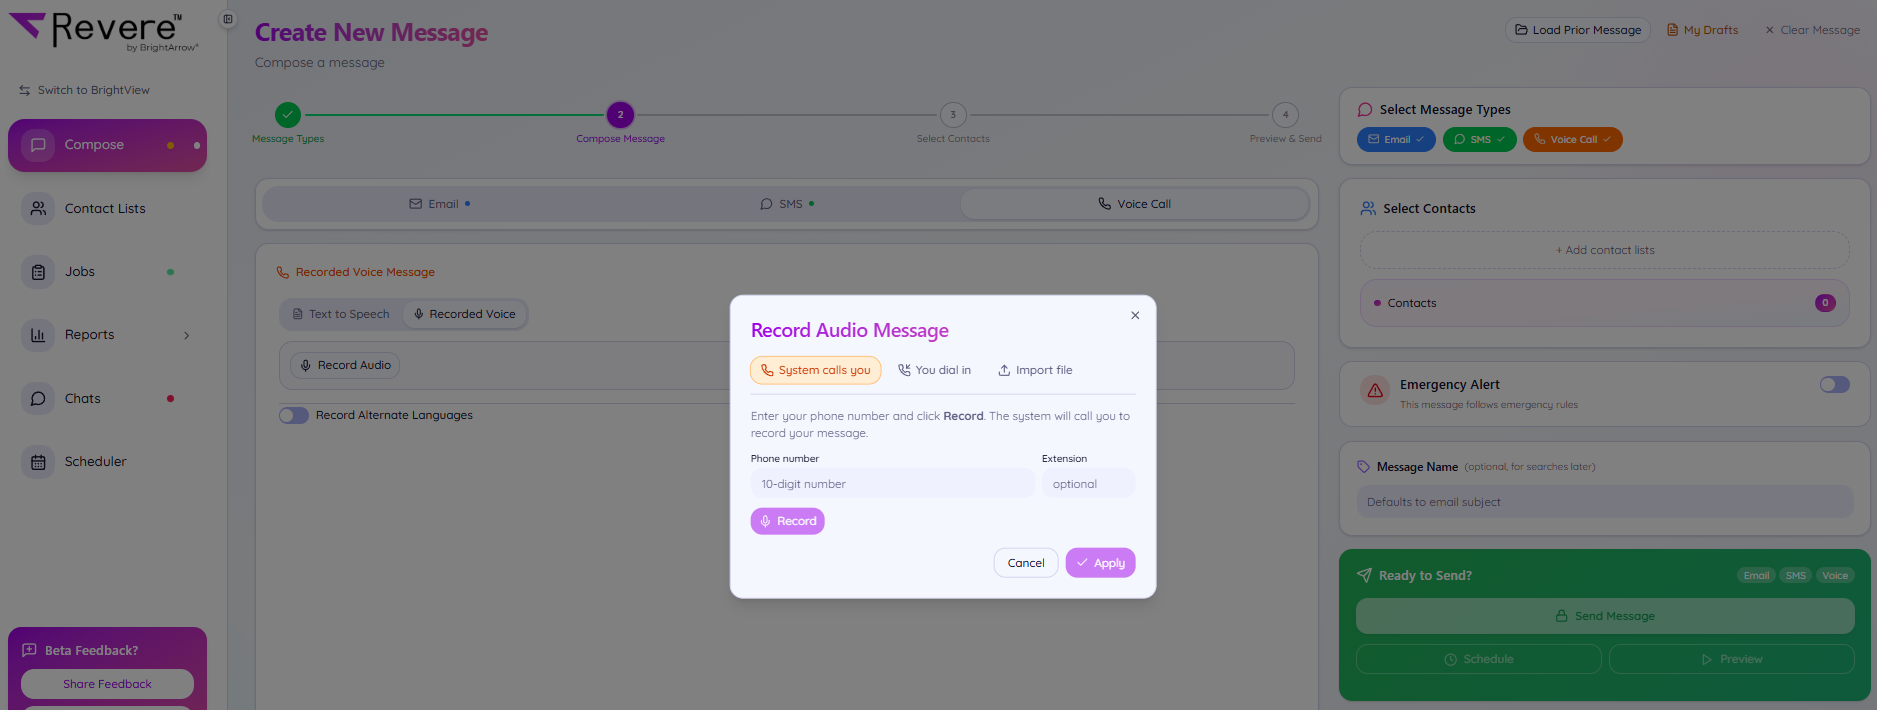
To record your own voice or upload a recording that is saved on your computer, toggle to Recorded Voice then click the "Record Audio" button. Various options will appear to allow you create or add your recording to the message. Recorded voice calls cannot be translated and will be sent exactly as you recorded them. You can use the Record Alternate Languages button to record a message in another language.
Select your contacts
Click “+ Add contact lists” to open the list picker. Search for a list by name or browse by folder, then check off one or more lists to send your message to. Revere shows how many contacts each list contributes. Click Confirm when you're done.
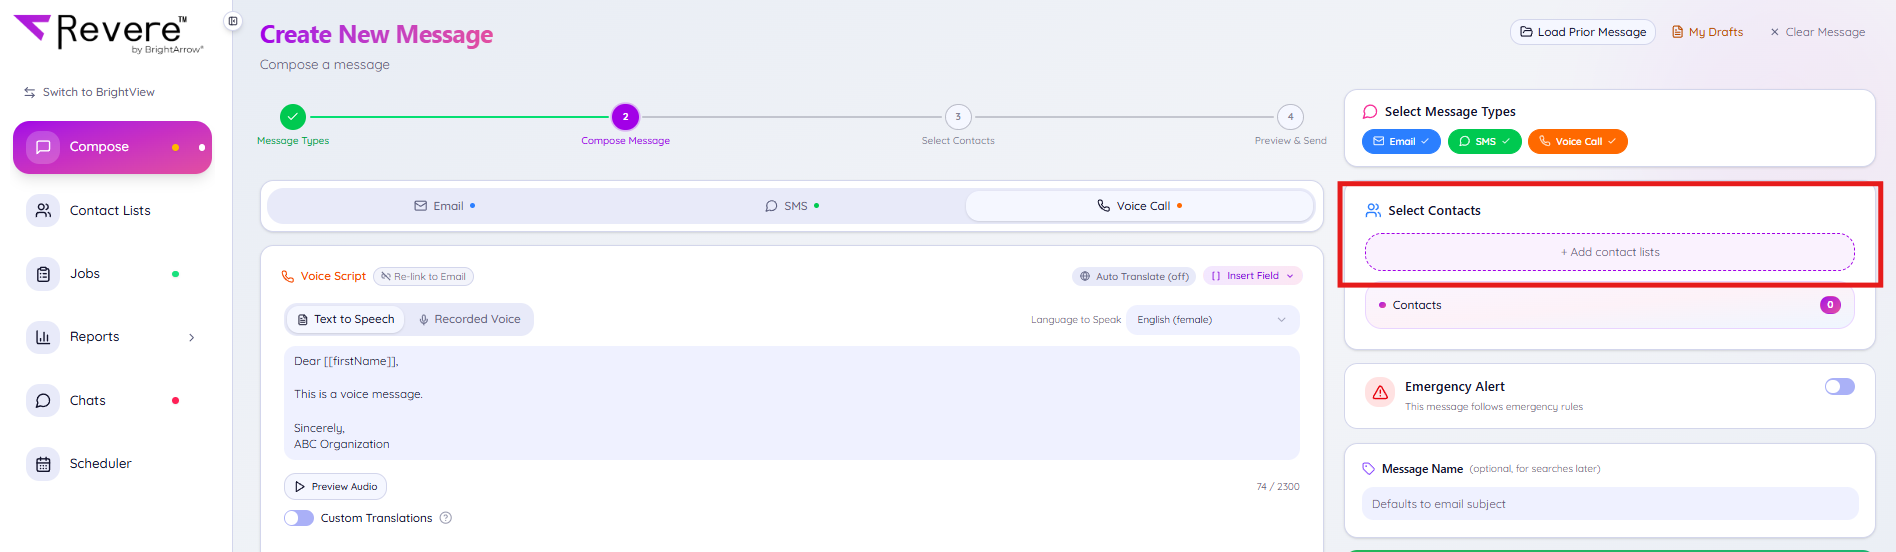
Shown above: The Add Contact Lists dialog with no lists selected.
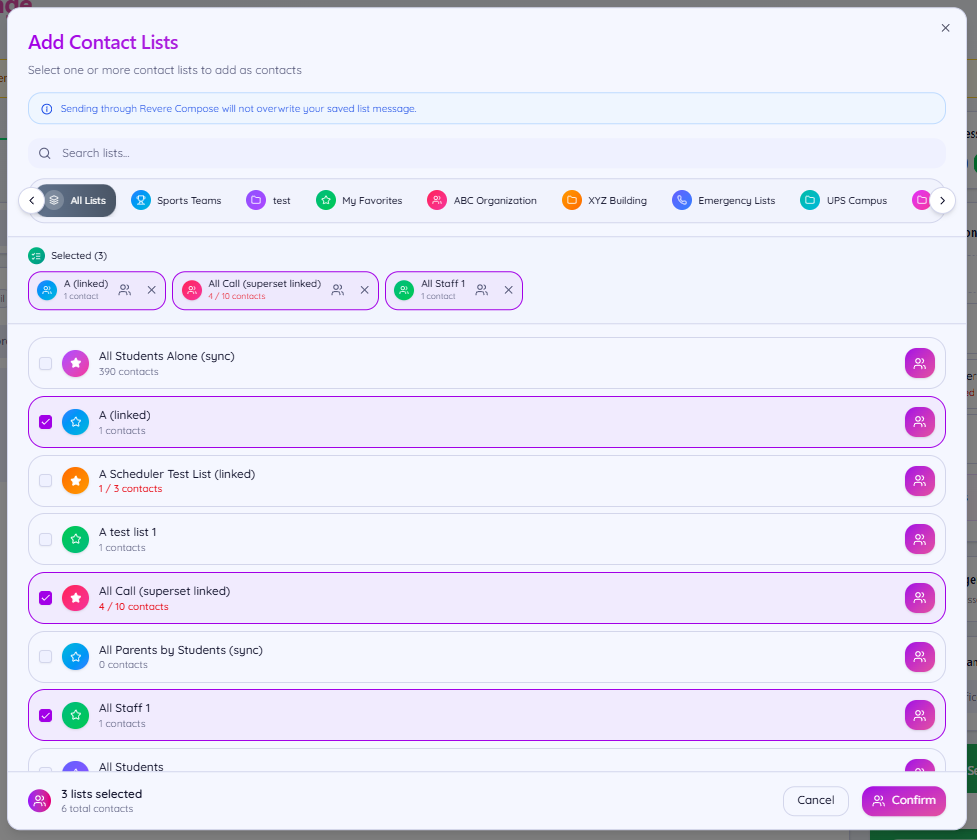
Shown above: Selecting contact lists.
Review your selected contacts
Back on the main Compose screen, each list you added is listed individually with its own contact count and an X to remove it, plus a running total at the bottom (for example, 6 of 12 contacts, where the total count of contacts in the selected lists is 12 but only 6 of those contacts are marked as "enabled" to be included in the message).
If your selected lists have conflicting settings, like different email headers, a banner at the top tells you which setting will be used. Before sending your message, review the contact count and the warning banner and ensure your message will be sent as you intend it to be. If your lists contain different email headers, click back on the email message in the navigation banner at the top of the message creation window, then review the email header options in the drop-down.
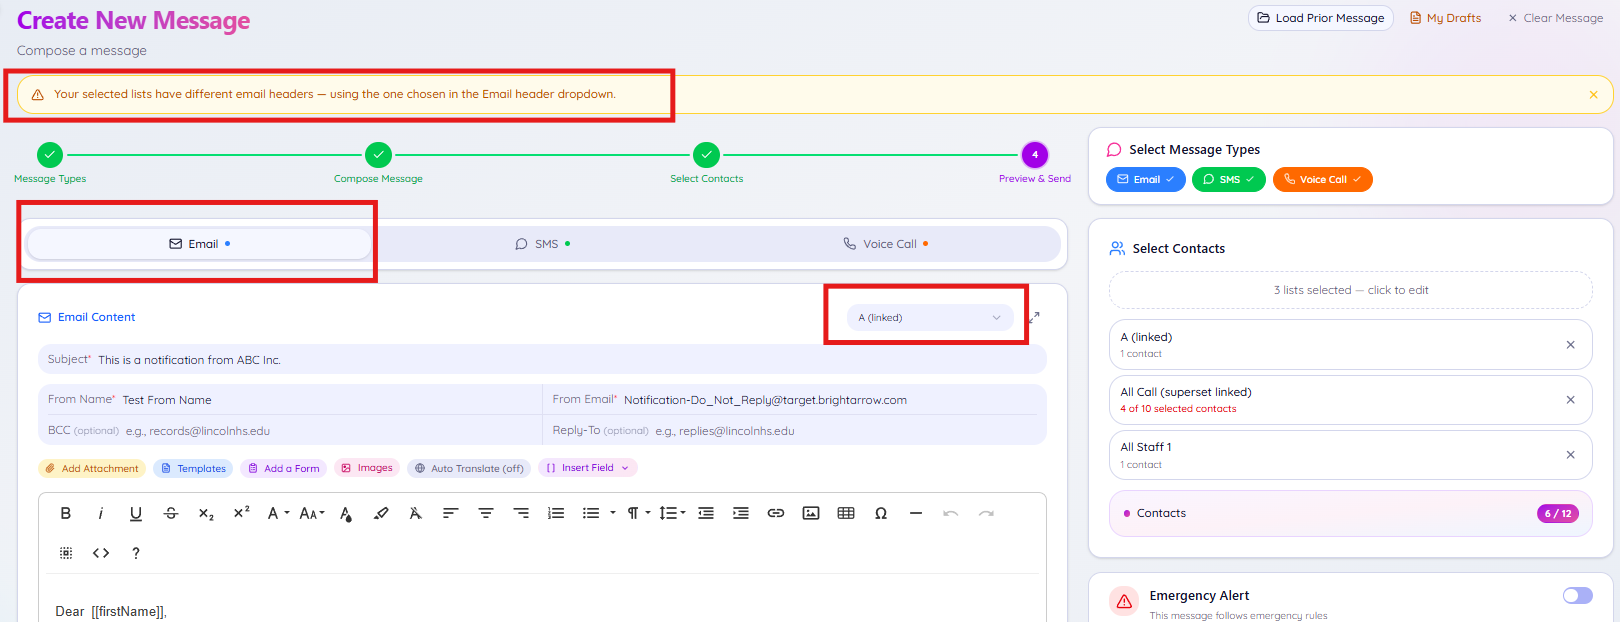
Select Contacts panel showing 3 lists added, with a header-conflict warning banner.
Turn on Emergency Alert if needed
If this message should follow your organization's emergency rules, switch on the Emergency Alert toggle in the right-hand panel.
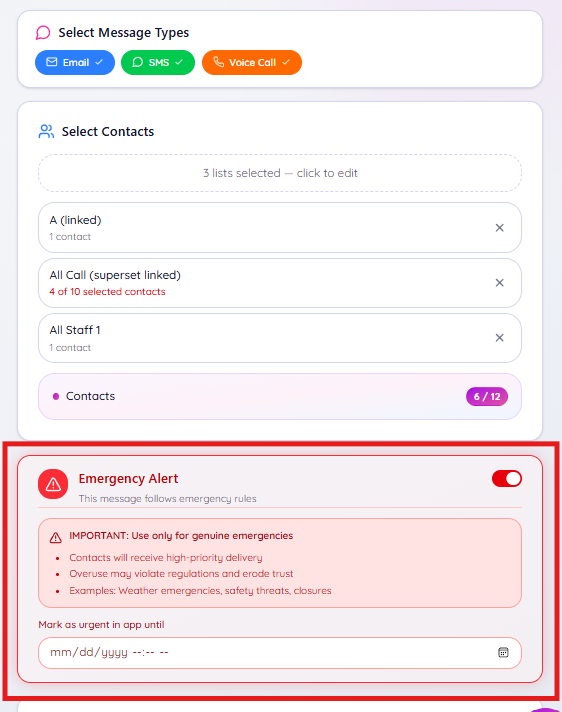
Toggling on the Emergency Alert switch in Compose.
Name your message (optional)
Add a Message Name so this message is easier to find later using search. The Message Name is for your internal use only and recipients will not see it. Helpful to use when referencing Message Summary Reports or using Load Prior Message.
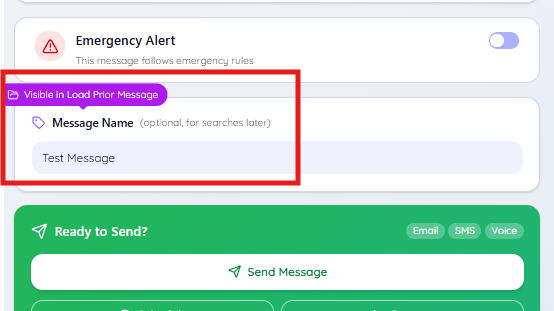
The optional Message Name field.
Preview & Send
Once all four steps show a green checkmark, use Preview to see exactly what recipients will get, Schedule to send at a later time, or Send Message to deliver right away.
Good to know: Sending a message through Compose is separate from a list's saved message — the two never overwrite each other, so it's safe to use Compose for a one-off send without disturbing a list's standing message.