Creating Groups to Share Lists
Many times people will want to share lists with others. This may be to reduce duplicating work or so that a co-worker can proof-read the message or to have a set of common data everyone starts from. With school districts it is common to put people who work in the same building in a group so they have access to the same students and parents. A law office may group by office location to have shared client lists. While you can share a list between users it is often easier to create groups.
Using a group to separate lists
Over time the number of lists you have can grow and become a lot to look at. Sometimes you need to keep them just in case. You can use a group to separate them and hide/show them as needed.
Ex: A school district wants to have pre-made lists ready with their bus routes. There are 50 bus routes in the morning and again in the afternoon. Since the same route may have different riders in the morning than in the afternoon they'll need separate lists for a total of 100 bus route lists. Those 100 lists all show up in the main group along with the rest of the lists.
Instead, a new group can be made called transportation and the 100 lists can be put in that group. All the users who need access can be granted access to the transportation group so everyone who needs to see those lists can, but they can also hide that group when they don't need to look at them. In all cases the 100 bus route lists don't clutter their day-to-day lists.
How to create a group
Groups can only be created from the main login. Users can be added to that main group, another group, or set up as individuals but only the one login can add new users or create new groups.
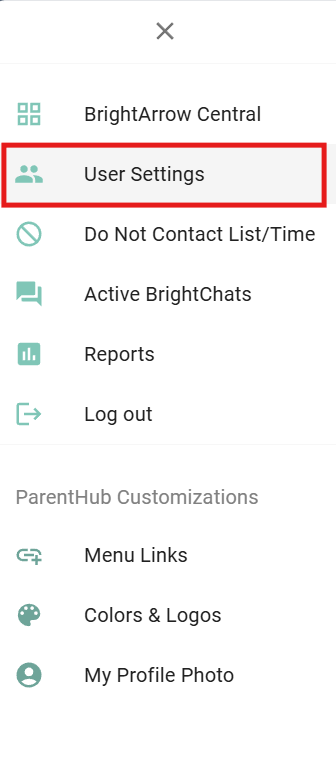
- Click on the "hamburger" menu in the upper left corner.
- Select User Settings.
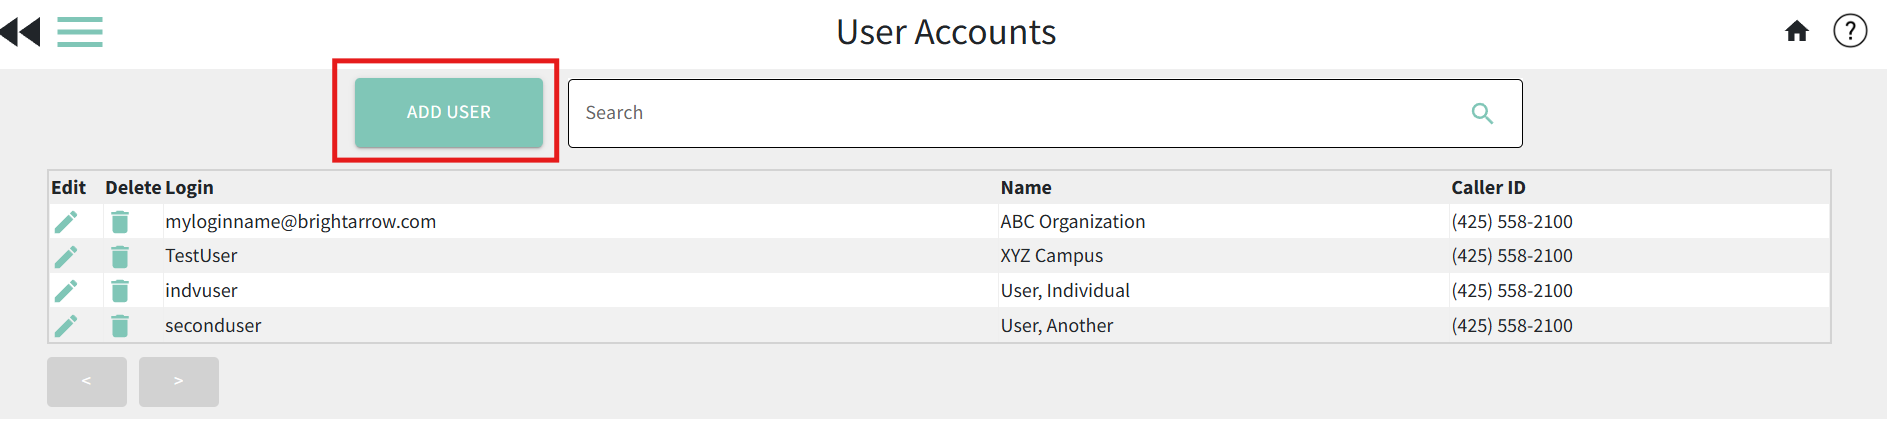
- This will take you to the User Accounts page. The main account group will be the first row and all the other groups will follow that. After the groups will be the individuals who may also be members of each group. To add a new group click Add User.
- Enter your new group information:
- Group Name: Give the new group a name that will make it easy to find in the future.
- Group Login Name: Login names must be unique. Even though no one will login as this group directly it must be unique.
- Password: A required field, even though no one will login as this group directly.
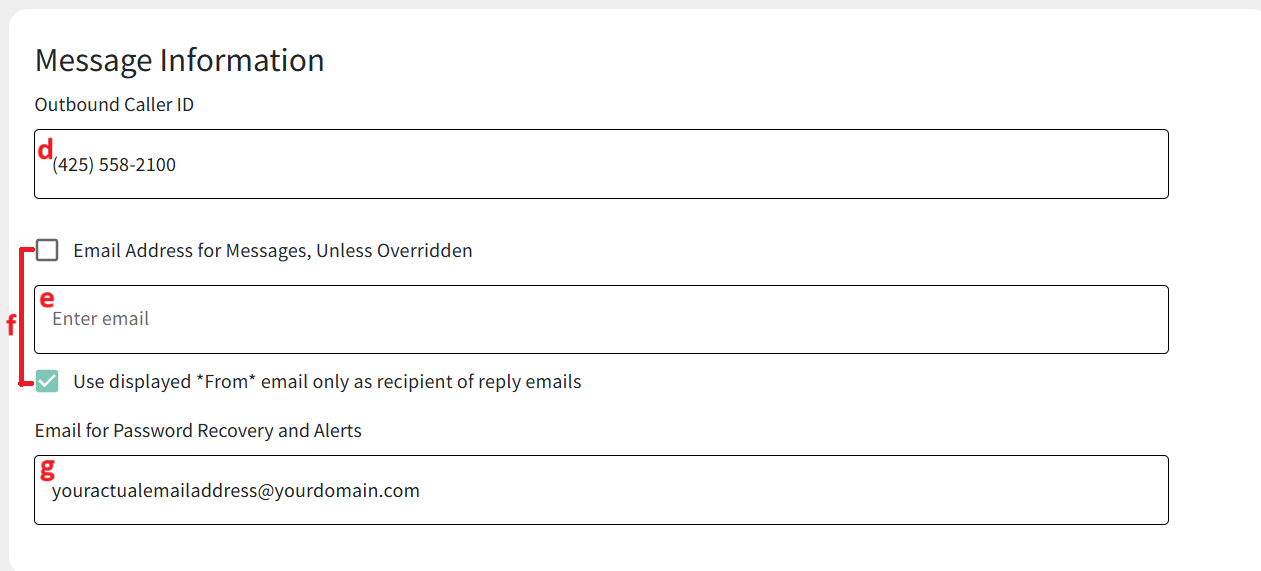
- Outbound Caller ID: Enter a default phone number for outbound voice messages. This number will be the default caller ID for new lists created by this group.
- Email Address for Messages: Enter a default email address for outbound email messages. This will serve as the default sending email for new lists created by this group
- Check the second checkbox and leave the first one blank.
- Email Address for Password Recovery and Alerts: If a member of this group forgets their password and uses the "forgot my password" option but doesn't have their own email address listed as the recovery then who should get the recovery email?
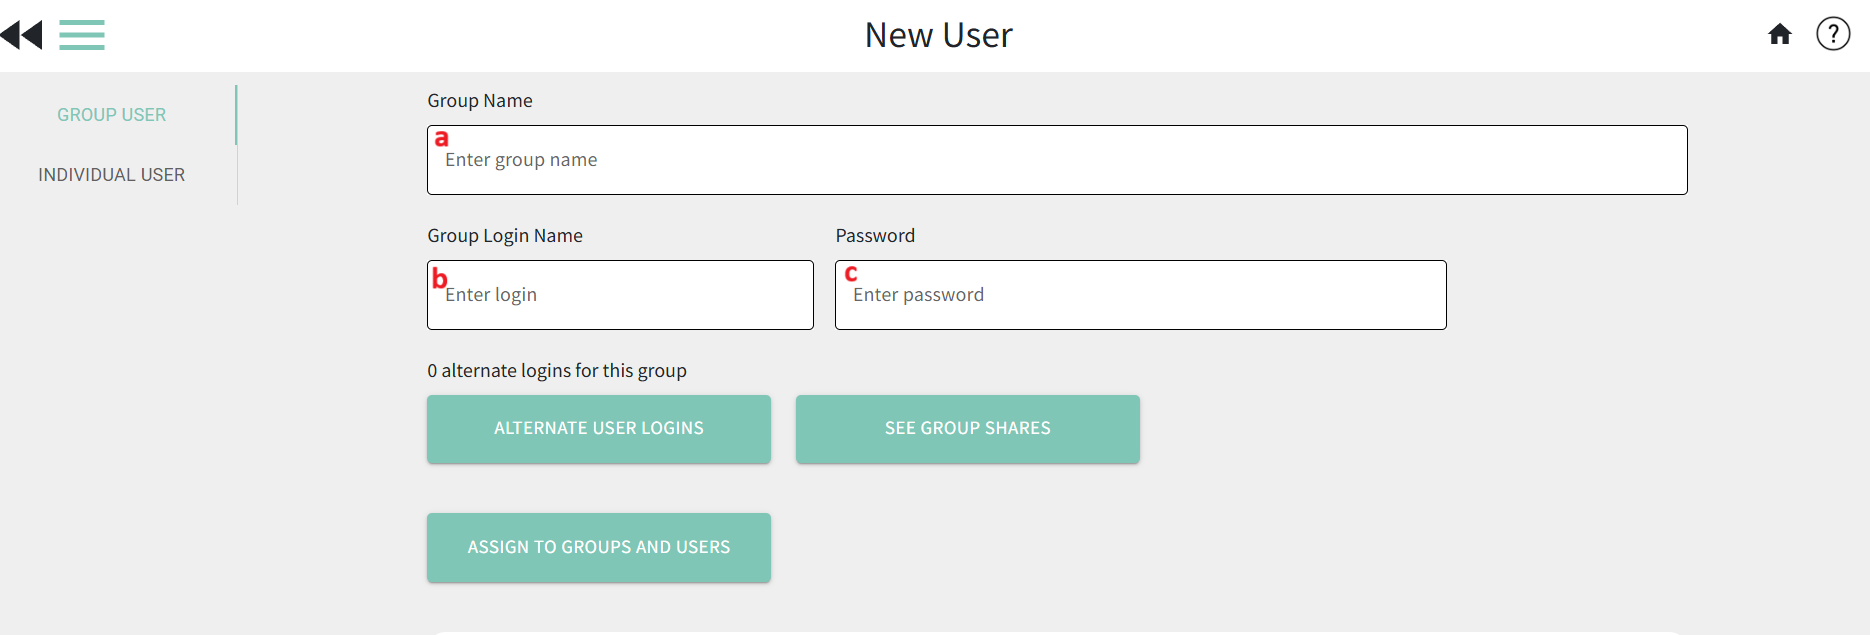
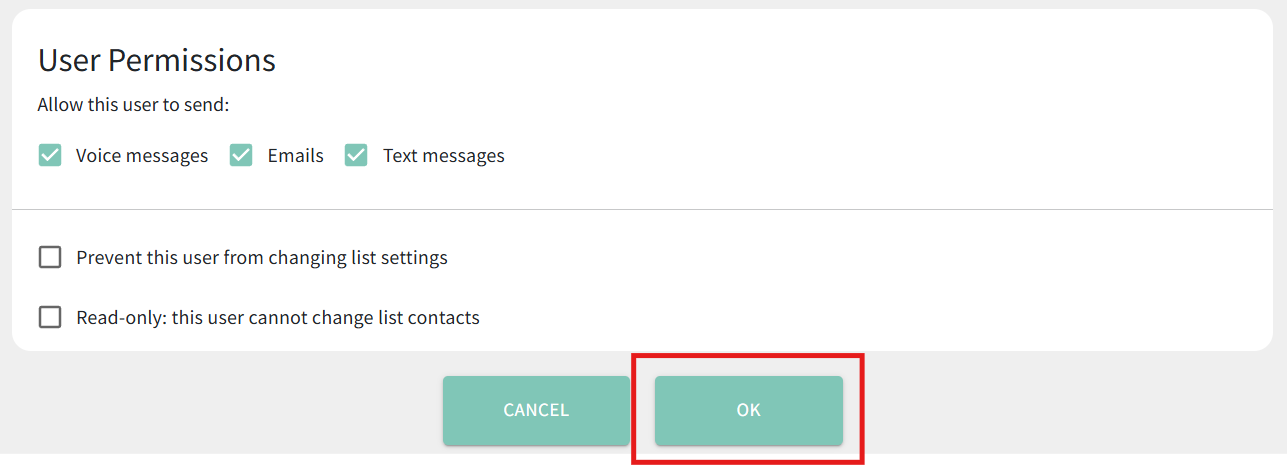
- Ignore the User Permissions section at the bottom because no one will be logging into this group directly, so they don't apply.
- Click OK.


Your new group is now created. You can now add the group to users who need to see the lists added to it.
Adding lists to the new group
Now that you have your new group you can add your lists to it. Anyone with access to that group will be able to see those lists.
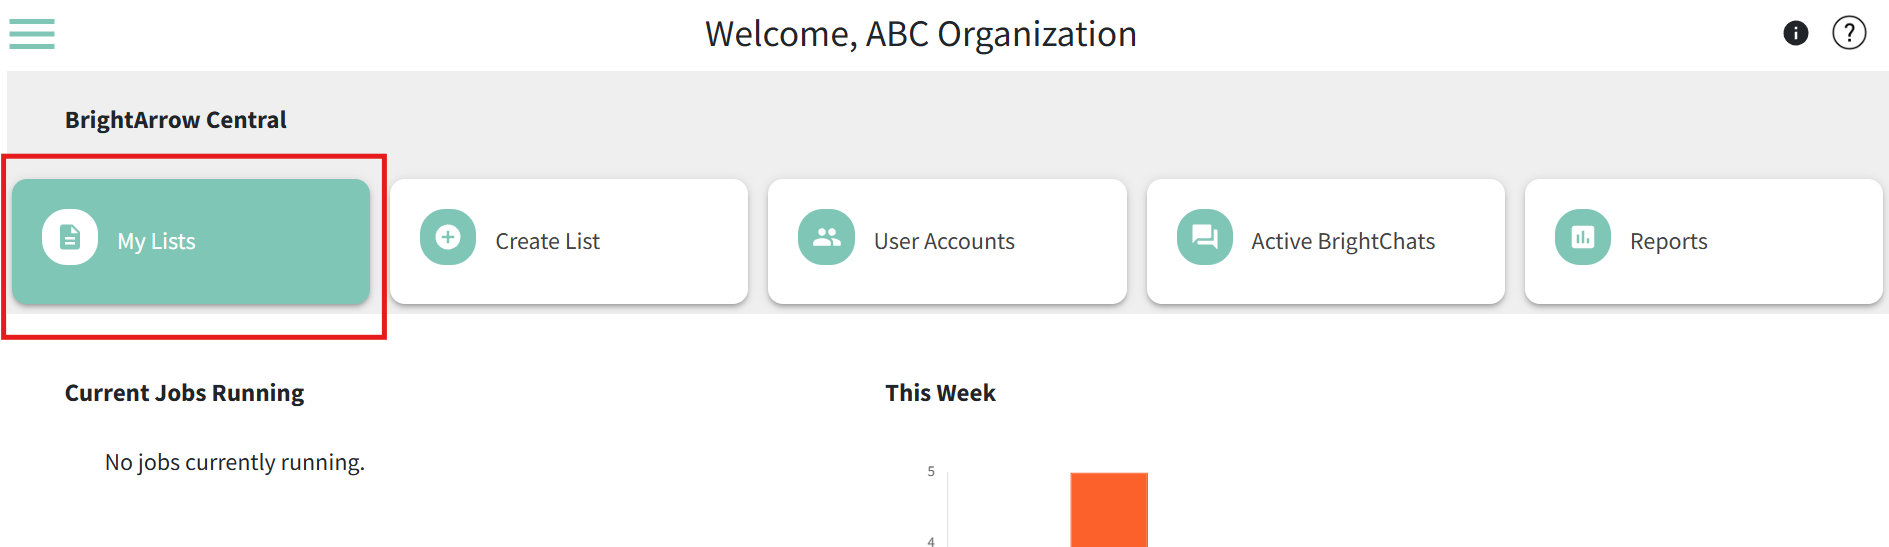
- Click on My Lists.
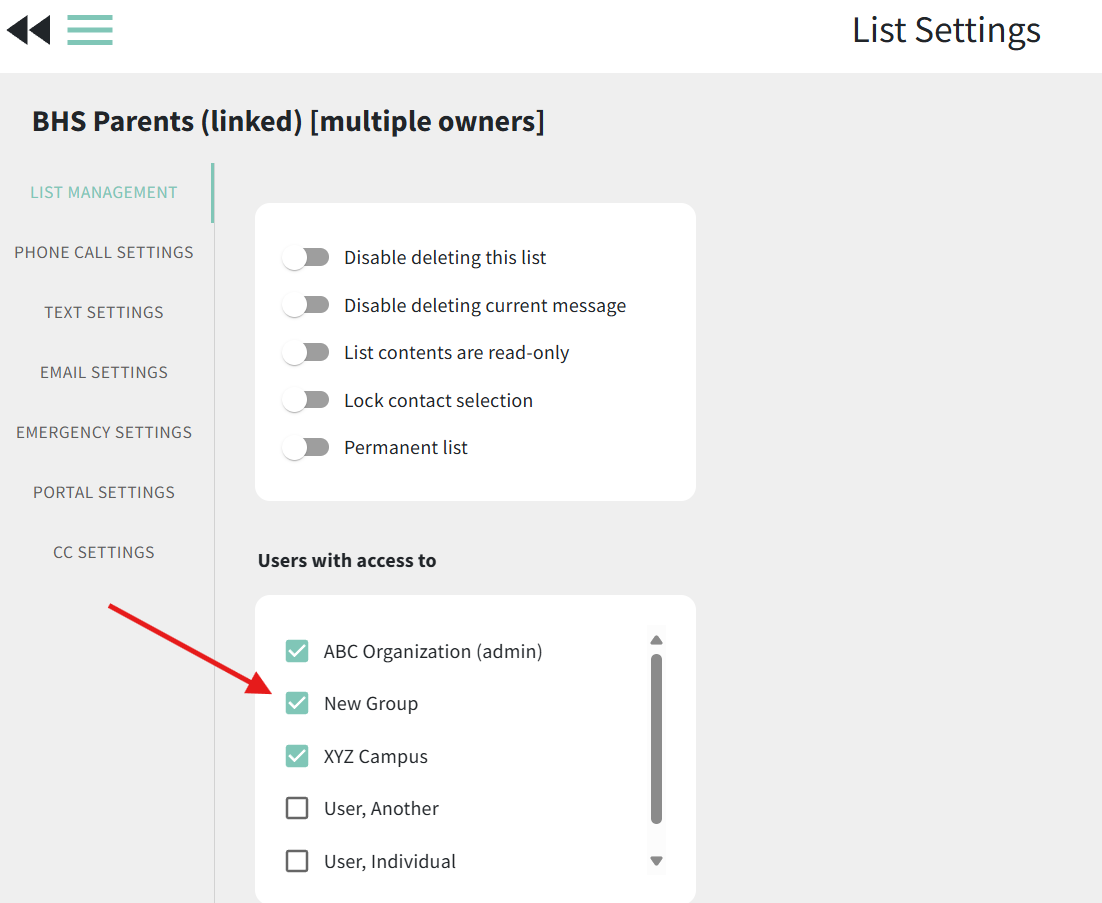
- Find a list you would like to move to the new group and hover over it. Several options will appear including List Settings which will appear as a gear image. Click on the gear icon to get to List Settings.
- In List Settings there will be many options. Moving a list is in the List Management options, which is the first page. In the Users with access to section you will see all groups and users, including your new group. Check the box next to the group you wish to move the list to.
- Note that every list must have at least one group or user assigned to it.
- Anyone with access to the list will be able to make changes to the list. If you are sharing a list with multiple groups, you may want to make copies of the list and share one with each group.
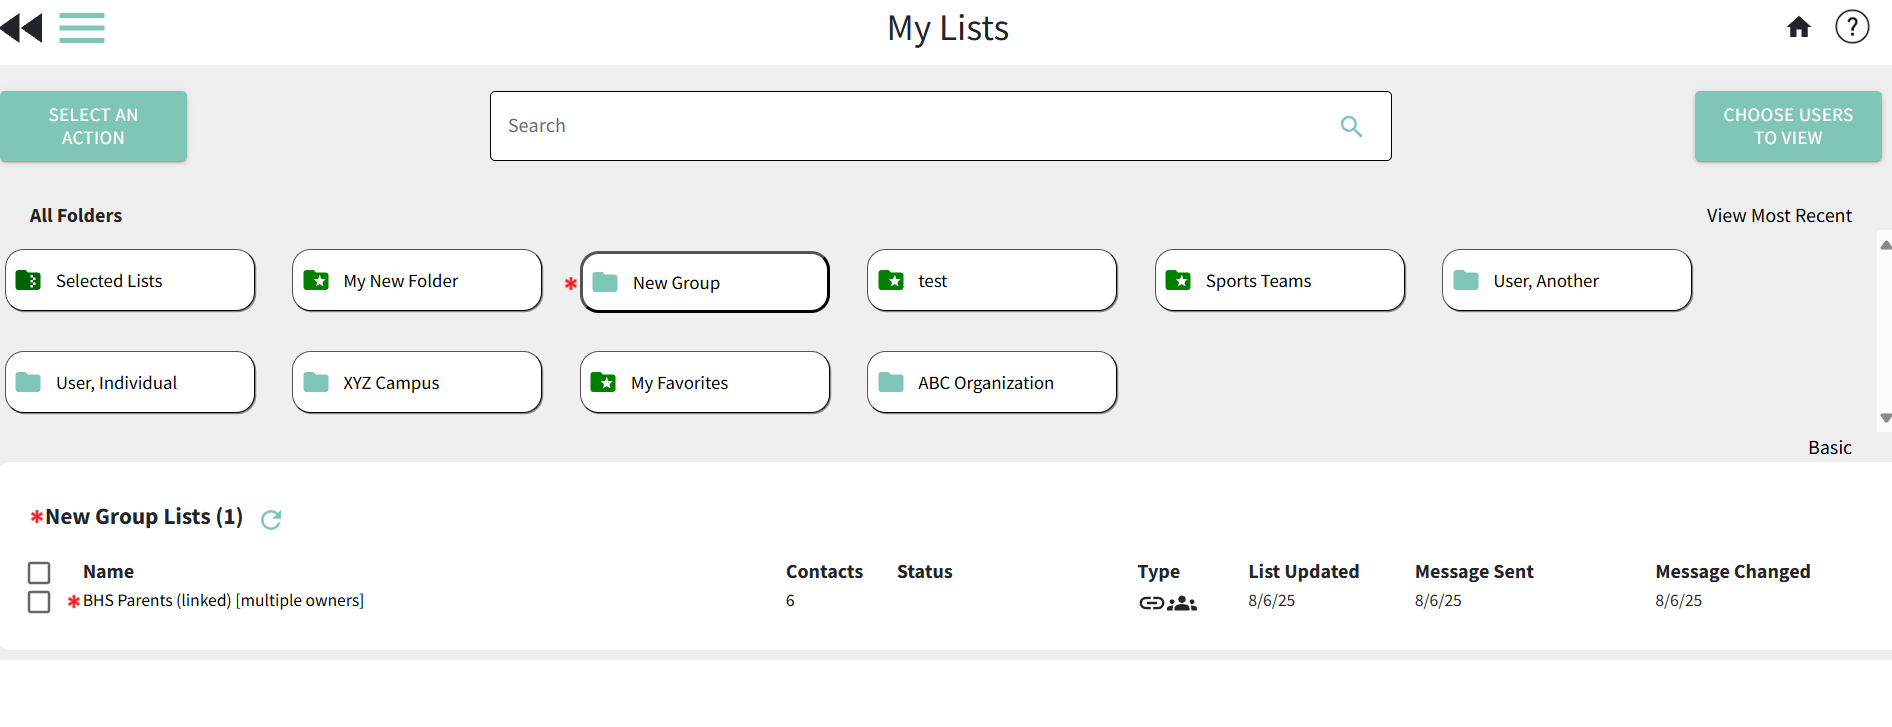
- Click the back double arrows to move back to the My Lists page. You should now be able to find the list in the new group.