Do Not Contact List
If a parent or user has reached out and would like to stop receiving calls, texts, and/or emails, we have an option to add them to the Do Not Contact list through BrightArrow. You'll be able to also customize if they would only like to receive emails, not texts/calls, or vice versa.
How to add a phone or email to the "Do Not Contact" list
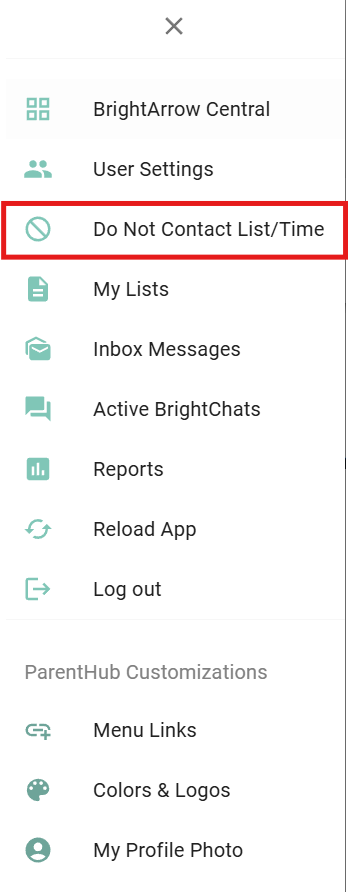
1. Click on the top left menu (3 lines)
2. Select the "Do Not Contact List/Time" option
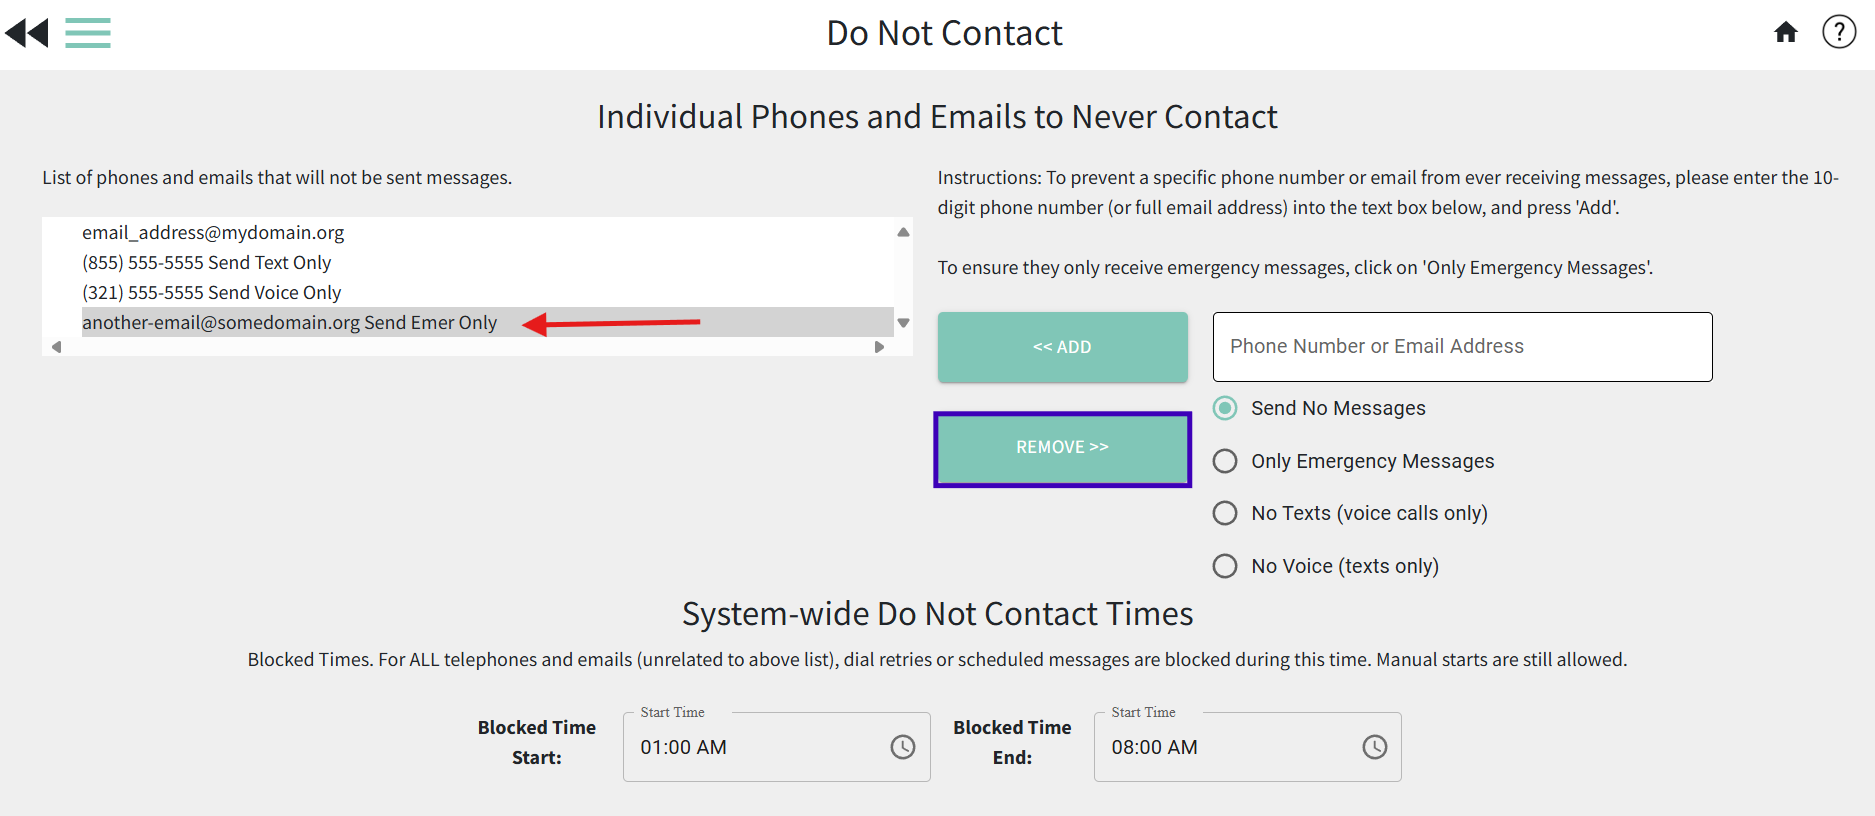
3. In the new window that appears, enter the phone number or email address (separate entries only)
4. Use the radio dials to indicate if the phone number or email address should receive certain types of messages
- Send No Messages: no messages of any type will send to the phone number or email address entered
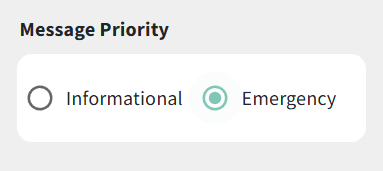
- Only Emergency Messages: messages will only send to the phone number or email address entered if the Message Priority is set to "emergency" in the message creation page
- No Texts (voice calls only): text messages will not send to the phone number, but voice calls will send
- No Voice (texts only): no phone calls will send to the phone number, but text messages will send
5. Click ADD
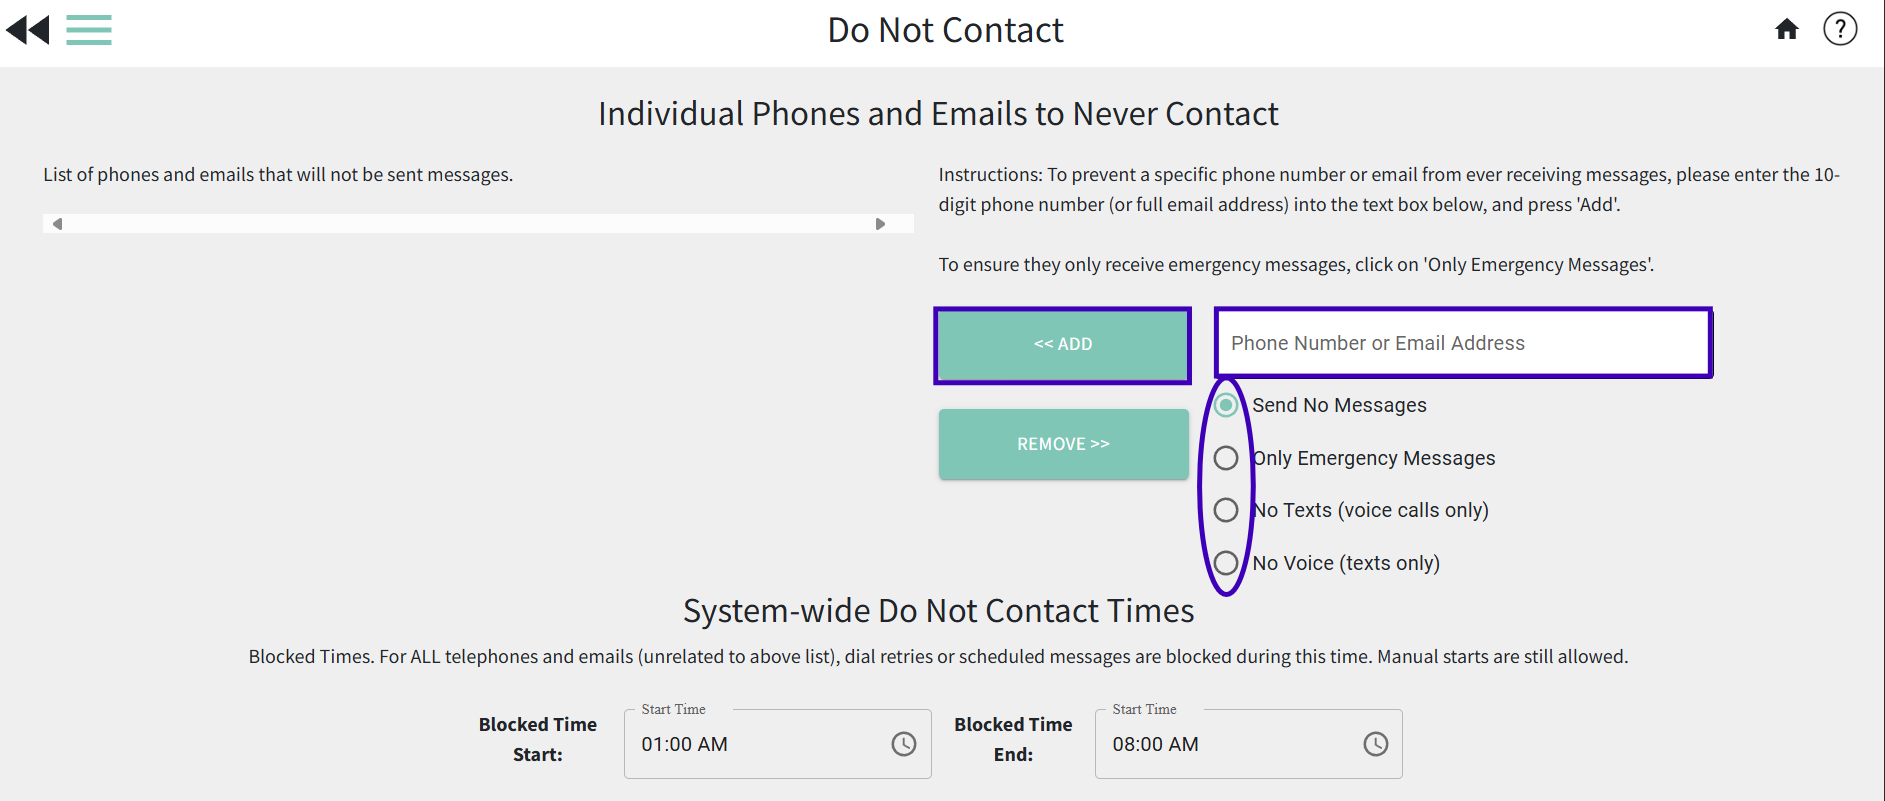
6. You'll now see the phone or email generated on the left-hand box. That means you have successfully added it to the Do Not Contact list
7. Click the double-back arrows in the upper left to save your changes and return to the previous page
What if someone wants to receive emergency notifications but not other notifications?
If you have a contact who wants to receive emergency alerts only and not any "regular" messages, you can add them to the Do Not Contact list with the "Only Emergency Messages" radio dial selected. Note that in order for the contact to receive emergency text messages, they must still opt in by texting Yes to 79041 (applies to USA recipients only).
With the "Only Emergency Messages" radio dial selected, enter your contact's phone number or email address then click "Add." In the list of phones and emails that will not be sent messages on the left, you will see "Send Emer Only" next to their phone or email. Now, when you create a message and mark it as "emergency" they will receive it. They will not receive any messages marked as "informational." See this article for more information about the difference between informational and emergency messages.

How to remove a phone or email from the Do Not Contact list
1. Click on the top left menu (3 lines)
2. Select the "Do Not Contact List/Time" option
3. In the new window that appears, in the left column, click on the phone number or email address that you want to remove from the do not contact list so they start receiving messages again
4. Click the Remove button
 5. The phone or email address is now removed and will start receiving messages again
6. Click the double-back arrows in the upper left to save your changes and return to the previous page
How to set system-wide do not contact times
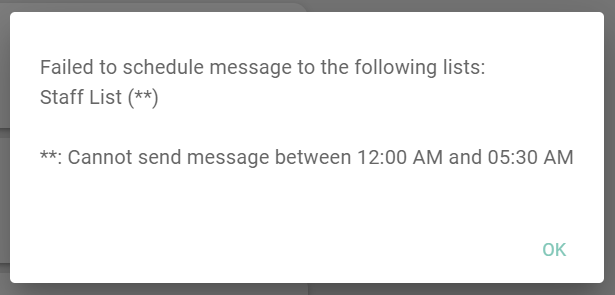
If your administration decides that they want to block users from accidentally scheduling messages to send out during certain times, you can set system-wide "do not contact" times. Users will still be able to create and send a message manually during these hours, however, they will not be able to schedule a message to send during these hours. This helps to make sure your contact's phones aren't ringing if a user accidentally schedules the message to send at 2:00AM instead of 2:00PM. Also, if your list is still re-dialing calls for recipients who have not answered the phone, with the system-wide do not contact times in place you can ensure that the calls will stop trying to re-dial.
1. Click on the top left menu (3 lines)
2. Select the "Do Not Contact List/Time" option
3. At the bottom of the page, in the "System-wide Do Not Contact Times" section, use the clock icon to select the timeframe that messages should not send during
 4. Click the double-back arrows in the upper left to save your changes and return to the previous page
5. If users try to schedule a message during the "blocked" timeframe, they will receive an error message stating that they cannot schedule the message