How to Change a User's Access
You might have some staff members who have changed roles or who are now working in a different building or campus. If you need to assign a user to a different building or update their level of access, your system superadmin can make the change in a few steps.
The steps below can only be done by the BrightArrow superadmin.
Updating a user's access in Revere
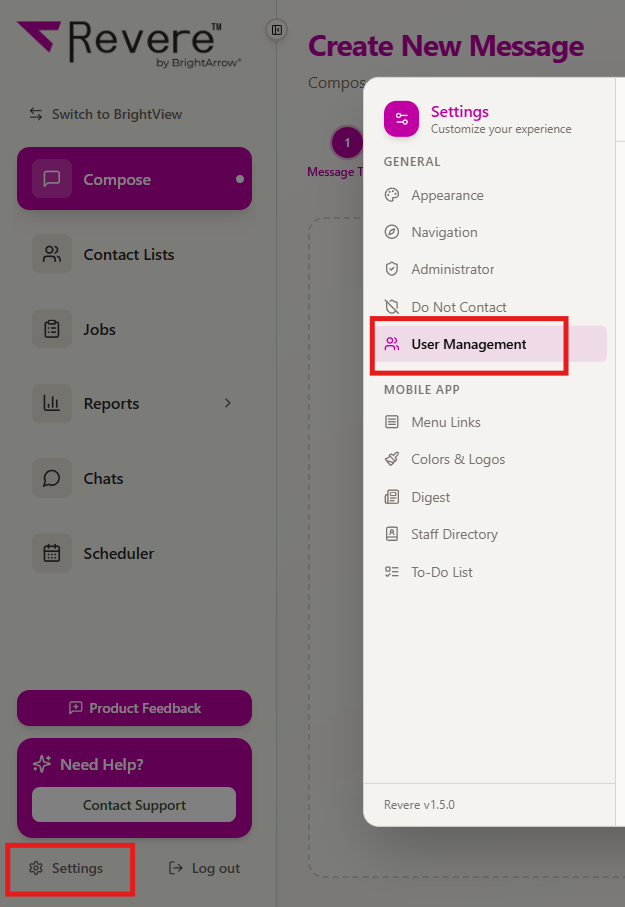
- In your Revere navigation panel, go to Settings > User Management. If you do not see the User Management option stop - you are not logged in as the superadmin.
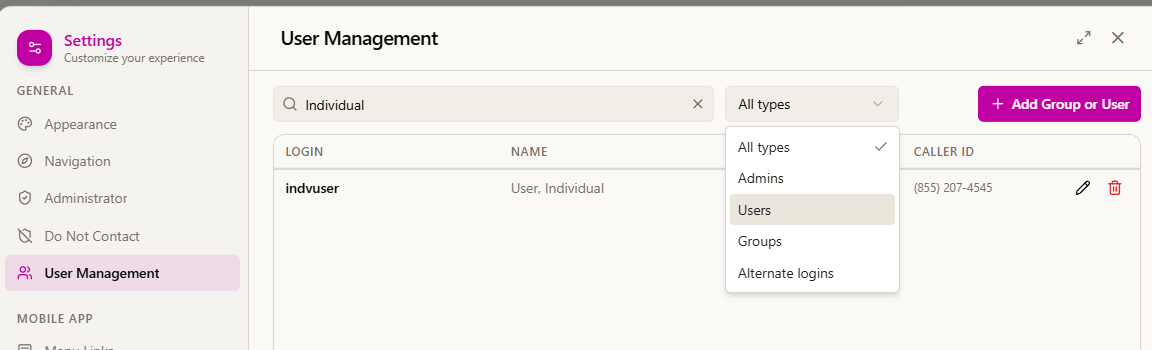
- Find the user who you need to change in your list of users or search for the user whose access needs to be updated. You can search by their name or by their login name. Filter options are also available to filter by user type.
If the user's type shows as Alternate Login, please reach out to our support before making any changes.
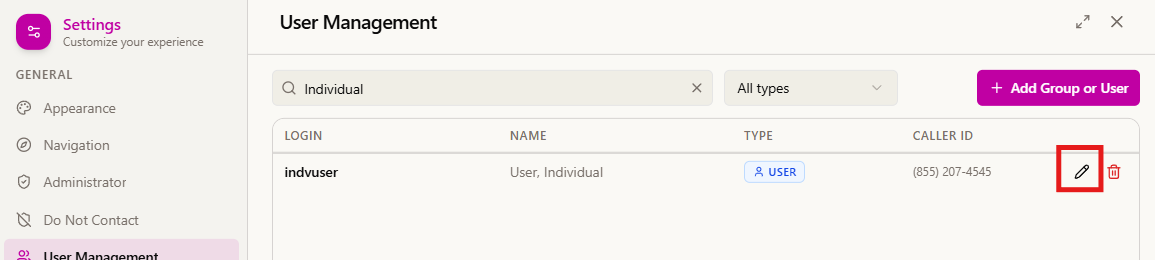
- Click the edit pencil in the same row as their name.
- Scroll down to the User and Group Access section. Notice the 3 radio dials.
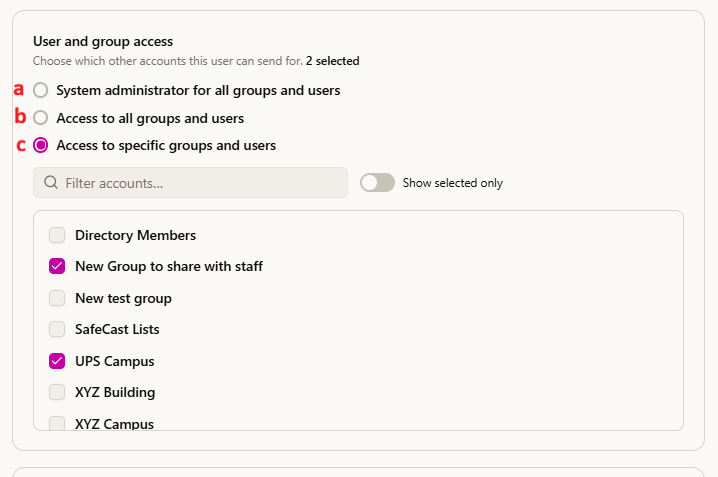
- If they are a superadmin, the first radio dial will be marked. They have the highest level of access and can see all lists and reports and can manage user accounts.
- If they have the second radio dial marked, they are a district-level admin with access to all lists and reports but cannot manage user accounts.
- If the 3rd radio dial is marked, they can have access that's limited to only specific buildings/folders/user groups. Teachers will have the 3rd radio dial marked as well, even if a school's group/folder has not been shared with them.
- If the user changed roles, you may need to adjust the radio dial accordingly.
- If they formerly had access only to one building but should now have access to all buildings, move the radio dial from "Access to specific groups and users" to "Access to all groups and users."
Example: A campus secretary was promoted and now works in the corporate office. Before they only had access to the one campus they worked in but now they need access to all campuses. Move them from the 3rd radio dial to the second one. - If the user is in a similar role but is now working in a different building, do not change the radio dial away from "Access to specific groups and users." Click the "Assign to Groups and Users" button to change which building(s) they have access to (detailed in step #6).
Example: An office staff member was working at XYZ campus but is now working in the same role at the UPS campus, so they need access removed from the XYZ lists and access added to the UPS lists.
- If they formerly had access only to one building but should now have access to all buildings, move the radio dial from "Access to specific groups and users" to "Access to all groups and users."
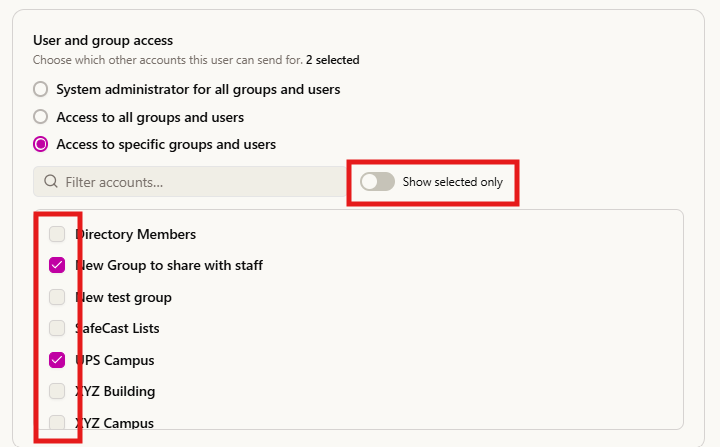
- If the user needs to have limited access to see only the lists for certain users or buildings, with the 3rd radio dial marked, select the checkboxes for any buildings or other users that the person should have access to. Deselect any buildings or users that the person should no longer have access to. Double-check your work by toggling on the "Show selected only" toggle.
- Scroll to the bottom of the window and click Save Changes to save your changes.
Updating a user's access in BrightView
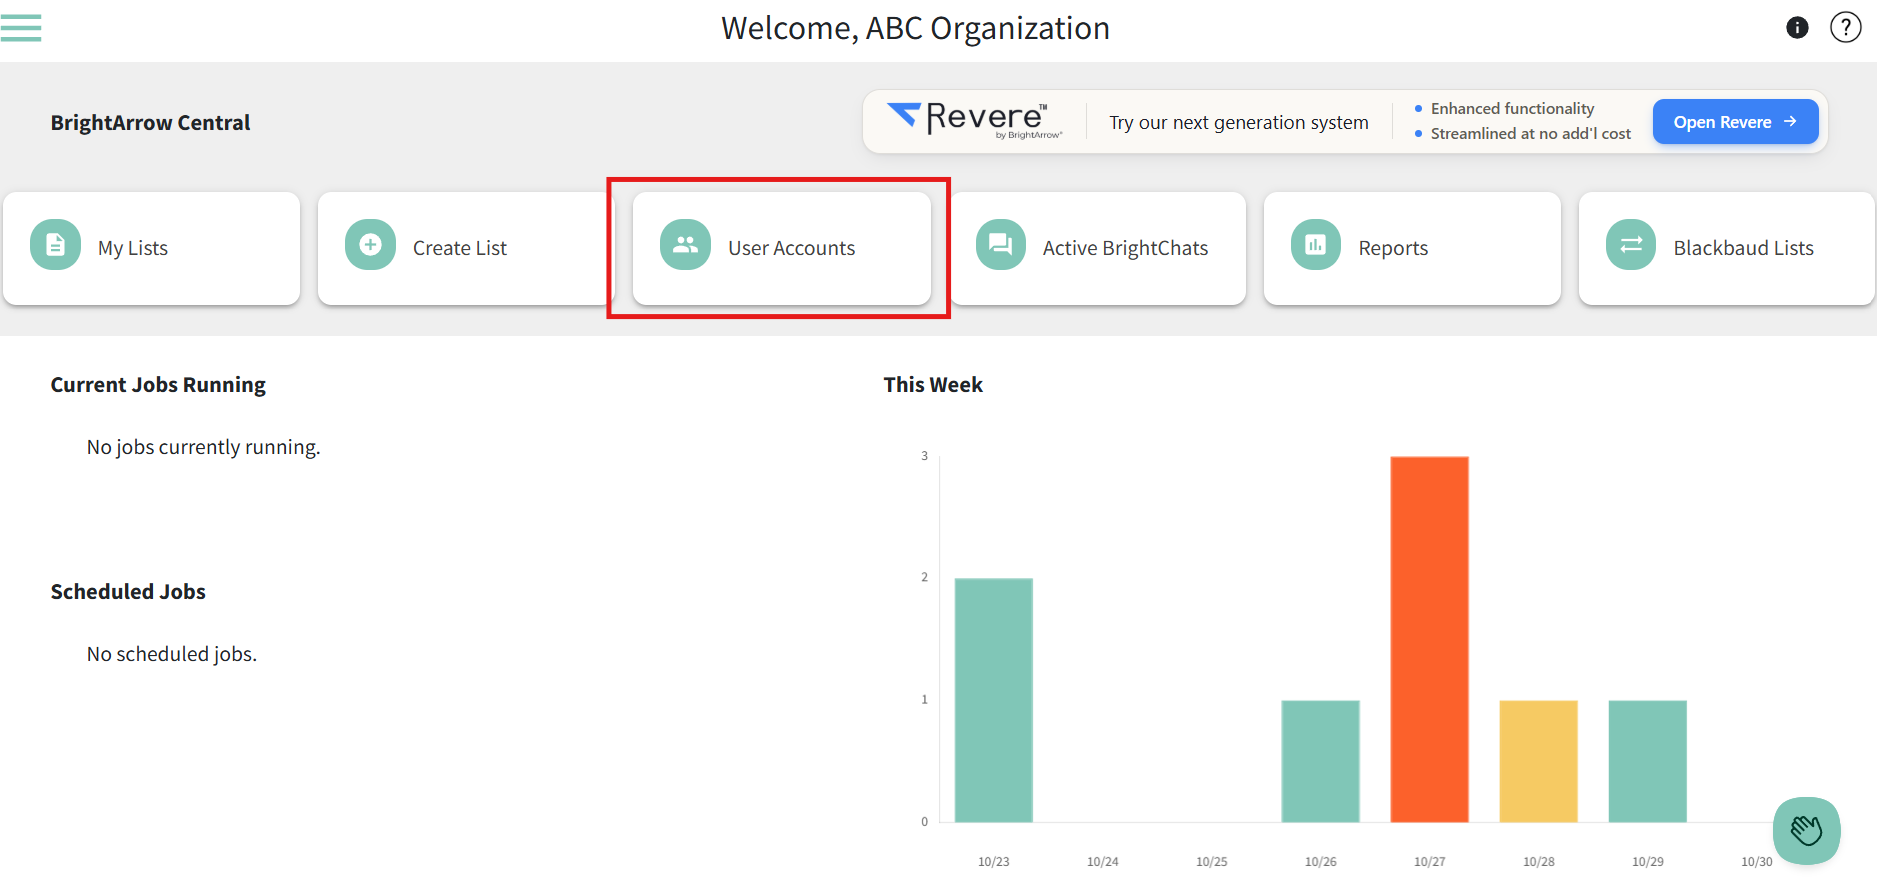
- In BrightView (BrightArrow Central) click the User Accounts button from your dashboard page. If you do not see the User Accounts button, stop - you are not logged in as the superadmin.
- Find the user who you need to change in your list of users or search for the user whose access needs to be updated. You can search by their name or by their login name.
If the user's type shows as Alternate Login, please reach out to our support before making any changes. - Click the edit pencil in the same row as their name.

- Notice the 3 radio dials.
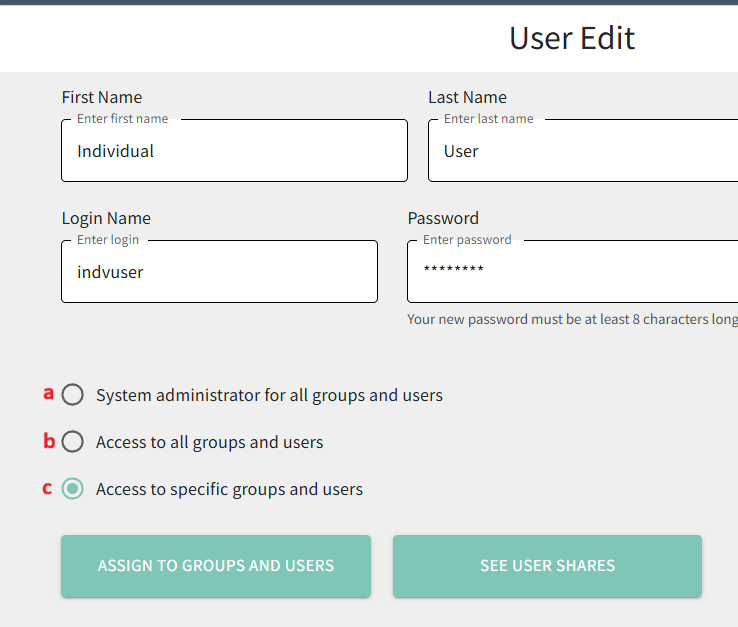
- If they are a superadmin, the first radio dial will be marked. They have the highest level of access and can see all lists and reports and can manage user accounts.
- If they have the second radio dial marked, they are a district-level admin with access to all lists and reports but cannot manage user accounts.
- If the 3rd radio dial is marked, they can have access that's limited to only specific buildings/folders/user groups. Teachers will have the 3rd radio dial marked as well, even if a school's group/folder has not been shared with them.
- If the user changed roles, you may need to adjust the radio dial accordingly.
- If they formerly had access only to one building but should now have access to all buildings, move the radio dial from "Access to specific groups and users" to "Access to all groups and users."
Example: A campus secretary was promoted and now works in the corporate office. Before they only had access to the one campus they worked in but now they need access to all campuses. Move them from the 3rd radio dial to the second one. - If the user is in a similar role but is now working in a different building, do not change the radio dial away from "Access to specific groups and users." Click the "Assign to Groups and Users" button to change which building(s) they have access to (detailed in step #6).
Example: An office staff member was working at XYZ campus but is now working in the same role at the UPS campus, so they need access removed from the XYZ lists and access added to the UPS lists.
- If they formerly had access only to one building but should now have access to all buildings, move the radio dial from "Access to specific groups and users" to "Access to all groups and users."
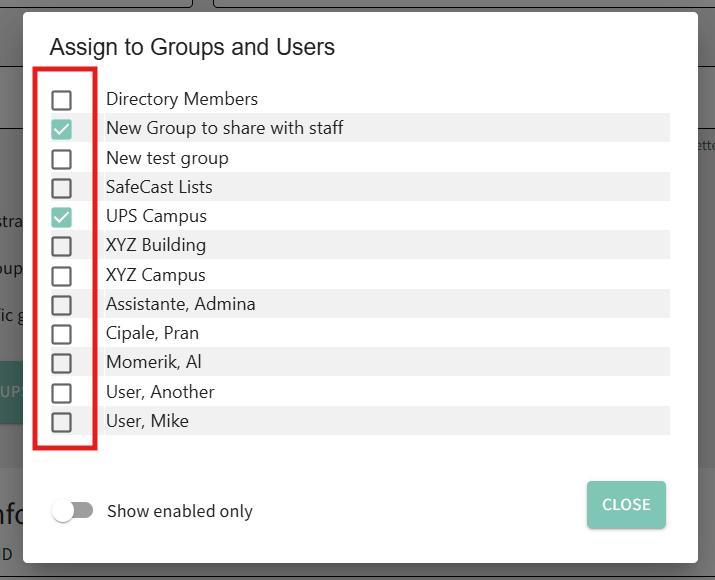
- If the user needs to have limited access to see only the lists for certain users or buildings, with the 3rd radio dial marked click the Assign to Groups and Users button. The Assign to Groups and Users window will pop-up. Mark the checkbox for any buildings or other users that the person should have access to. Deselect any buildings or users that the person should no longer have access to.
- Double-check your work by toggling on the "Show enabled only" toggle.
- Click "Close" in the pop-up window when you're finished making changes.
- Scroll to the bottom of the screen and click OK to save your changes.
