Emailing Forms and Surveys
In BrightView, you can create a form or survey to be sent to your list contacts by email. For sending surveys through voice or text, see here.
Create the form or survey
- Start by clicking on the name of the list that you want to send the form or survey to, then create a new message.
- Mark the "Email" box as the message type.
- On the email message creation page, click the Add Form button to start creating your form or survey or to open a form/survey you've previously created.
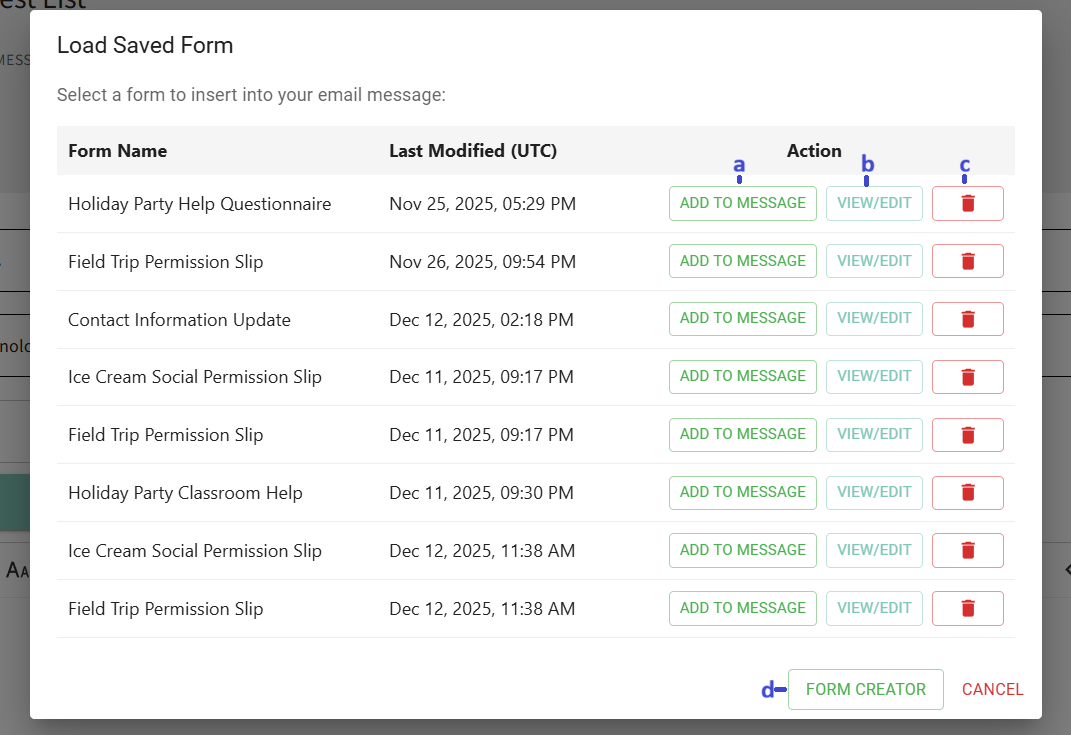
- A new window will open showing a list of all the surveys/forms that are already created in your account.
- Click the "Add to Message" button to add the form directly to your email message.
- Click the "View/Edit" button to view and/or edit the form.
- Click the "Delete" trash can icon to permanently delete the form from your account.
- Click the "Form Creator" button to start creating a brand-new form.
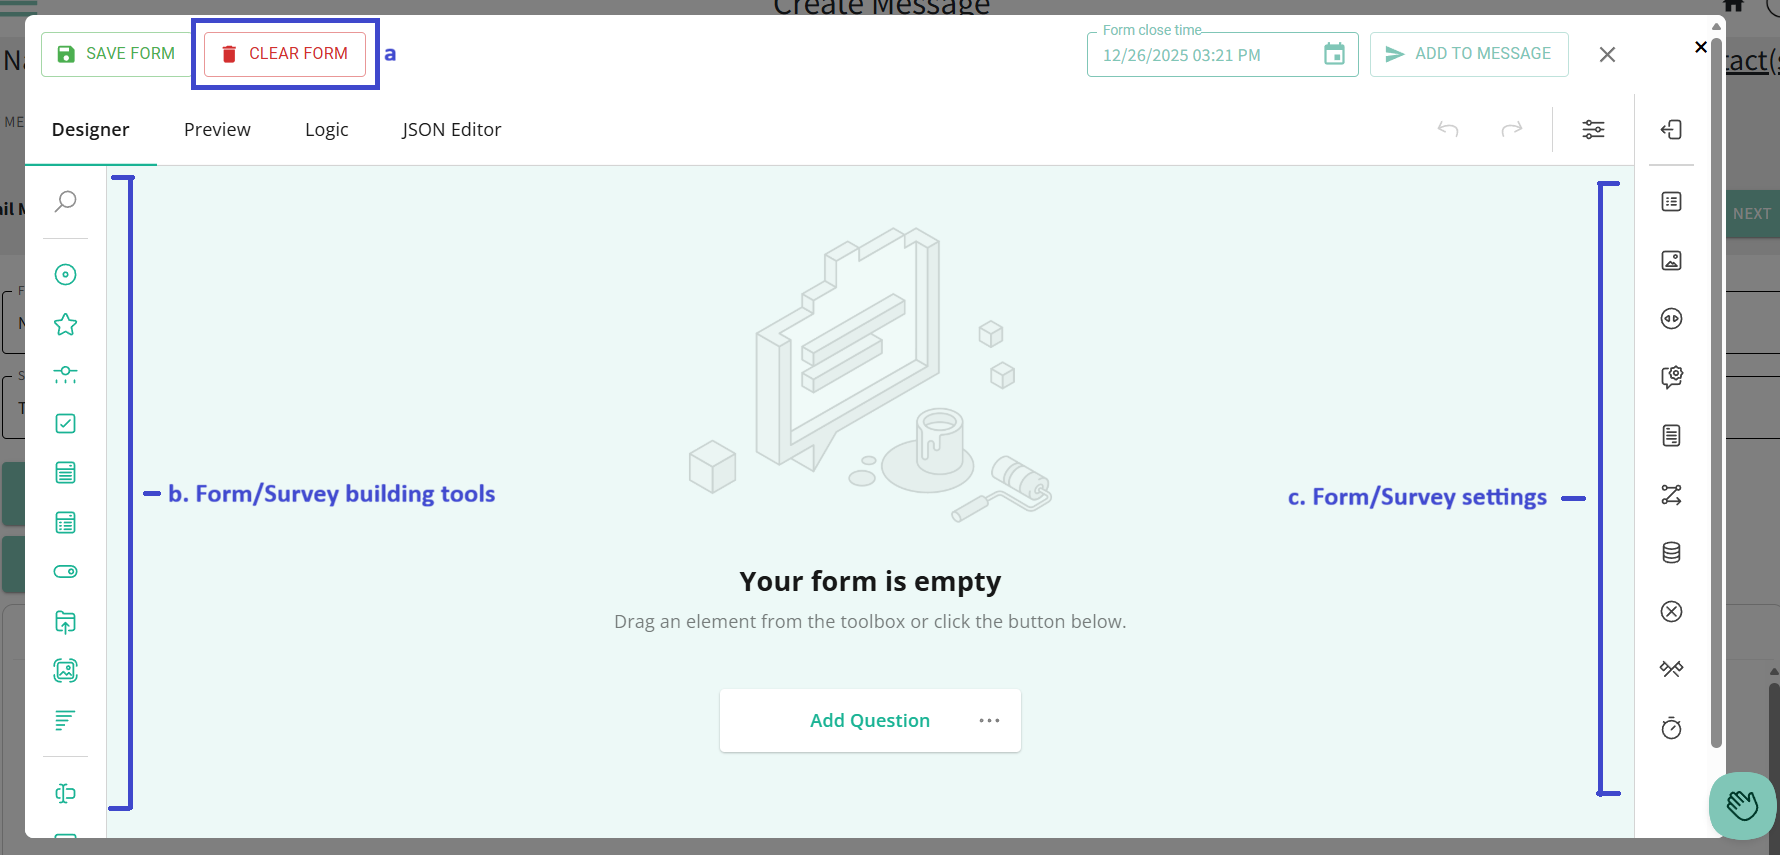
- After clicking either the View/Edit button or the Form Creator button, the Forms/Surveys creation window will open and you can start creating or editing your form.
- When you open the form creator, the last form you were working on will load automatically. You can click "Clear Form" to start a new form.
- Use the icons on the left to build your form or survey. Clicking any of the various options on the left will allow you to create a new question in that format.
- Use the icons on the right to designate settings for the form or survey.
- Click on any item within your form to edit it to your liking.
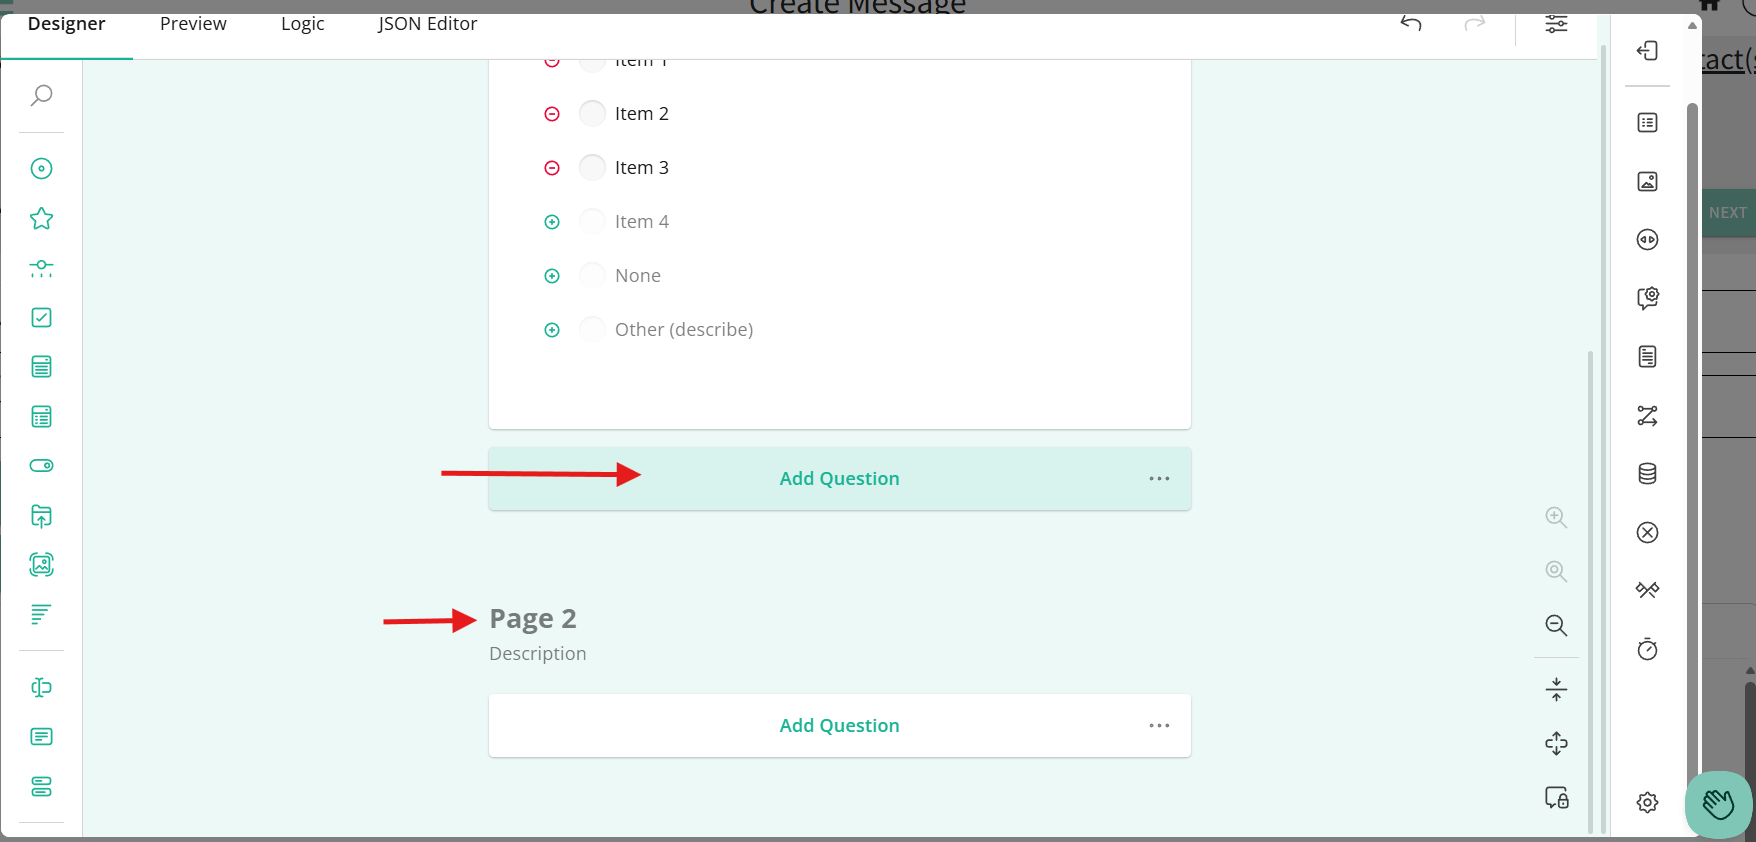
- As you scroll down toward the bottom of the form designer window, you can add additional questions by clicking the "Add Question" button. If you want multiple pages in your form, click "Add Page."
- Note that the form designer pre-populates the option for additional questions and pages to be added, but don't worry, if you add nothing there they will not populate to your final form that you send out.
- Clicking "Add Question" will add a new question to your form. Using the options at the bottom of the question panel, ou can choose what type of question you want to use, format how answers are input, mark the question as "required," or even duplicate the question. Duplicating the question is especially helpful if you've added formatting using the settings from the right-side panel that you want to use in your next question too.
- Add logic to your questions using either the settings panel on the right side of the page or by clicking the "Logic" tab at the top of the screen.
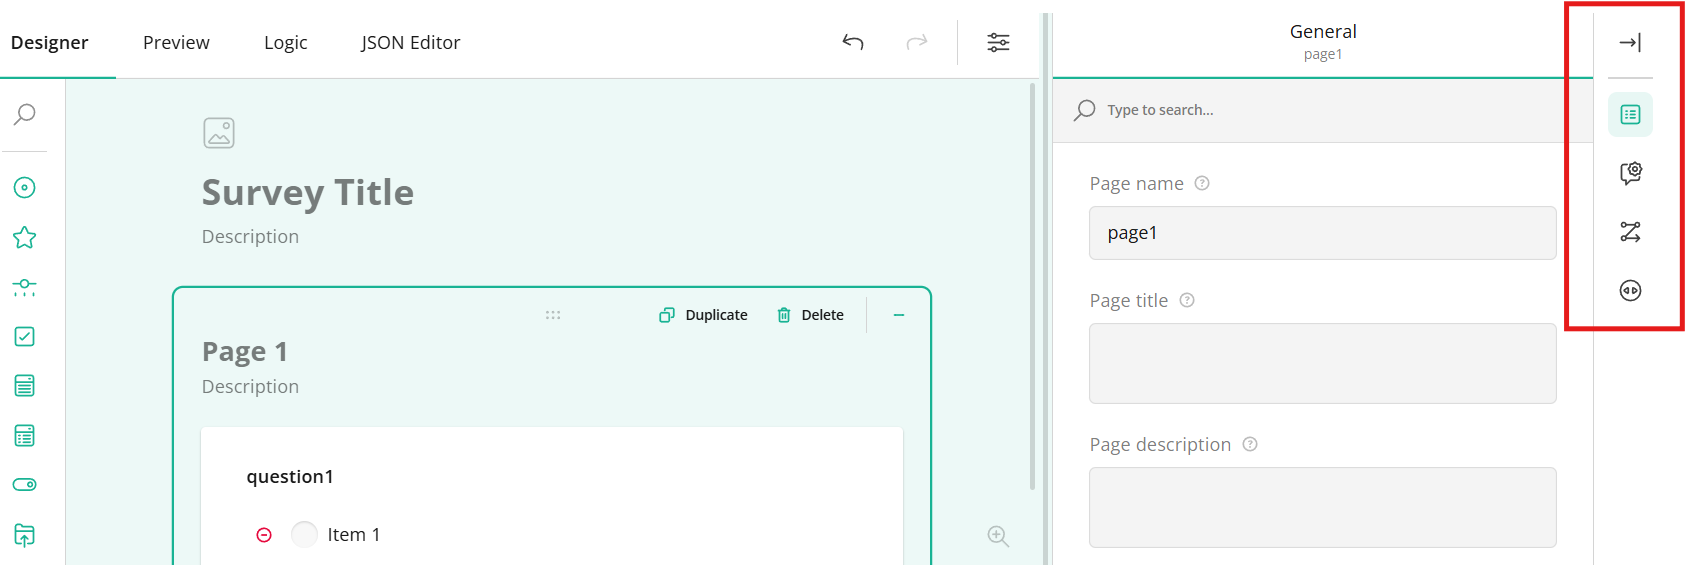
- Using the settings in the right-hand panel, you can name your questions, add logic such as "if question 1 is answered, then show question 2," and determine exactly how your questions will populate for your contacts. The settings panel is great for adding logic and other specifications to individual questions. First, click in the question box, then click any of the icons in the right-hand panel.
- To apply logic to specify the flow of the entire form/survey, use the "Logic" tab located at the top of the screen.
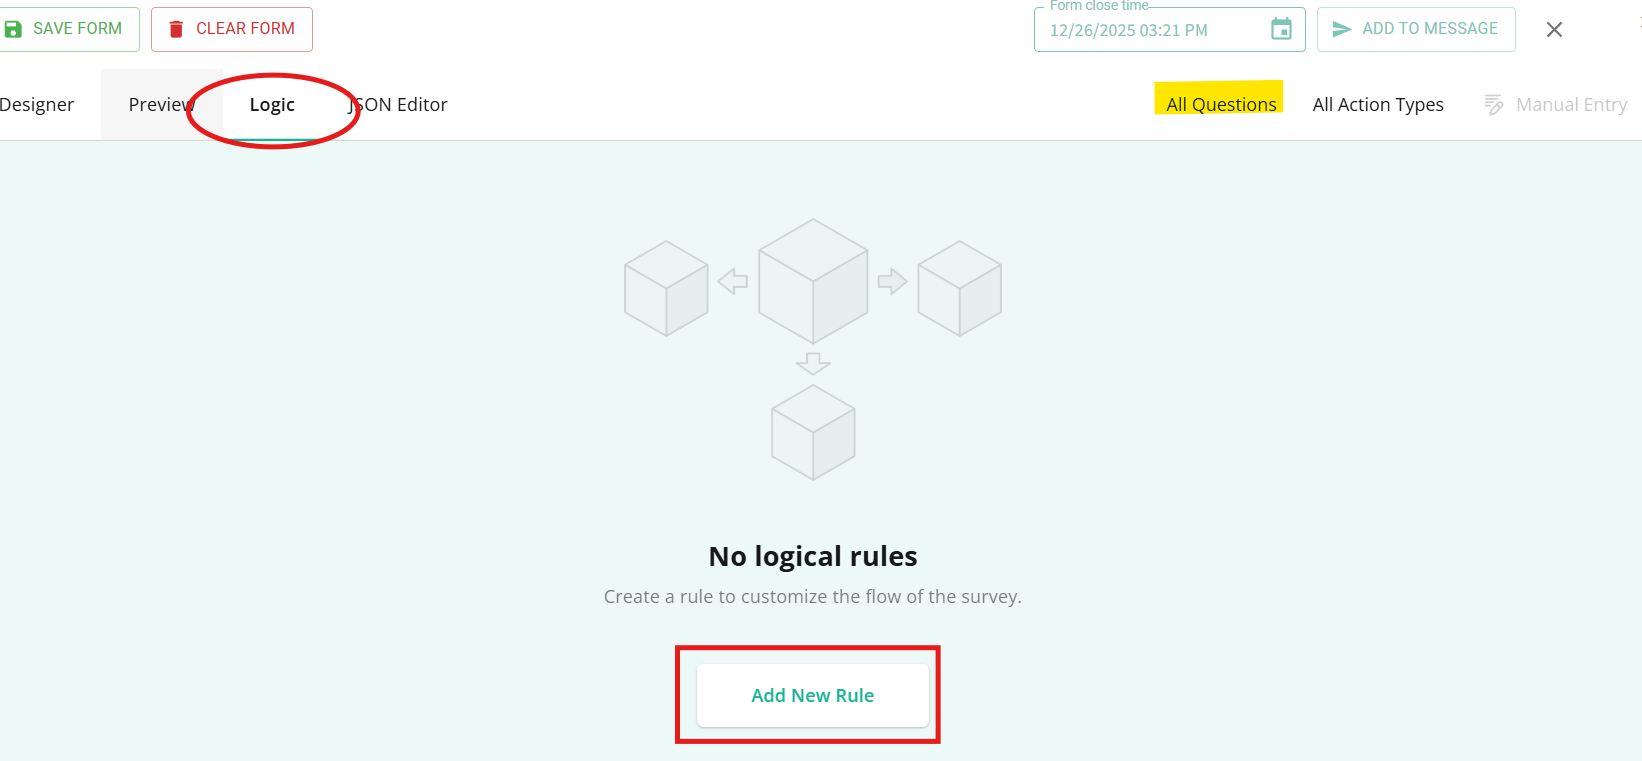
- Once your form or survey is created, you can preview it by clicking the "Preview" tab at the top of the screen.
- Now that your form/survey is to your liking, click the "Save Form" button so you don't lose any changes.
- In the pop-up window, give your form a name that will make it easy to find again in the future and use the "Share to" option to specify if you would like to share the form with any other BrightArrow users in your organization. Then, click "Save."
- With your form now saved, you can pull it up again later (reference step #5 of this article), or add it to your email message right away using the "Add to Message" button. You can also set the "Form close time" if you'd like to set an expiration date/time on your form so that it cannot be completed by your contacts after the Form Close Time has lapsed.
- Once you've clicked "Add to Message" you will be redirected back to the email creation page. A pop-up window will appear asking you to name your form link. Whatever you type there is what the link to your survey will show as to your contacts. After you've given your form a name, click OK.
- The link to your form/survey is now added to the email body. Add any additional text as needed, and remember to change the subject line, from name, etc. before sending your email.
- Click Next to proceed through the message creation pages to send out your message.


Viewing the results
Once your survey or form has been sent, you can see the responses in the BrightArrow Reports page under the "Forms" tab.
- Use the "Select Published Survey" drop-down menu to select the form you wish to view responses for.
- Click "Individual Responses" to see details of what each recipient responded with.
- Click "Summary" to view summary charts that show the overall results of your survey.
- Use the "CSV" button to export the results to a CSV file to filter and analyze the results.

Who can see the results?
Anyone with access to the BrightArrow list that the form was sent to will be able to view the results. System administrators will be able to see the results for ALL forms sent by anyone in your organization.