Creating a New Message
So you've created or chosen your list and you want to send a new email, text and/or voice message. This is handy for Weekly Notifications, Classroom Announcements, Newsletters, and so much more. The first part of this article will show you how to navigate creating a new message. The following sections will cover message types: Email, Text, and Voice.
How to Create a New Message
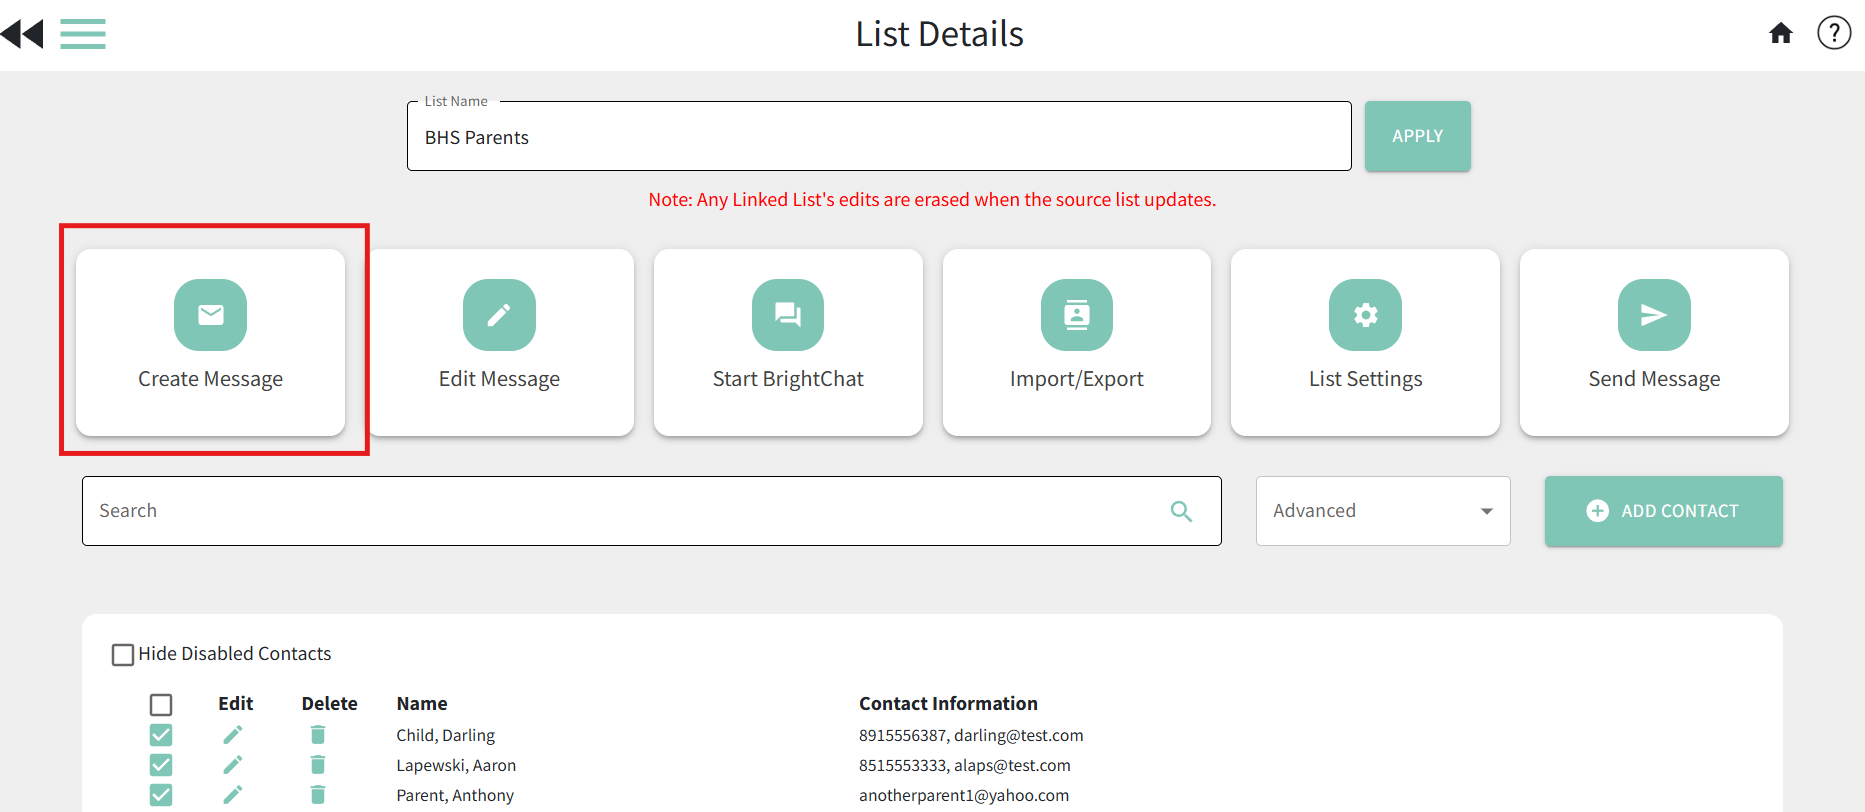
- Navigate to the My Lists page, then click on the name of the list you will be messaging. For assistance sending a message to multiple lists at once, see here.
- Click the "Create Message" button.
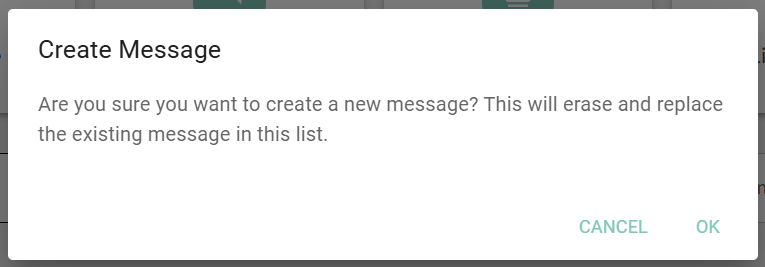
- If a message has been created in this list before, you will get a pop-up notifying you that the previous message will be erased and replaced. Click OK to proceed.
- Clicking OK will overwrite any SAVED message in the list. To make changes to your saved message, use the Edit Message option rather than the Create Message option.
- If the previous message in the list was already sent, you can retrieve it again later using the Load Prior Message option.
- If you have a scheduled message pending, it will not be overwritten when you click OK. A new temporary copy of the list will automatically be created for your scheduled message.
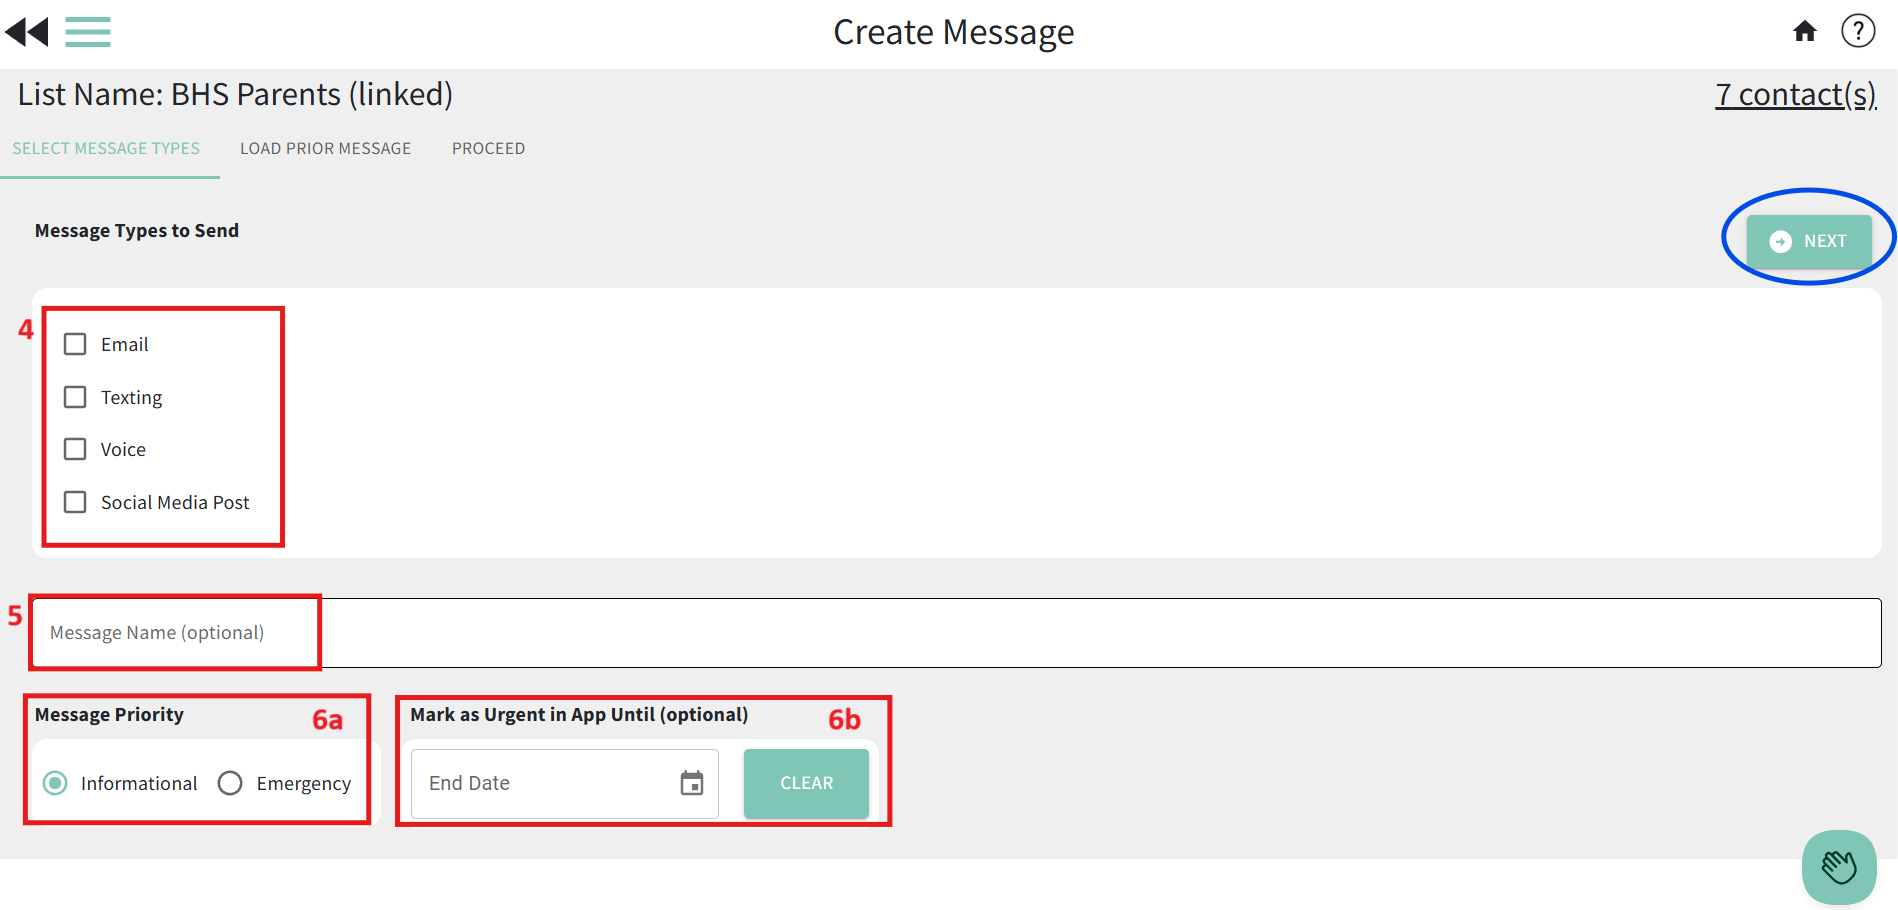
- You'll now decide what TYPE of message you'd like to send. You can select one or more options.
- Give your message a name. This step is not required, but it will make it easier to find again in the future should you need to reuse it or view the report of it.
- Indicate the priority level.
- If your message is a true emergency, mark the radio dial accordingly. Doing so will give your messages a higher priority on our servers. Please reserve this option only for true emergencies.
- If your contacts use the ParentHub app, you can mark the message as urgent in the app to help draw attention to it. See here for more details about this feature.
- Click "Next."
- We will cover the types of messages below. Remember, you also have the option to choose multiple. Example, an email AND a text message, or all 3 options.
Three Main Types for Messages:
For Emailing:
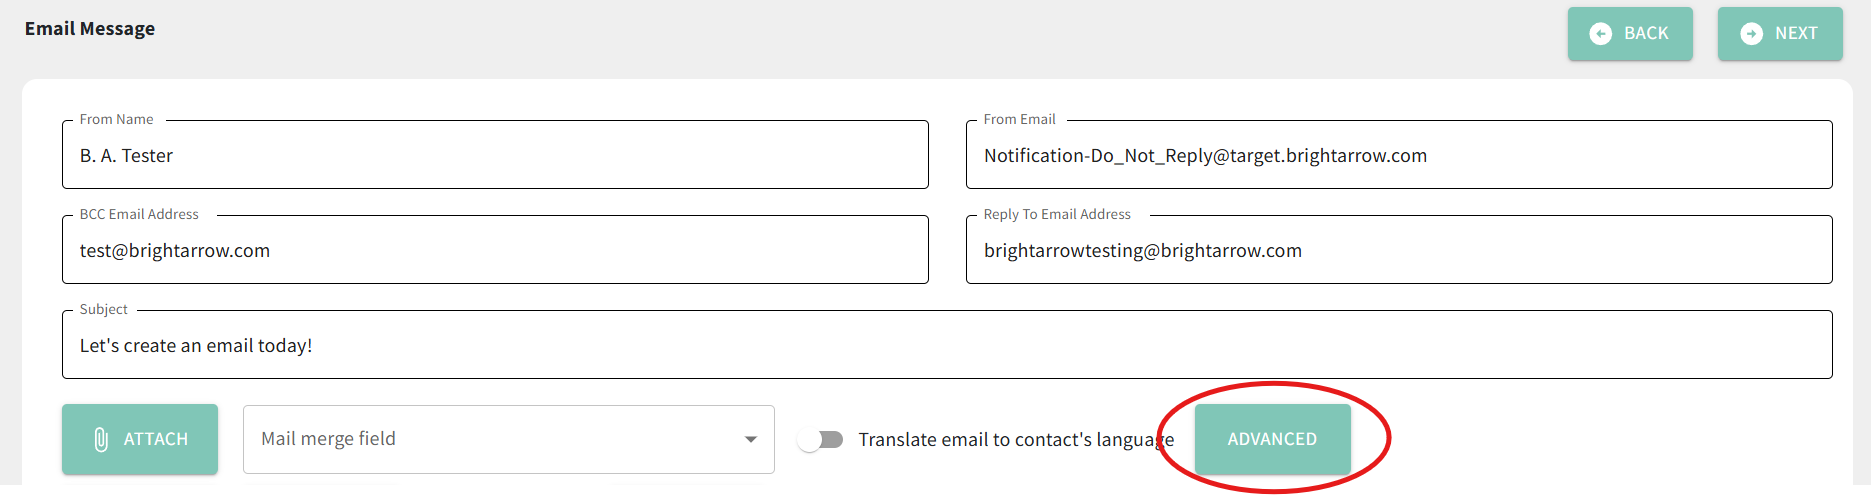
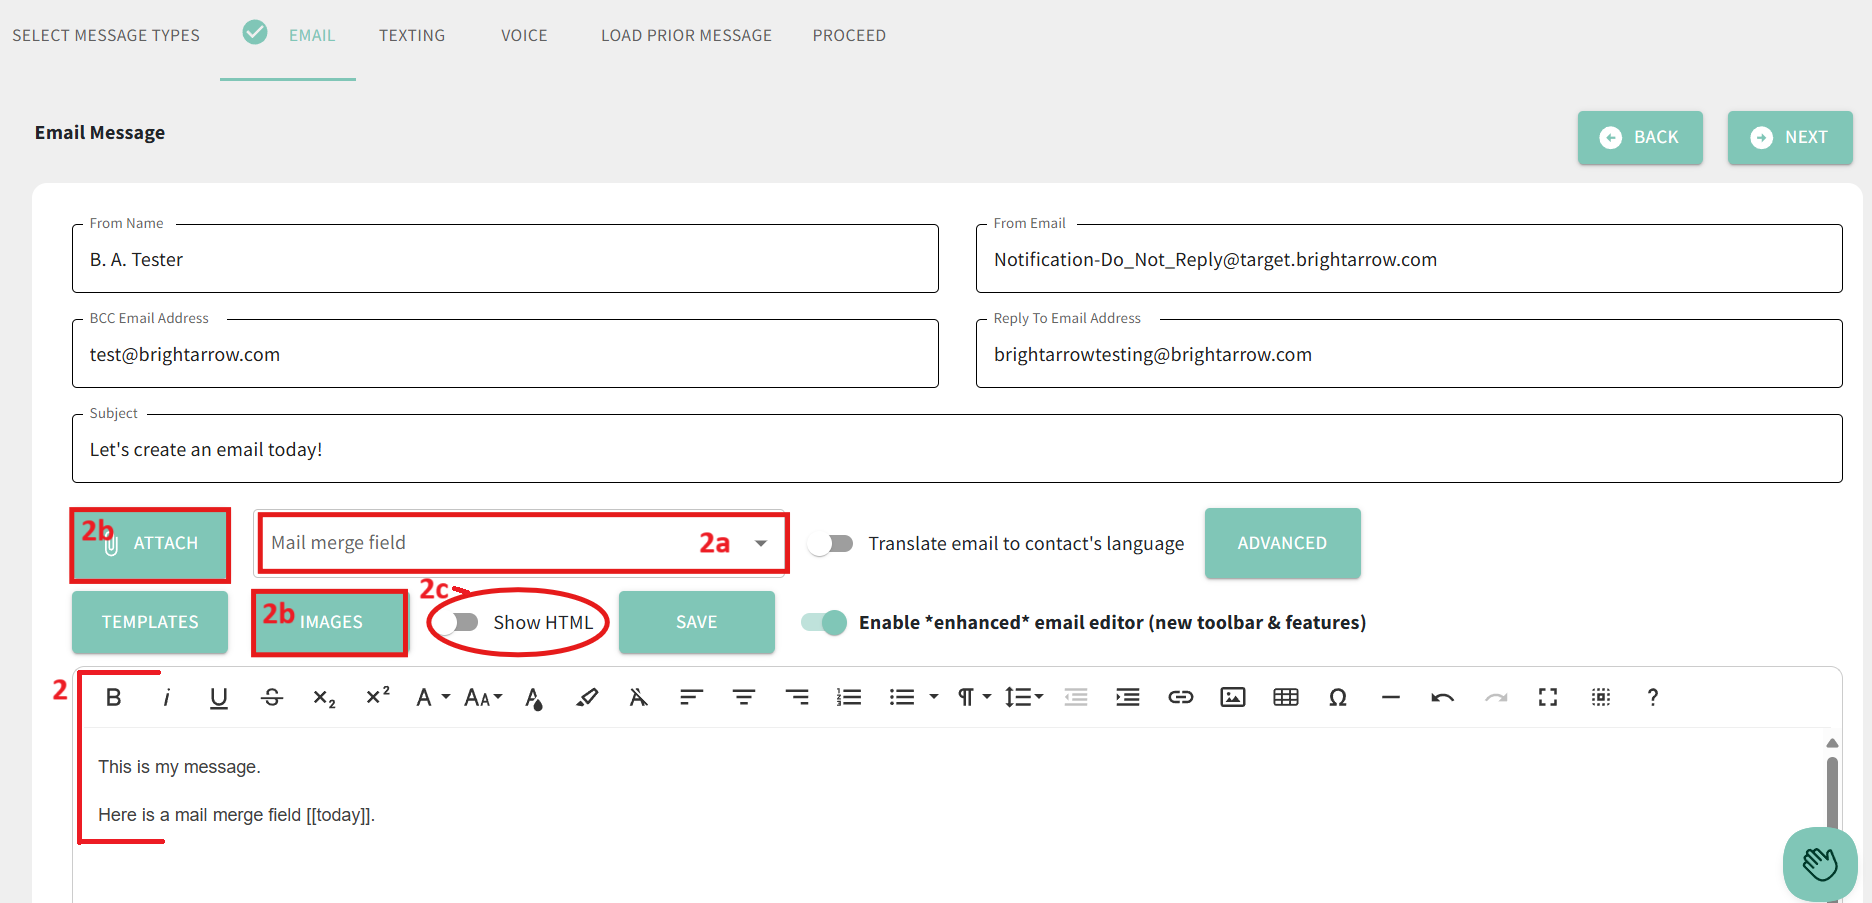
- Enter the "From Name," "From Email," and "Subject" for your message.
- Click the "Advanced" button if you want to add anyone to the CC field or a "reply to" address.
- Multiple email addresses can be added in the CC field; comma separated, no spaces.
- You can type in the text box the message you'd like to send.
- Add mail merge fields to include dynamic information.
- Add images or attachments as needed.
- Copy/paste HTML from an outside source or add additional formatting using the "Show HTML" toggle.
- Once your email message is complete, you can hit "Next."
- If you chose more than one message type, you will be brought to the next message creation page.
- If you chose to only send an email, you will be brought to the final page which has multiple options.


- Send Message Now - this option will send the message now to the contacts that selected are on the list.
- Save Message - this option will save your message so you can revisit it later to edit or send.
- Schedule Message - this option allows you to schedule a time and day for the message to go out (for example, if it is currently 8am and you would like it to go out at 10am, you can set it here).
- Preview Message - this option allows you to send the message to yourself first so you can preview it.
- Cancel - this will cancel your message creation and the message will not be saved.

For Texting
If you chose "Texting" as a message type, you'll be redirected to the text message creation page.

- You can type in the text box.
- Note the character count. For all text messages containing over 160 characters, recipients will receive a truncated version of the text message along with a link to view the full message. The truncated version typically shows the first 100 characters, although this can differ depending on any special characters or URLs that are included in your message.
- Mail merge fields work in text messages the same as they do in emails.
- If you also created an email message, the text of the email will automatically populate on the text messaging screen. Overwrite it as needed by turning the "Link to Email Message" toggle OFF. Turn the "Link to Email Message" toggle ON to re-populate the text from the email message (all formatting will be removed).
- Images cannot be imbedded in text messages.
- URLs can be copy / pasted into the message and your contacts will receive it as a clickable link.
- Once you've finished writing your text message, you can click "Next."
- If you chose to also send a voice message, you'll be brought to the voice message creation page.
- If you chose not to send a voice message, you will be brought to the final page which has multiple options.
- Send Message Now - this option will send the message now to the contacts that selected are on the list.
- Save Message - this option will save your message so you can revisit it later to edit or send.
- Schedule Message - this option allows you to schedule a time and day for the message to go out (for example, if it is currently 8am and you would like it to go out at 10am, you can set it here).
- Preview Message - this option allows you to send the message to yourself first so you can preview it.
- Cancel - this will cancel your message creation and the message will not be saved.
For Voice
If you selected Voice as a message type, you'll be redirected the voice message creation page.

- You have a few options on how you'd like to send a voice message.
- Recorded Voice - send your contacts a pre-recorded voice message.
- You will have three options to choose from: (1) call our system and record your message, (2) our system calls you to record your message, (3) upload a recording that you already made.
- Use the "Show Message Text" option for a reminder of what you wrote in other message types.
- Mail merge fields cannot be used with this option (instead use the "Recorded Voice with Mail Merge Field" option).
- Your recording will be delivered as-is. It will not be translated to your recipients' preferred language.

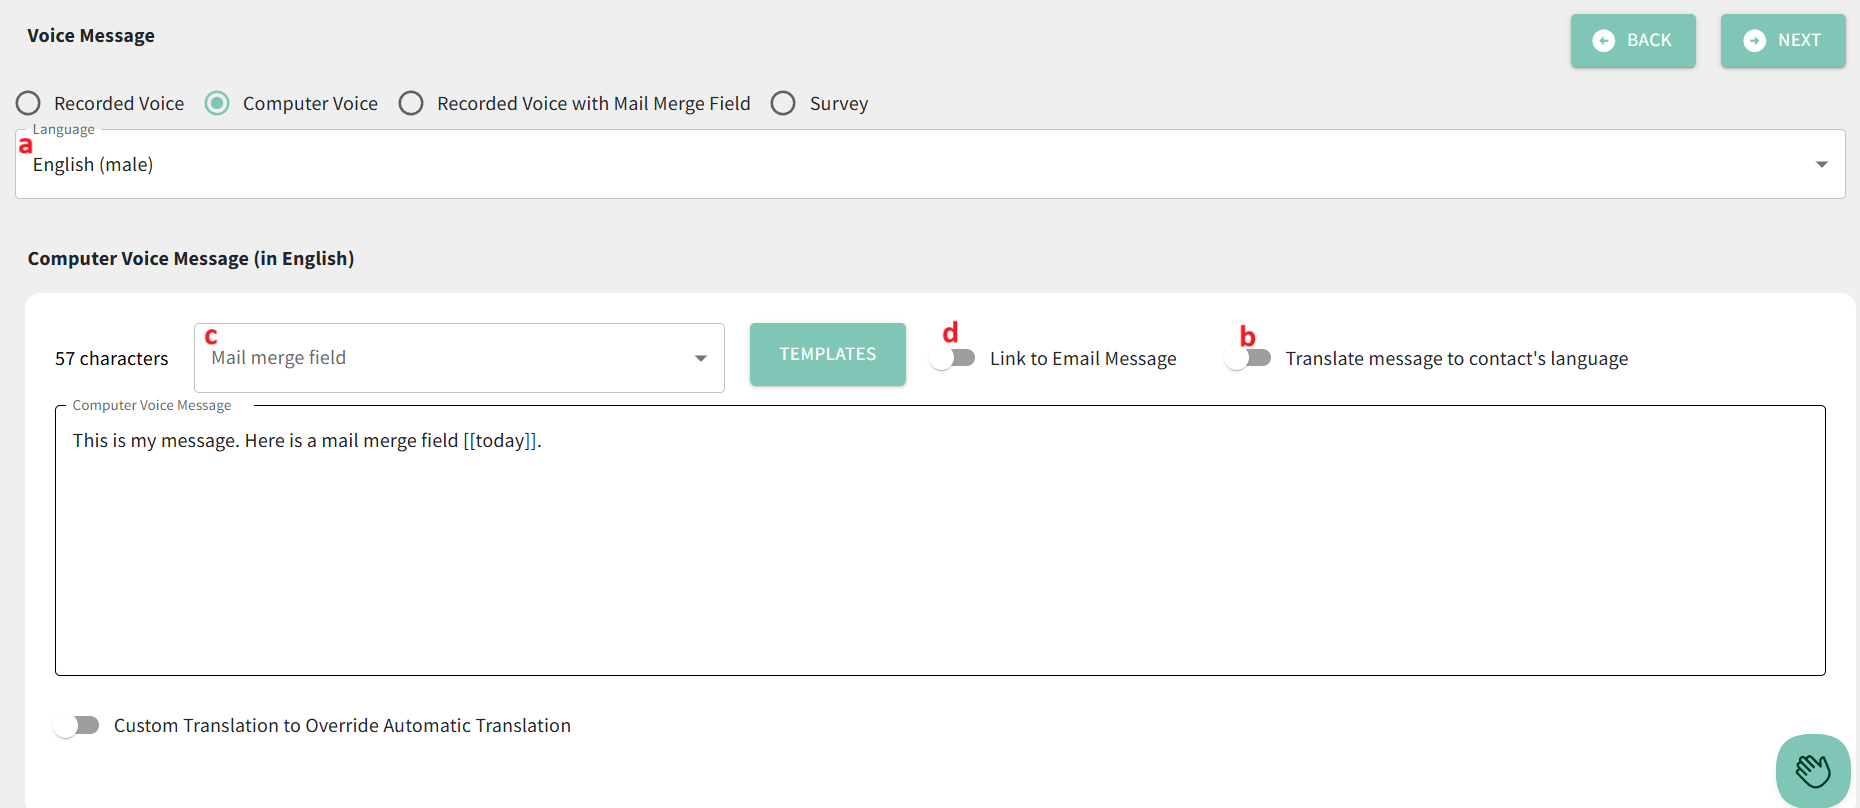
- Computer Voice - type your message and a computerized voice will read it.
- Use the Language box at the top of the page to tell the computer which language to read your message in.
- Computer Voice messages can be translated to your recipients' preferred language by turning the corresponding toggle ON.
- Mail merge fields work for Computer Voice messages the same as they do for SMS and email messages.
- If you also created an email message, the text of the email will automatically populate on the voice messaging screen when the Computer Voice option is selected. Overwrite it as needed by turning the "Link to Email Message" toggle OFF. Turn the "Link to Email Message" toggle ON to re-populate the text from the email message (all formatting will be removed).
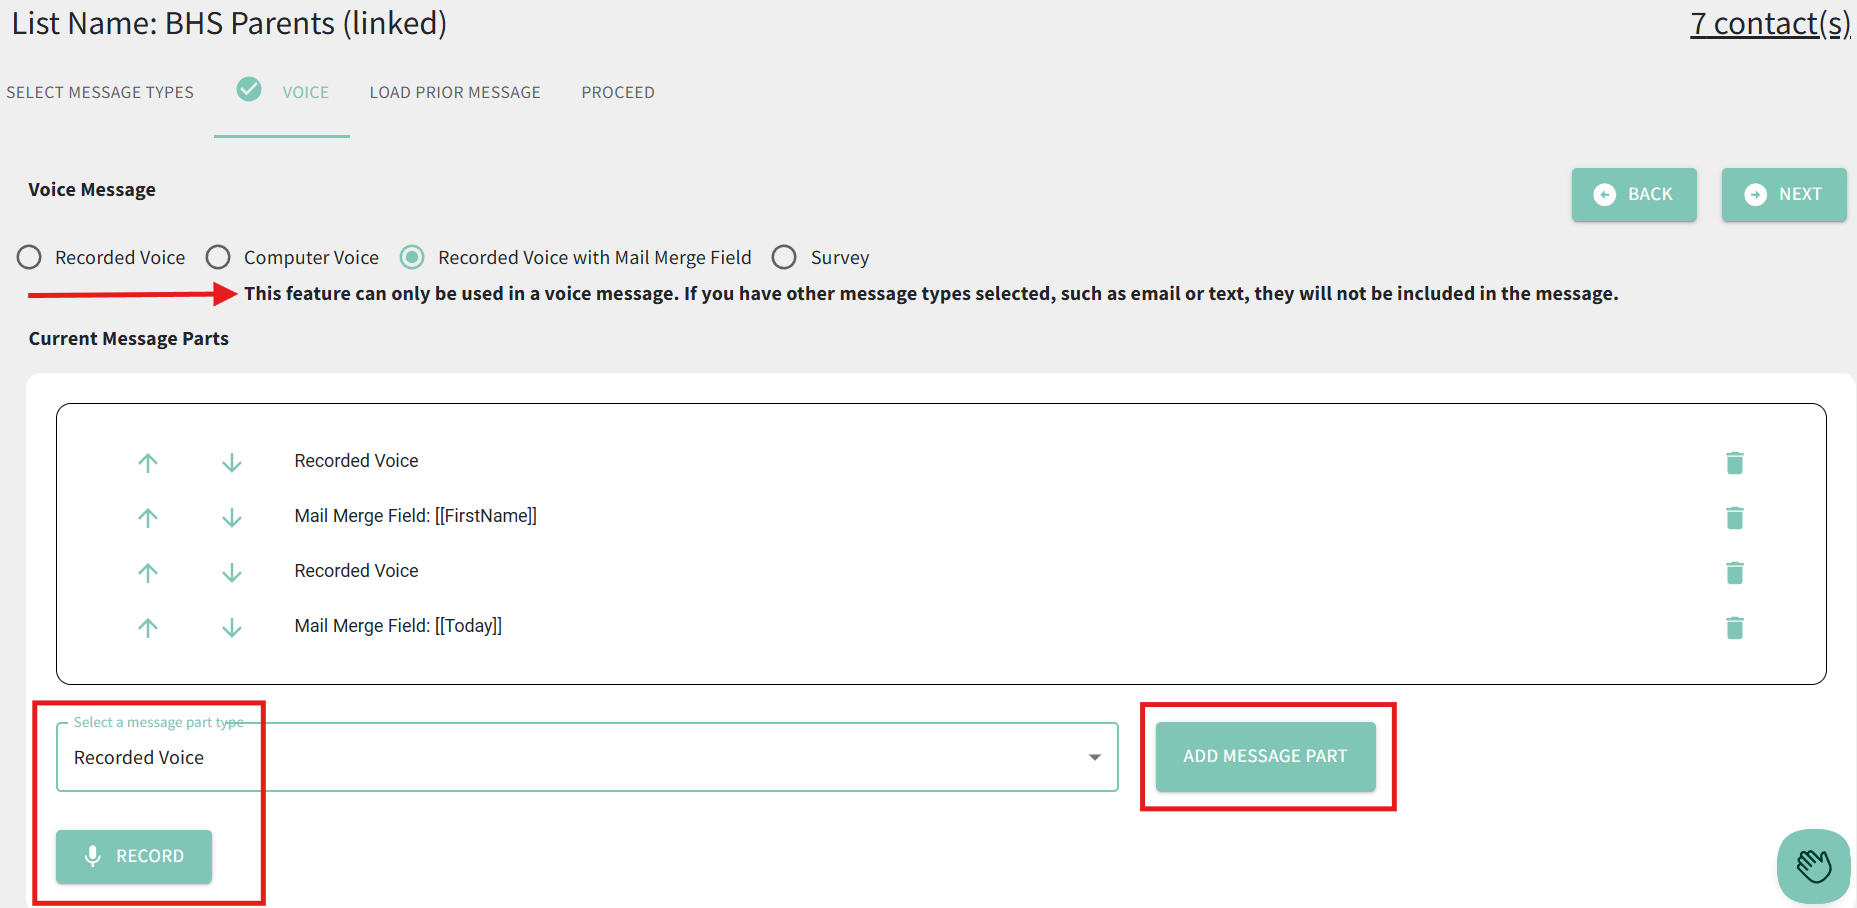
- Recorded Voice with Mail Merge Field - This option will allow you to create a multi-part message so that you can send a voice recording that dynamically includes mail merge field information.
- IMPORTANT: this option can only be used if you are creating a voice message only. Do NOT use this option if you have also selected the email and/or text message types. We strongly suggest that you "preview" the message before sending it to your constituents to make sure each part is exactly how you want it.
- Create your message by adding one message part at a time.
- Choose Recorded Voice as the message part type. Click the Record button to record the portion of your message up until the mail merge field needs added. Then click the button to "Add message part."
- Choose mail merge field as the message part type. Choose which field to use, then click "add message part."
- Record the next voice portion of your message, then click "add message part," and so-on until your message is complete. The message will be delivered as your recorded message, along with a computer voice inserted for any mail merge fields. It will not be translated to your recipients' preferred language.
- Recorded Voice - send your contacts a pre-recorded voice message.
- Click "Next" to go to the final screen. You'll have the following options:


- Send Message Now - this option will send the message now to the contacts that selected are on the list
- Save Message - this option will save your message so you can revisit it later to edit or send
- Schedule Message - this option allows you to schedule a time and day for the message to go out (for example, if it is currently 8am and you would like it to go out at 10am, you can set it here)
- Preview Message - this option allows you to send the message to yourself first so you can preview it
- Cancel - this will cancel your message creation and the message will not be saved.
Video Demo
In this excerpt from a training webinar, we review how to create a new message.