How to Create and Send a New Message in BrightArrow Revere
In BrightArrow Revere Message Center, you can easily create and send an email, text, and/or voice call to send to your contacts. This article focuses on creating and sending a message from the Compose tab, but in Revere you also have the option to create and/or send a message from the Contact Lists tab.
Creating the message
You can start creating your message right away from the Revere Message Center's landing page.
- Start by selecting the types of message(s) you wish to send by selecting the respective bubbles. You can send multiple message types at the same time.
- If your organization's BrightArrow subscription does not allow you to send certain message types, your options may be different than the screenshot below.
- With your message types selected, you can now start to compose your message. Use the links below for extra help with message creation.
- Creating an email message, adding attachments, and inserting images
- Creating a text (SMS) message
- Creating a voice call
- Inserting mail merge fields to dynamically insert contact information
- Saving the message as a draft to work on again later
- Using the Load Prior Message option to reuse a message you sent in the past
- How to load an email template
- Using the auto-translate feature
- If you're sending more than one message type, create your email first then click the next message type in the bar at the top of the message creator
- Notice that the following message types will automatically pull in the verbiage from your email message. You can make any edits as needed by clicking into the text box.
- If you are sending a voice call along with another message type, you can use the text-to-speech option to have a computer voice read your verbiage or choose the Record Audio option to record your voice or upload a pre-recorded audio file.


Choosing the recipients
With your message now created, you can choose the recipients who should receive the message.
- In the Select Contacts section, click the Add Contact Lists bubble
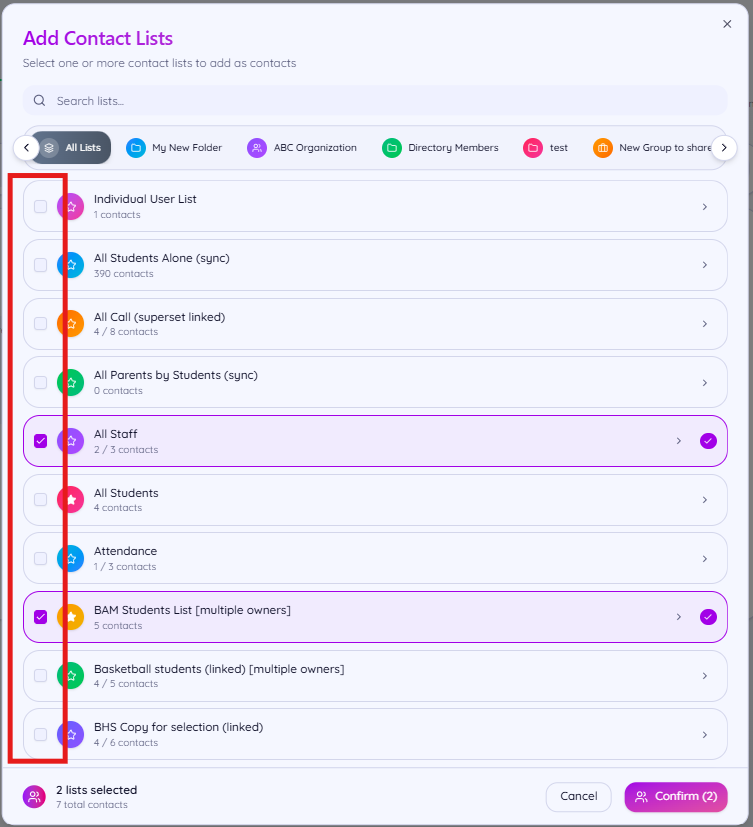
- The Add Contact Lists window will open. Mark the checkbox next to the list(s) you would like to send your message to. You can select as many lists as you want.
- If you know the name of the list(s) you'd like to message, you can use the search bar at the top of the window to quickly locate the list(s)
- If you know which folder your list is in, you can click on the name of the folder (located under the search bar) to narrow down the results
- Or, scroll through your lists until you find the list(s) you need
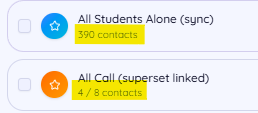
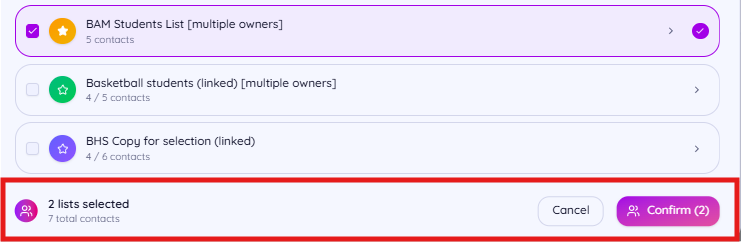
- Take note of the number of contacts that are enabled in your list(s). Only the contacts who are enabled will receive the message.
- In the screenshot below, you can see that the "All Students Alone (sync)" list shows 390 contacts and all of them are enabled. However, the "All Call (superset linked)" list shows 4 / 8 contacts, indicating that there are a total of 8 contacts in the list but only 4 of them are enabled so your message would only send to those 4 for that list.
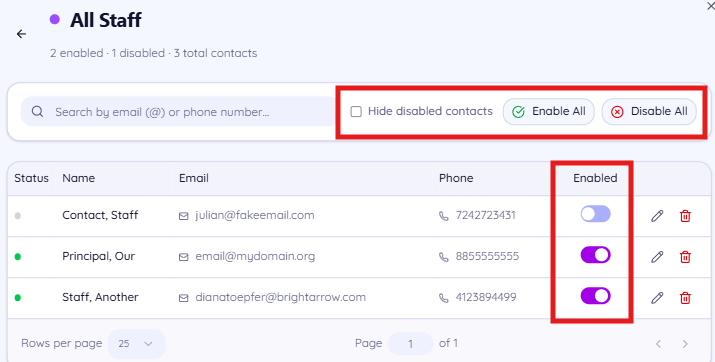
- To review which contacts are enabled in the list, click the little arrow. If the "Enabled" toggle is turned off for a contact, they are disabled and will not be sent your message. If the toggle is turned on, the contact is disabled and will be sent your message. You can adjust each toggle accordingly or use the Enable All or Disable All bubbles at the top of the window.
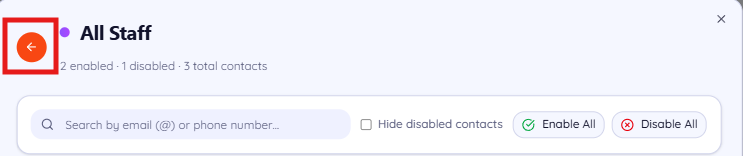
- If you reviewed the contact selections, use the back arrow in the top-left of the window to return to the "Add Contact Lists" section
- With your contact lists selected, review the details at the bottom of the page to ensure you have the right number of lists selected and contacts enabled, then click Confirm


Sending the message
Now that your message is crafted to your liking and your contacts have been selected, you're ready to send the message.
If the message you're sending is a true emergency, toggle on the toggle in the Emergency Alert section. If the message is not an emergency, leave that toggle off. See here for more help understanding when to use the emergency alert toggle.
- In the "Ready to Send" section, you can preview your message, schedule it to send at a later time, or send it right away.
- Preview: Send the message to yourself before sending it off to your recipients. If you're sending an email, you'll have the option to enter your email address. If you're sending a voice or text message, you'll have the option to enter your phone number.
- Schedule: Set a future date/time to send your message.
- Send Message: Send the message now.
- After you click "Send Message" you'll see a pop-up window. Give your message a final review, then click "Confirm & Send."
- Your message is now sending. Go to the Jobs section to see it sending in real time. Once the sending is completed, you can see the details of the message sent summary report in your BrightArrow Reports All Messages page.


Not ready to send your message yet? Save it as a draft to come back to later
If you don't have time to finish crafting your message and need to come back to it later, or if you just aren't ready to send or schedule it yet, you can save it as a draft to pull it up again at your convenience.
- In the upper-right corner of the Create New Message page, find the button "My Drafts."
- To save a draft of your current message, click the "Save Current as Draft" button.
- Give your message a name in the "Draft Name" text box
- Indicate who else should be able to see the draft by using the "Who can see this draft" drop-down
- Click "Save Draft" to save your draft
- When you're ready to pull up the drafted message again, just go back to "My Drafts" as shown in step #1 above and click "Load." For more information about loading drafts, see here.


