Creating Email Messages in Revere Message Center
This article will walk you through the steps of creating an email message in the Revere Message Center.
The basics
The landing page in the Revere Message Center is the message creator, but if you need to navigate to it from somewhere else in the interface you can get there by clicking the "Compose" button in the left panel.

- On the Create New Message page, click the "Email" bubble found in the Select Message Types section. If you are also sending a text (SMS) and/or voice call, you can select those too.
- No matter how many message types you selected, if you chose Email as a message type, the email creation screen will show first. Start crafting your email message.
- There are various options available for you to use to improve your email. See the topic "What are the options?" in this article for more specifics.
- If you want to load an email template, use the "Templates" button at the bottom of the page.
- If you want to load a message you sent in the past, use the "Load Prior Message" option in the upper-right of the page.
- If you won't have time to finish your message, you can use the "My Drafts" button in the upper-right of the page to save it as a draft to come back to later.
- With your message created, you will now choose the contacts to send it to. In the Select Contacts box, click "Add contact lists"
- Mark the checkbox next to each contact list you want to send your message to, then click "Confirm"
- Use the search bar at the top of the Add Contact Lists window to search for a list by name.
- Click on any of your folders in the row underneath the search bar if you want to only look at lists within a certain folder.
- Use the little arrow located in the right of the list's row to select specific contacts to send the message to.
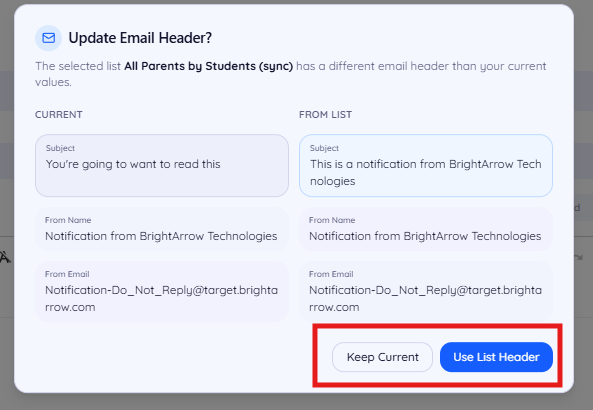
- If any of the contact lists you chose have a default subject line, from name, from address, or reply to address that does not match what you entered into the email you created, you will see a pop-up window asking you to confirm which one you want to use.
- Click "Keep Current" to use what you entered into the email.
- Click "Use List Header" to use what you have pre-set as a default in the list's email settings.
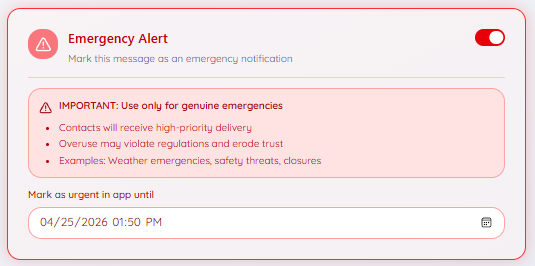
- If your message is an emergency, turn on the Emergency Alert toggle.
- ParentHub App users can also mark the message as an urgent alert in the app. Set an expiration date for the urgent alert using the provided box.
- Give your message a name (optional). The subject line from your email message will automatically be added as your message name, but you can change it if you wish. The message name will not be shown to your recipients. It will make it easier for you to find the message in the future via BrightArrow Reports or if you're using the Load Prior Message option.
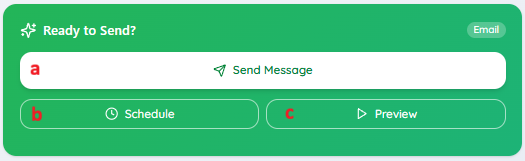
- You can now send or schedule your message.
- Send Message: send the message immediately
- Schedule: schedule your message to send at a future date/time
- Preview (recommended): send a "preview" of the message to yourself before sending it to your contacts
- After clicking "Send Message" you will see a pop-up window. Confirm the details of your message and click "Confirm & Send" if all looks good.
- Your message has been sent! In the pop-up window click "Go to jobs" to watch the message send or to find the report of the message, or click "dismiss" to stay on the message creation screen and start a new message.


What are the options?
-
No matter how many message types you selected, if you chose Email as a message type, the email creation screen will show first. Start crafting your email message.
- Message types bubble: Each message type (email, SMS, and/or voice call) you selected will show here. Click on the message type to move to that portion of your message.
- Subject: Enter the subject line for your email message. If you have a default subject line set up for the contact list you'll send the message to, you'll have a chance to review it later when you choose the contact list.
- From Name: This is the sender's name your recipients will see when they get the email in their inbox. If you have a default from name set up for the contact list you'll send the message to, you'll have a chance to review it later when you choose the contact list.
- From Email: This is the email address your message will send from. If you have a default from email address set up for on the contact list you'll send the message to, it will populate for you later when you choose the contact list. Note that the from email address needs to be set up with BrightArrow in order for your email messages to send properly. If you are unsure if you can use the from email address you want to, please contact our support.
- Add attachment: Attach a document or picture to your email message. Note that this is for generic attachments only. Any attachments added using this option will be sent to all message recipients. If you are sending a confidential attachment, do NOT use this option. Instead, use the PDF Uploader or a different method for emailing reports.
- Insert merge field: Use this drop-down to select a mail merge field to insert into your message. Mail merge fields dynamically insert your contacts' information to personalize their message. Reference this article for help understanding where the data in your mail merge fields comes from.
- Toolbar: Use the various formatting options to make your message look exactly the way you want it to.
- Textbox: Enter the contents of your email message in the text box.
- Templates: Create and save email templates so you don't have to re-format each time you craft an email. Templates are especially helpful to add your logo, standard formatting, or any disclosures to an email message. For more help with templates, see here. Note that templates are different than drafts, but you can also use drafts to create an email that you will use again and again. For more help with drafting messages, see here.
- Images: Use this option to quickly insert an image from your Images Gallery or to upload a new image. You can also use the image icon in the toolbar.
- Auto Translate: If your contacts' preferred language is saved in their custom fields, you can use this option to have your message automatically translate to each respective contact's preferred language.
- Expanded: This option will expand the sending options that you see in the top of the window to include a BCC Email Address field and a Reply To Email Address field.
- BCC - Sends a copy of the message to the email address entered here. Note that if you're using mail merge fields, they will not populate dynamically for the BCC'd contact if that email address is not contained in your contact list that you send the message to.
- Reply To - Use this field if you want to receive replies from your email message. If you have a default reply-to address set up for the contact list you'll send the message to, you'll have a chance to review it later when you choose the contact list.
