Creating a Superset List
What is a superset list?
A superset list is a combined list that is composed of multiple individual lists. Superset lists are useful for situations where you want to send a single message to multiple groups of people without having to locate each list every time you send a message. If you regularly need to send a single message to multiple lists, you can create the superset list to avoid needing to manually select each list every time.
Ex: A school needs to regularly send a single message to all staff, all parents, and all students. Rather than selecting all three lists separately each time you need to send a message, one superset list can be created to encompass all three lists.
Creating a superset list in Revere
- In Revere, navigate to Contact Lists
- Click the +New List button in the upper right
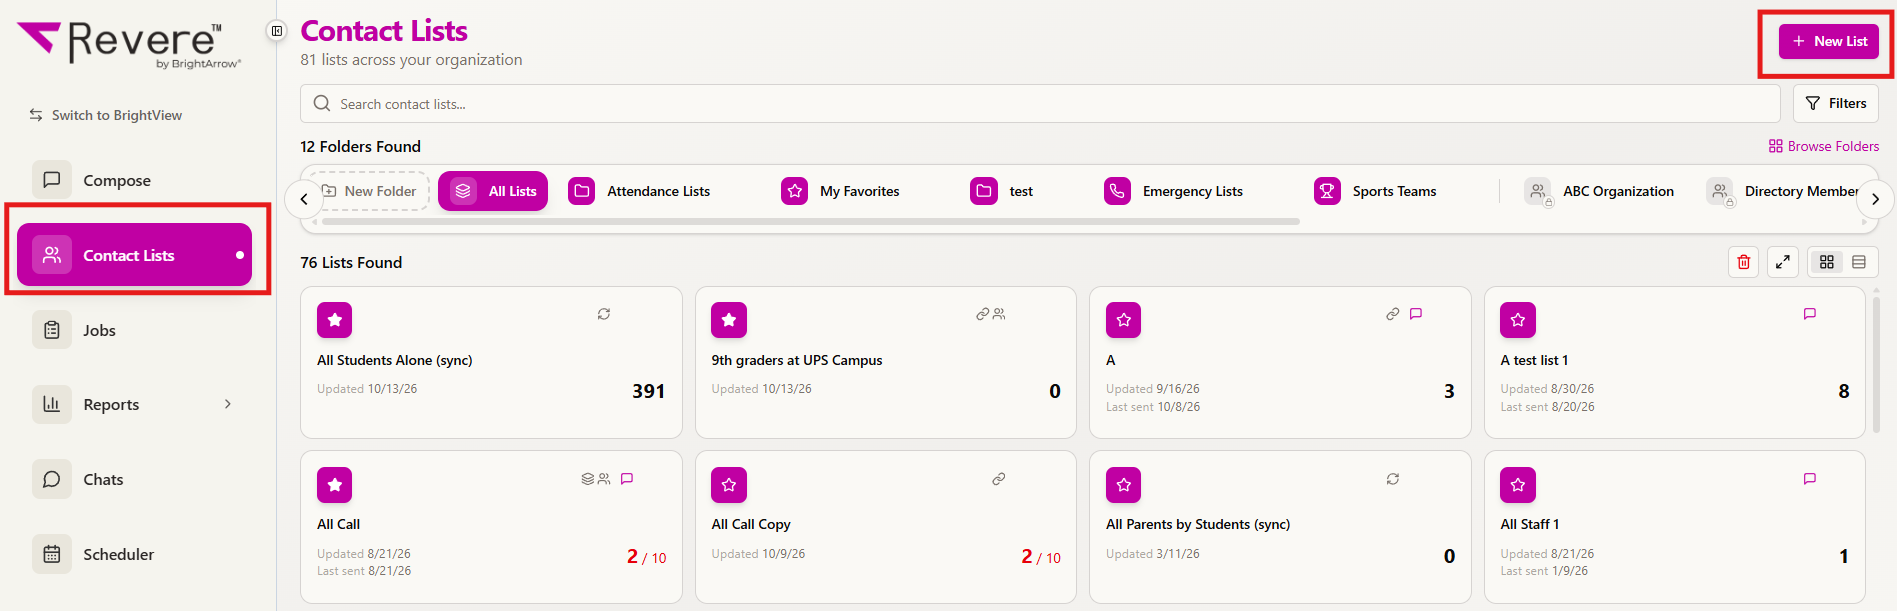 Shown above: Revere Contact Lists with side navigation, highlighting the +New List button
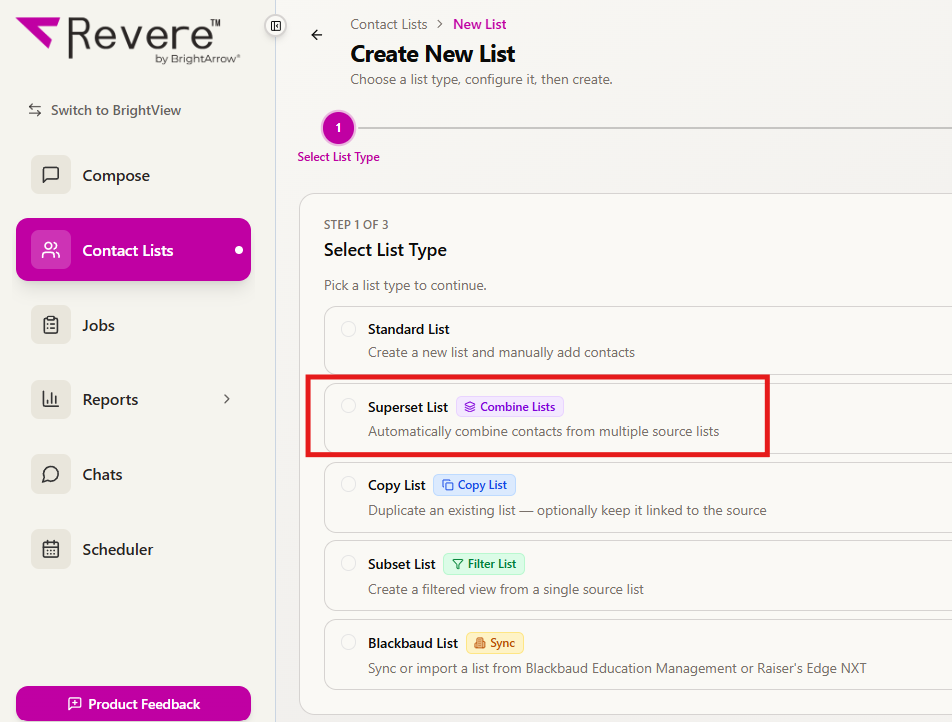
- Select the list type "Superset List"
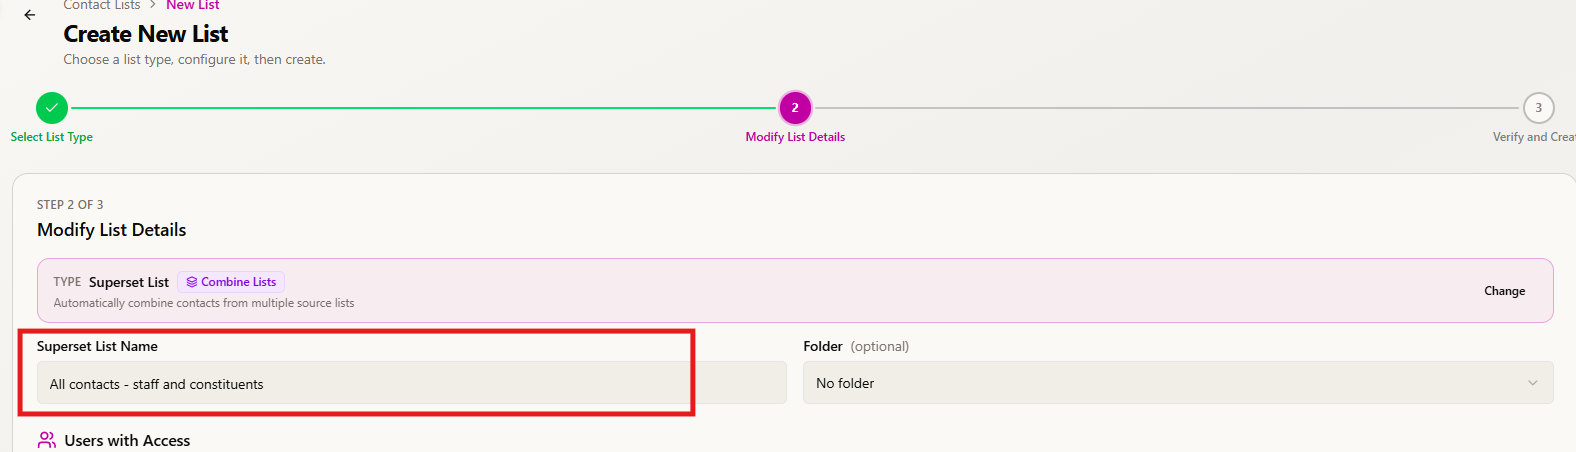
- Start by giving your new superset list a name that clearly describes it
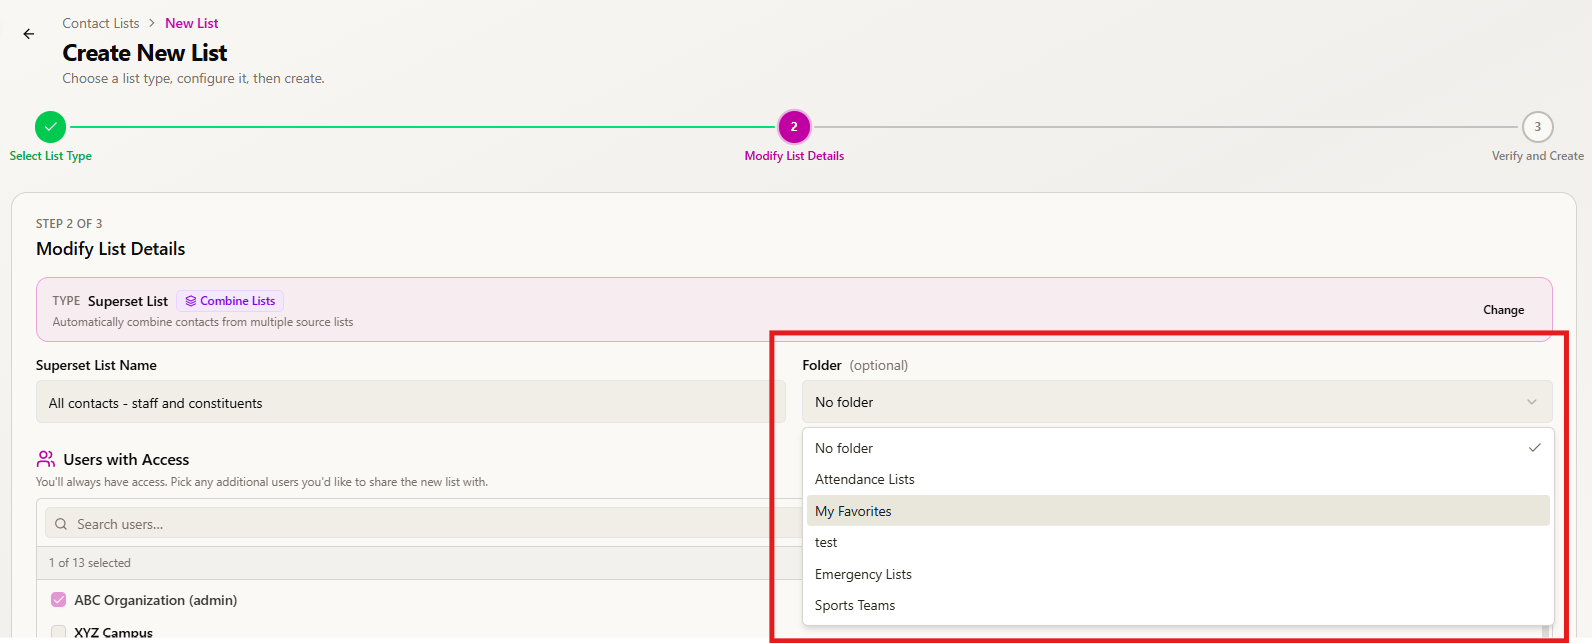
- If you'd like to save the list to one of your personal folders, use the Folder drop-down to select one. You can always add the list to a personal folder after you've created it too.
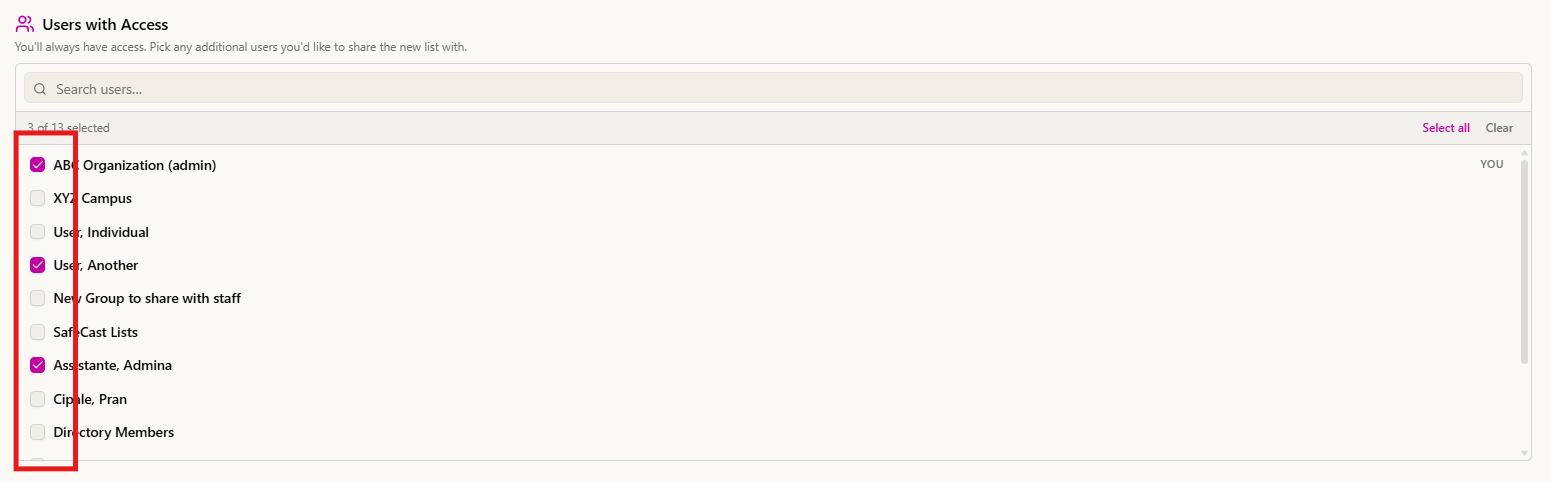
- In the Users with Access section, mark the checkboxes next to any users who should have access to the list. Depending on your level of access, you may see many other users here or you may see none or just a few. You can only share lists with users you have access to (but your system administrators can share it for you). There must always be at least one user or user group with access to the list.
- Set your link options. In most cases, you'll want to use the defaults but you can change them if you wish.
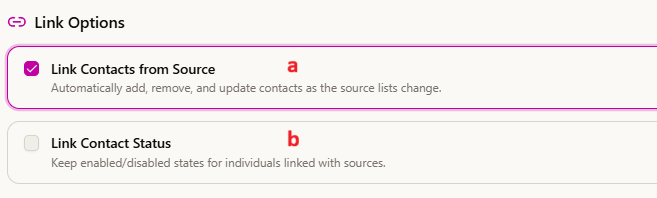
- Link Contacts from Source: With this checked, when a contact is updated in the source list those changes will flow down to the superset list as well. This way, your contacts' information will stay consistent across lists.
- Link Contact Status: In most cases, you'll want this unchecked. If this box is checked, if a contact is disabled/deselected in the source list they will be disabled/deselected in the superset list as well.
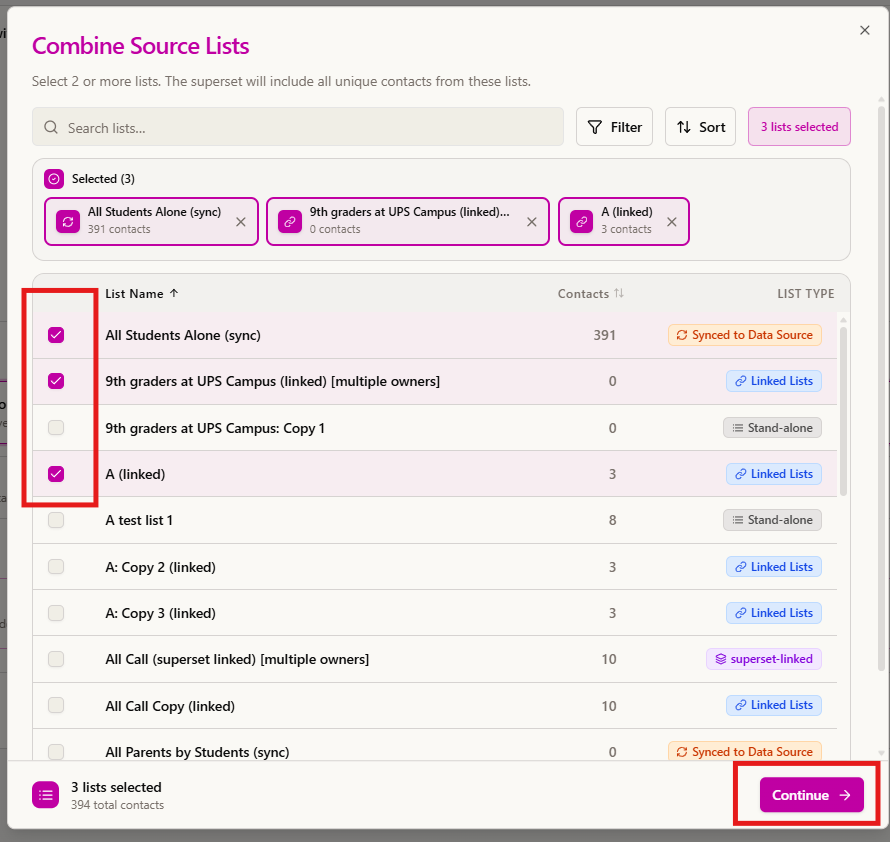
- In the Source Lists section, use the drop-down to choose the lists you want to combine. The original lists will stay intact and a new "superset" list will be created. In the Combine Source Lists window, mark the checkboxes next to all lists you'd like to include in the new superset list. Once you've selected your lists, click "Continue."
Lists will show in alphabetical order. Use the search, filter, and sort options at the top of the window for help finding the lists you need.
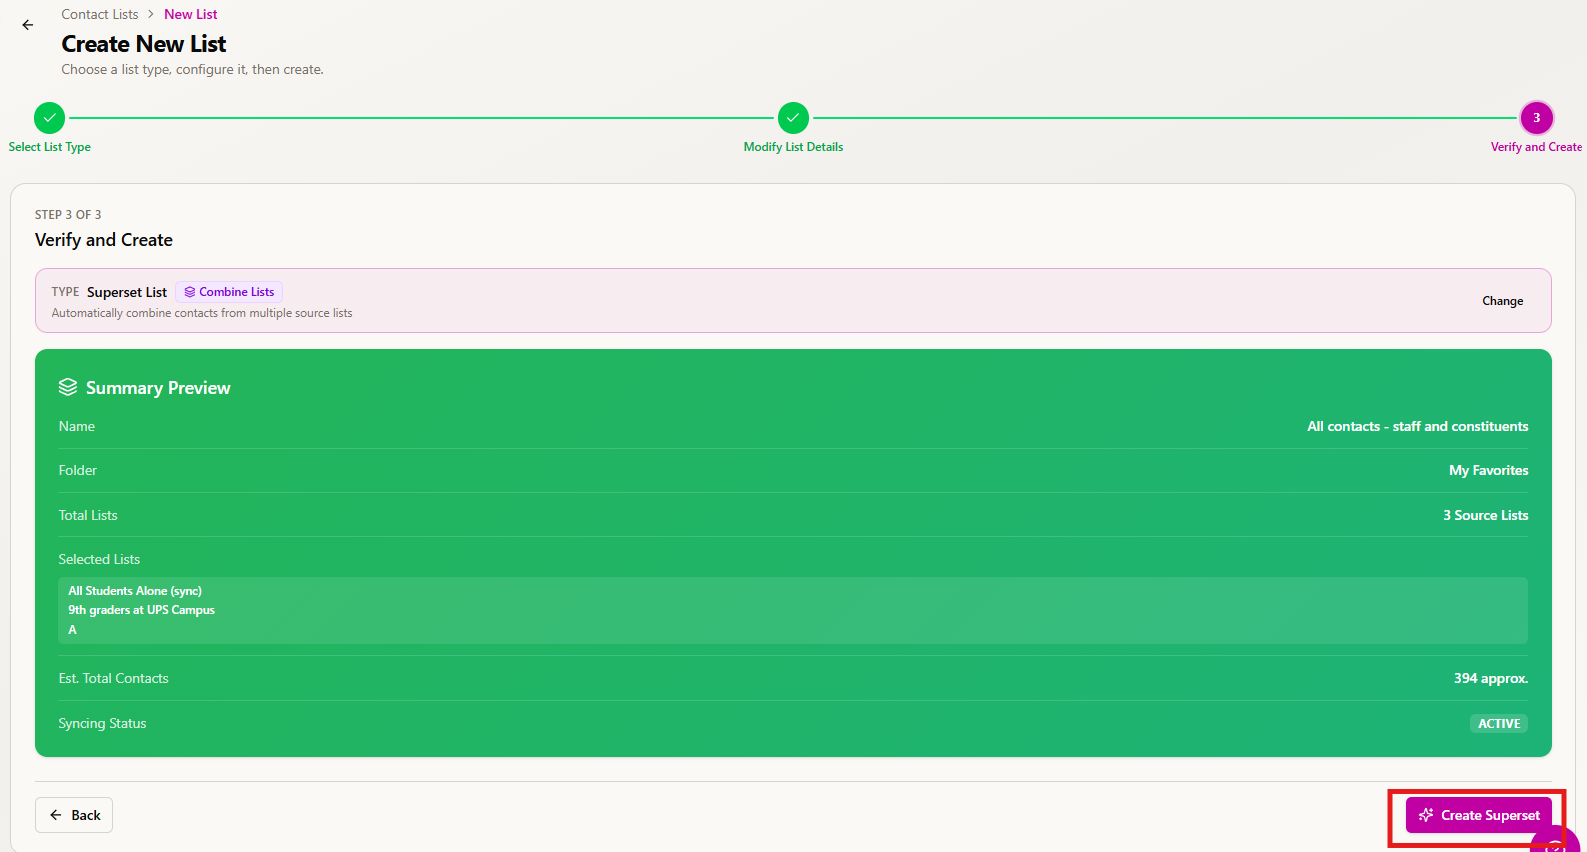
- You'll now see which lists you've selected along with the total number of contacts. Click the "change" button if you need to make any changes, otherwise click "Next" in the bottom right to continue to the final area of the list creation wizard.

- Review your data. If all looks good, click the "Create Superset" button.
- Depending on the size of the new list you created, it may take a minute or two to be created. Once complete, the new superset list will open so you can review contacts, the list's settings, or save a message to the list. If you need to make any changes to the superset list, simply click on the "Edit Superset" button at the top of the page to make your changes.
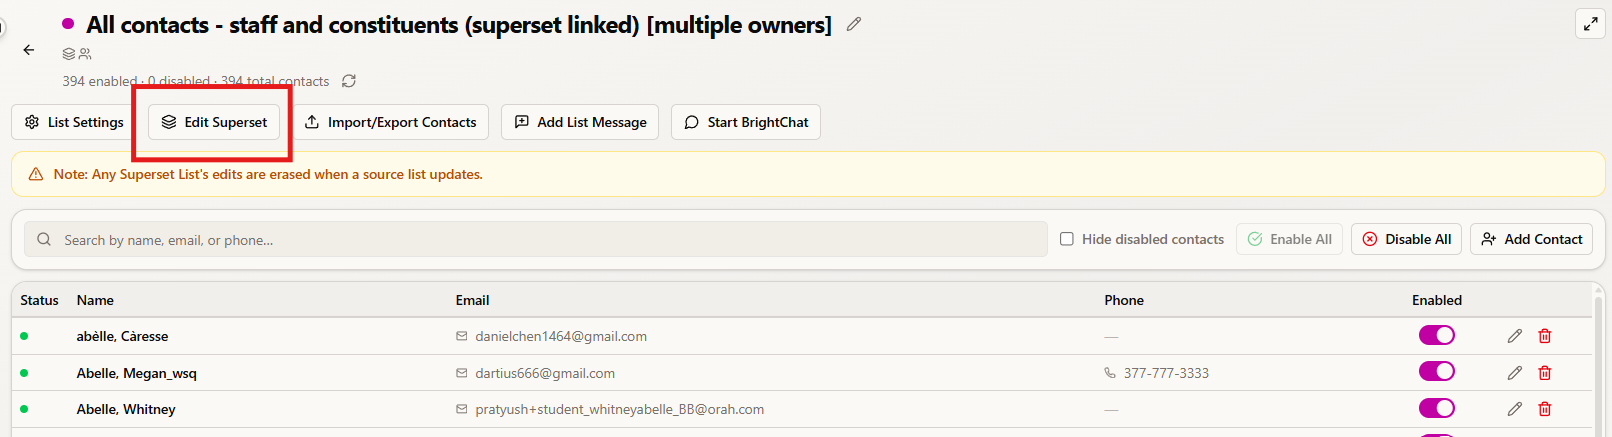
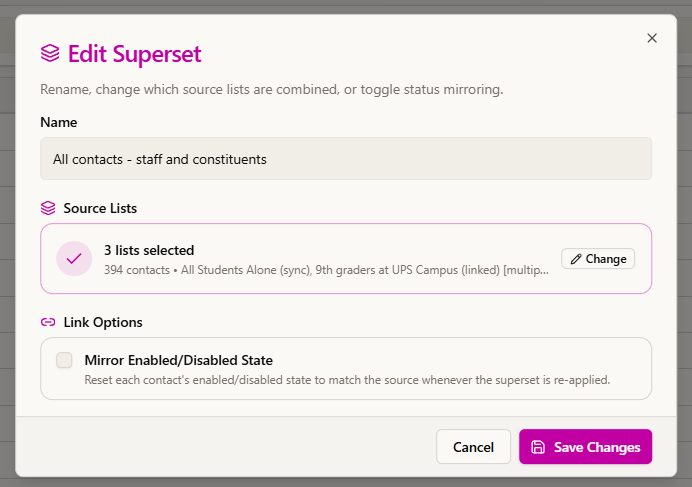
 Shown above: Revere Contact Lists with side navigation, highlighting the +New List button
Creating a superset list in BrightView
- From the My Lists page, check the boxes next to the source lists that already have the data you need. This can be a sync list, another linked list, or an independent list.

- Click on "Select an Action" on the top left to show the options.

- Select Create a superset list from the options.

- Give your new list a name.
- Leave the 2 checkboxes at the top alone. Those are the correct settings 99.999999% of the time.
- Keep linked To Source List: means when the source list is updated update this list as well. You would only uncheck that box if you were trying to make a list that was static and didn't get changes over time. Schools may do this before roll over to keep a copy of the previous school year's data before roll over. Nearly 100% of the time leave this box checked.
- Derived list's enabled contact state matches the Source List means if you disable a contact in the source list it gets disabled in this new list too. If you are trying to send a message from the source list and you unselect someone so that they don't get the message they'll be unselected in this list as well. Nearly 100% of the time leave this box unchecked.
- You can add and remove source lists from the box by clicking:
- Once you have all the lists you displayed in the box select OK. The first time the list is made it may take a few minutes, but after it's made all the changes will happen in the background without anyone noticing.
- Once the list is done being created you will see the list in the My Lists page. Notice that the list has the word (superset linked) at the end that you did not enter, this is automatic letting you know this list is linked to other lists.


Help, my changes are gone!
If you make manual changes to the data in the superset those changes will be overwritten once any of the source lists are changed. If your source lists are sync or linked lists, then when the source list(s) sync again it will update the superset and overwrite your manual changes.
To keep changes, you will want to update the source from where the data pulls. This is either the source list that is not a (sync) or (linked) list OR the system that we are syncing to such as a Google spreadsheet or your student information system.
I need to add/remove a list to my superset
If you need to edit your superset list by adding or removing a list, you can do so by navigating to the selected superset list.
1. Go into List Settings.
2. Click on "Edit Superset List" at the bottom of List Settings.
3. Edit your Source Lists as needed.
4. Click OK to save.

How can I see what lists are included in my superset list?
If you need to view what lists are in your superset list, you can do so by navigating to the selected superset list.
1. Go into List Settings.
2. Click on "Edit Superset List" at the bottom of List Settings.
3. View the Source Lists to see what lists are used.