Creating Voice Messages in Revere
This article will walk you through the steps of creating a voice (phone call) message in BrightArrow Revere.
The basics
In Revere, you can create messages through the Compose tab. Compose might be your landing page, but if not, click Compose in your navigation panel.

- On the Create New Message page, click the "Voice Call" bubble found in the Select Message Types section. If you are also sending an email and/or text (SMS) message, you can select those too.
- If you only selected Voice Call as the message type, the Voice Call creation screen will show. If you also selected email, click on Voice Call in the top bar to get to the Voice Call creation screen. Note: If you are sending an email and voice call together, create the email first. The verbiage from your email will automatically copy to the voice message if you're using the text to speech option (but you can edit it).
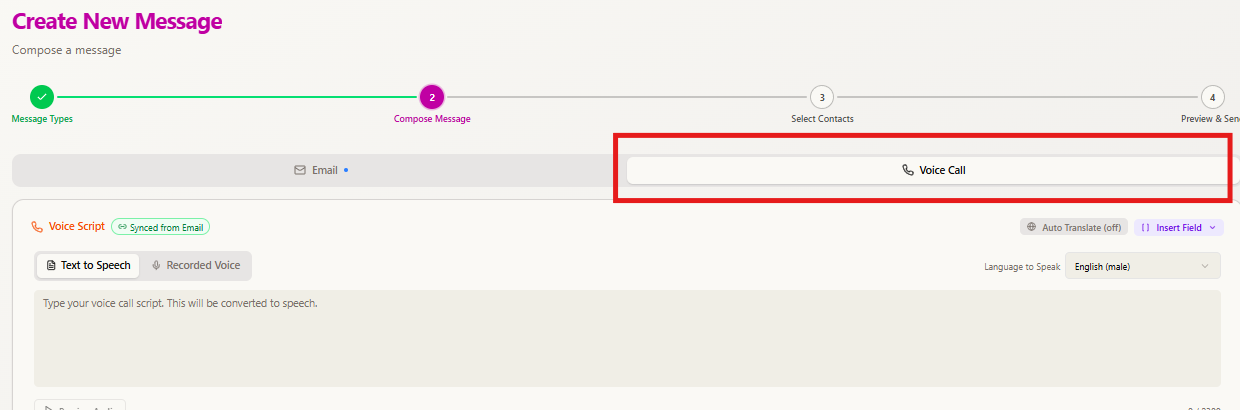
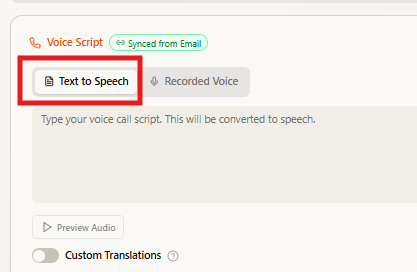
- Choose the toggle for Text to Speech or Recorded Voice depending on which option you'd like to use.
- Text to Speech: Type your message in the text box and a computer voice will read it to your phone call recipients (This option must be used if you are enabling the Auto Translate feature). Note that voice calls are limited to 2 minutes in length.
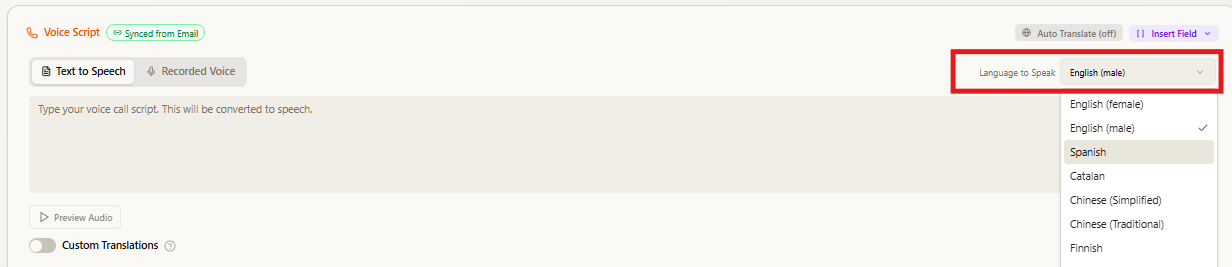
- For Text to Speech calls, choose the voice the computer should use to read your message in the Language to Speak drop-down.
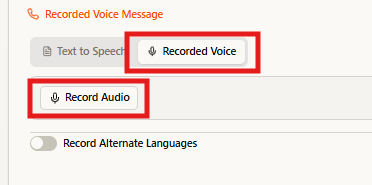
- Recorded Voice: Send an audio recording to your contacts. There are 3 ways to record. Start by clicking the "Record Audio" button. Note that voice calls are limited to 2 minutes in length.
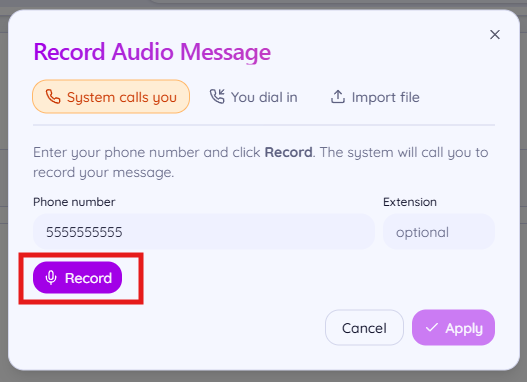
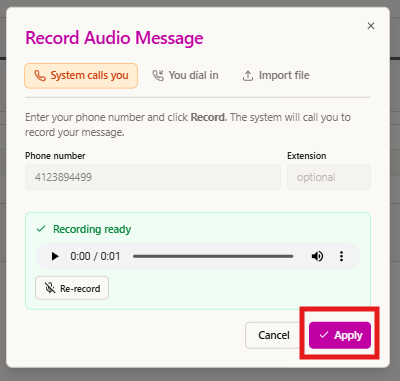
- Option #1 - System calls you: Enter your phone number in the phone number box, then click "Record." BrightArrow will call you. Follow the prompts to record your voice message. Note that voice calls are limited to 2 minutes in length.
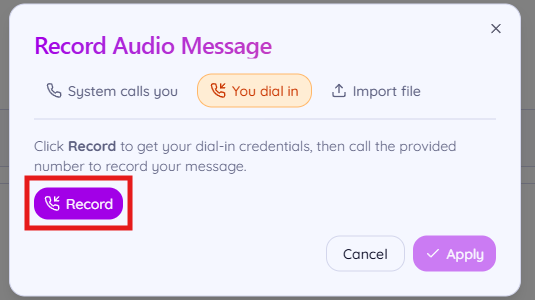
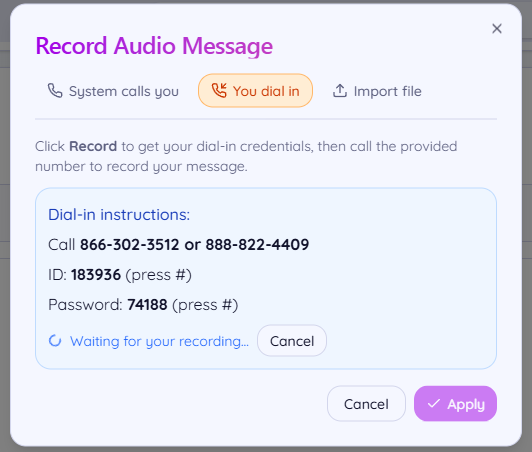
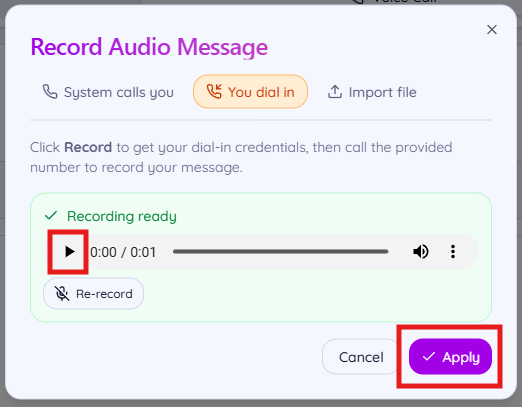
- Option #2 - You dial in: Click the "Record" button. Your screen will show Dial-In Instructions, including the number you should call, an ID number, and a numeric password. Once you dial the phone number, the system will prompt you to enter the ID number and password shown on your screen before recording your voice message. Note that voice calls are limited to 2 minutes in length.
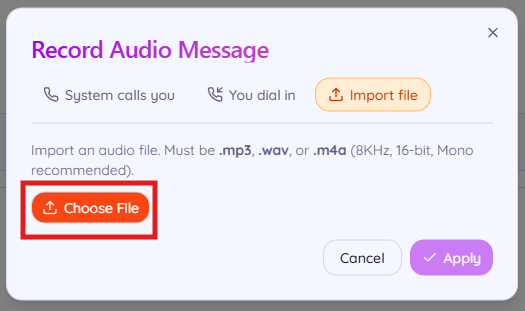
- Option #3 - Import file: If you have recorded and saved an audio file on your computer that you would like to send as your voice message, use this option. Click the "Choose File" button to import your audio file. BrightArrow accepts mp3, wav, or m4a files. Note that voice calls are limited to 2 minutes in length.
- Regardless of which recorded voice option you chose, once your recording is complete it will show in the pop-up window. Click the play arrow to listen to your recording if you wish. If you're ready to proceed, click "Apply."
- Text to Speech: Type your message in the text box and a computer voice will read it to your phone call recipients (This option must be used if you are enabling the Auto Translate feature). Note that voice calls are limited to 2 minutes in length.
- With your message created, you will now choose the contacts to send it to. In the Select Contacts box, click "Add contact lists"
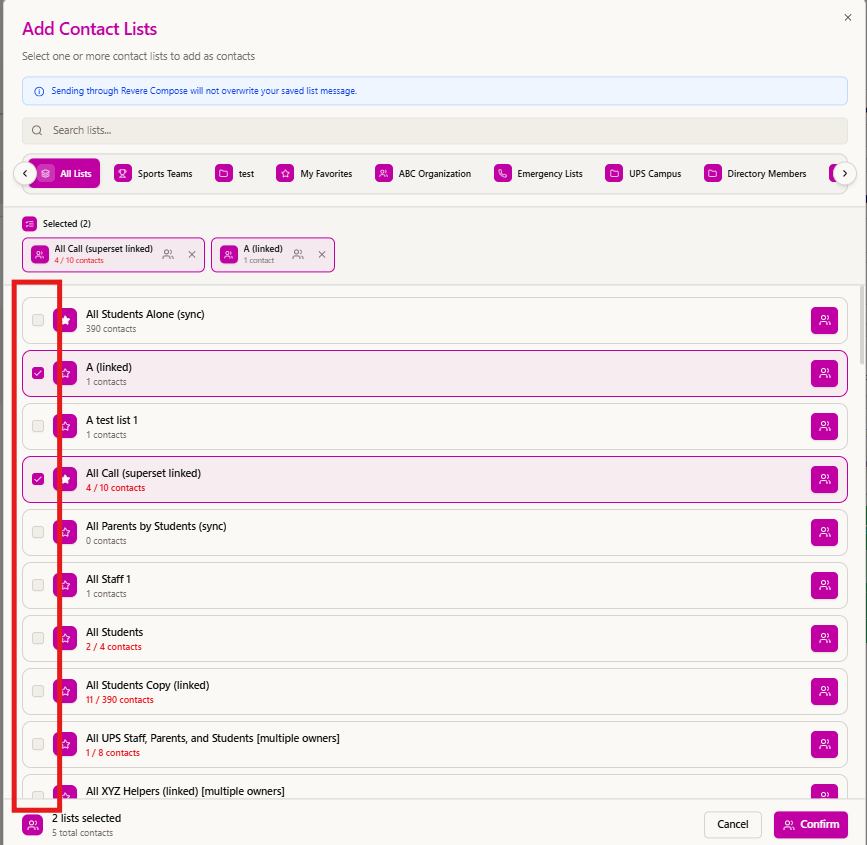
- Mark the checkbox next to each contact list you want to send your message to, then click "Confirm." You can select as many contact lists as you need.
- Use the search bar at the top of the Add Contact Lists window to search for a list by name.
- Click on any of your folders in the row underneath the search bar if you want to only look at lists within a certain folder.
- Use the people icon located in the right of the list's row to select specific contacts to send the message to.
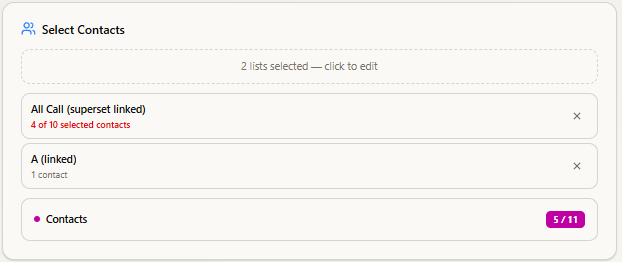
- The Select Contacts section will now show the list(s) you selected and show the total number of enabled contacts that will be considered to receive your message.
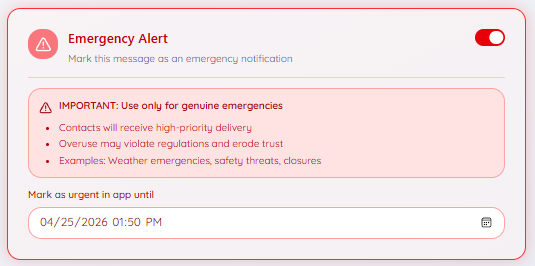
- If your message is an emergency, turn on the Emergency Alert toggle. Marking the message as an Emergency Alert will ensure the message sends to any contacts that are marked as "Emergency Only" in your Do Not Contact list.
- ParentHub App users can also mark the message as an urgent alert n the app. Set an expiration date for the urgent alert using the provided box.
- Give your message a name (optional). The subject line from your email message will automatically be added as your message name, but you can change it if you wish. The message name will not be shown to your recipients. It will make it easier for you to find the message in the future via BrightArrow Reports or if you're using the Load Prior Message option.
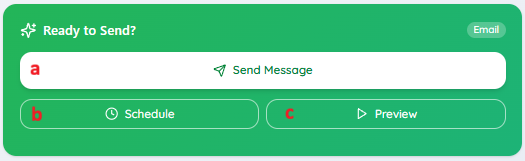
- You can now send or schedule your message. If you're not ready to send it yet, you can save it as a draft.
- Send Message: send the message immediately
- Schedule: schedule your message to send at a future date/time
- Preview (recommended): send a "preview" of the message to yourself before sending it to your contacts
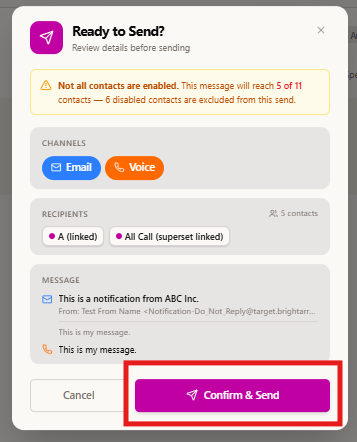
- After clicking "Send Message" you will see a pop-up window. Confirm the details of your message and click "Confirm & Send" if all looks good.
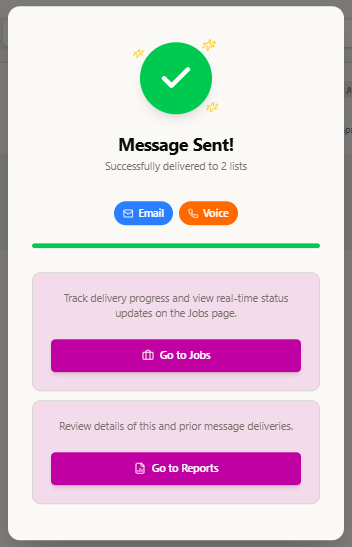
- Your message has been sent! In the pop-up window click "Go to Jobs" to watch the message send or "Go to Reports" to view the details of your message in your message summary reports. Click outside of the pop-up to stay on the message creation screen and start a new message.


Additional Options
There are additional features you can use to further customize your voice message.
Mail merge fields
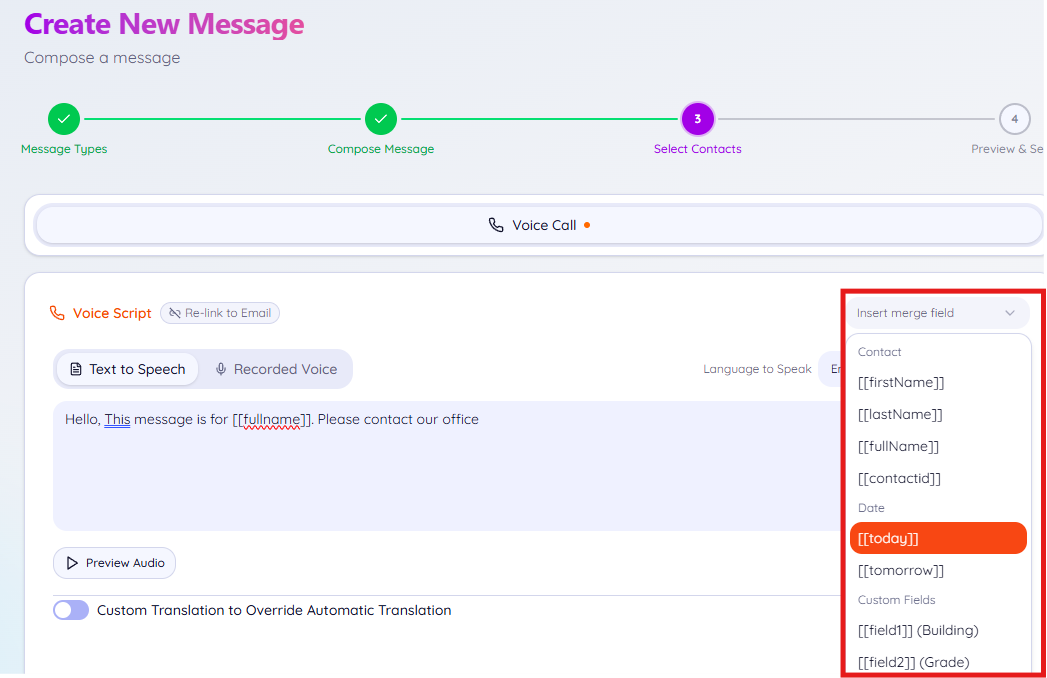
If you are sending a Text to Speech (computer voice) voice message, you can insert mail merge fields into your message to dynamically insert information. There are some standard fields like today's date and the contact's name, but you can also use any custom fields that you have associated with your contacts.
To use the feature, follow the above instructions to create a Text to Speech voice message, and use the "Insert merge field" drop-down to add in your mail merge fields.
 Language options
 Language options
There are multiple language options you can use when sending your voice message.
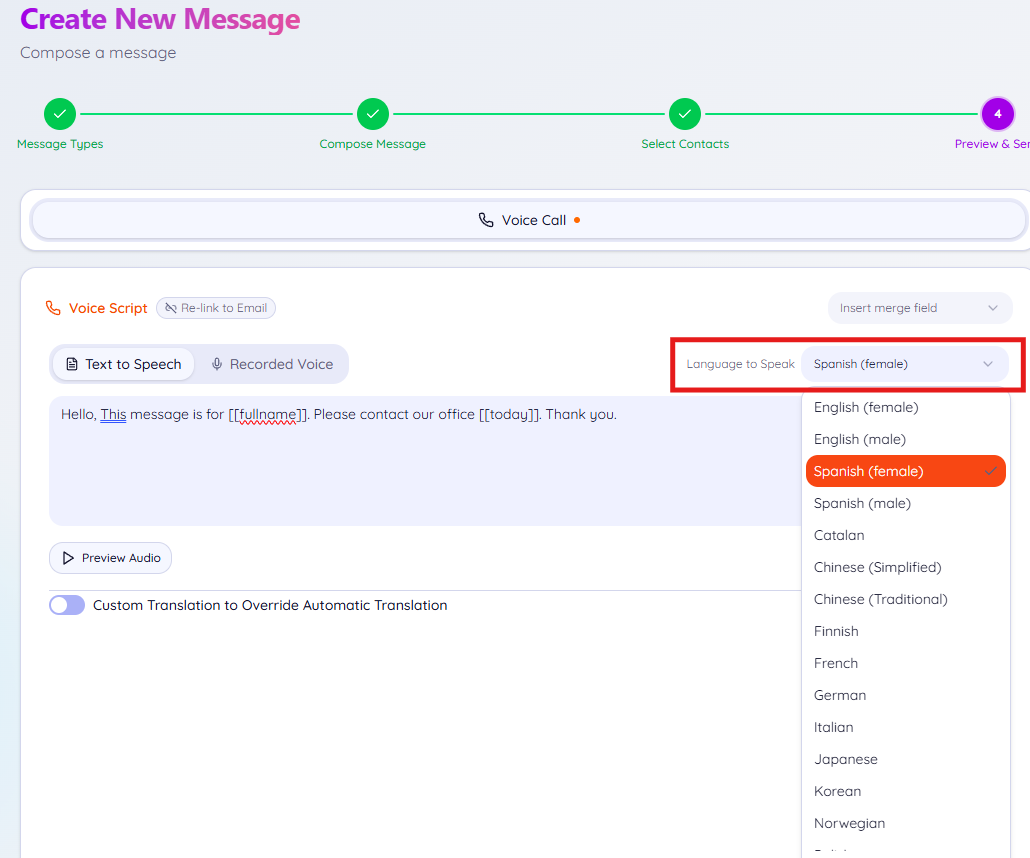
Language to Speak
If you are using Text to Speech to send your message, you can use the "Language to Speak" option to have your message read what you wrote with an accent that corresponds with what you wrote. For example, if your message is written in Spanish, use the Spanish (male) or Spanish (female) option to make sure the computer voice pronounces the words correctly. By default, the language is English but you can choose from various language options.
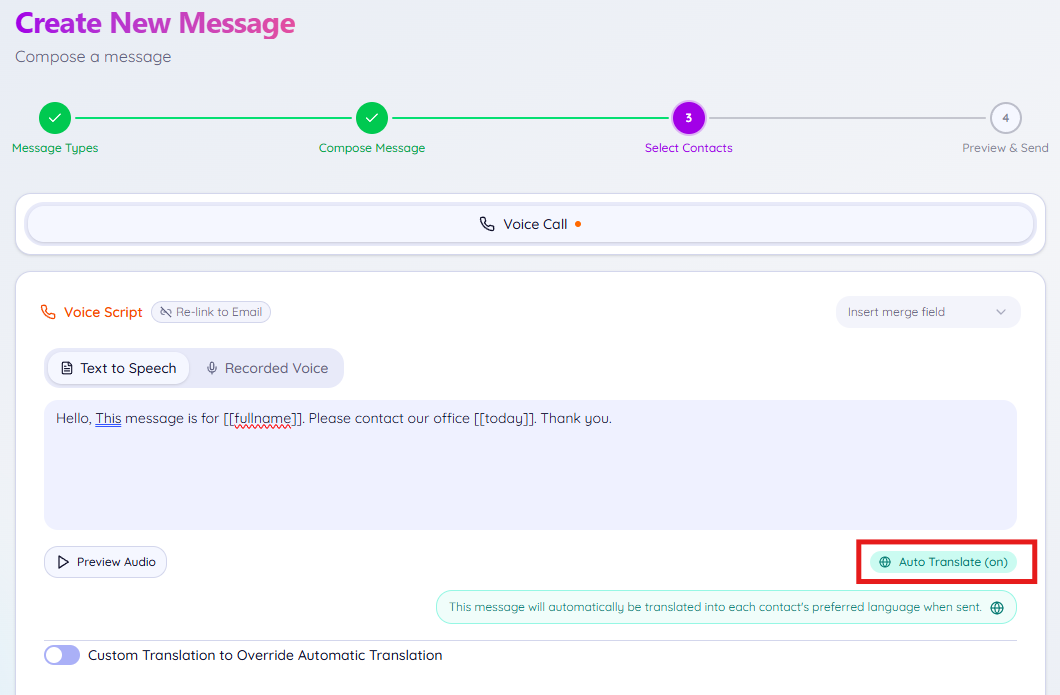
Auto-Translate
If you are using Text to Speech to send your message AND you have your recipients' preferred language saved in their custom fields, you can use the "Auto Translate" button to have your message translate based on your contact's preferred language. This option uses a computer-based translation service.
Custom Translation Override
If you are using the Auto-Translate feature with your Text to Speech call, you also have the option to translate the message yourself instead of relying on the translation software. You can do this for as many languages as you're comfortable translating. Using the "Custom Translation to Override Automatic Translation" toggle, you will write up the translated version of your message and choose the language to override. Any contacts who have that language in their custom field will receive your custom translated message instead of the auto-translated message.
Example: Some of your contacts have Spanish as their preferred language, and you are also a Spanish speaker so you know you can write the Spanish version of the message better than what a computer-based translation service can do. You also have some contacts who have French as their preferred language, but you don't speak French. You can create the English and Spanish versions of your message but let the computer translate the English version to French for your French speaking contacts.
- Start by creating a Text to Speech (computer voice) message using the steps above.
- Turn ON the Auto Translate option.
- Turn on the toggle for "Custom Translation to Override Automatic Translation."
- Choose the language to override using the "Add Language" drop-down options.
- With your language to override selected, click "Add."
- Another text box will appear. Enter the translated version of your message.
- If you need to add additional languages to override the auto-translation, use the Add Languages drop-down to choose the next language and click "Add" again.


Recording Alternate Languages
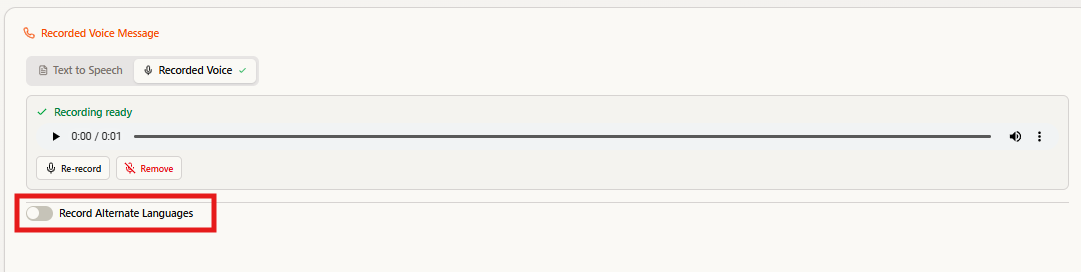
If you are recording your voice for the call AND you have your recipients' preferred language saved in their custom fields, you can record calls in multiple languages. Using this method, a computer-based translation service cannot be used but if you are fluent in other languages you can use the toggle to Record Alternate Languages to add recordings for each language you're comfortable speaking in. The calls will then be sent to your recipients based on matching criteria found in their custom fields > Language field.
- Use the option to record your voice message as detailed earlier in this article. The first recording you make will be the default recording that is used unless a recipient has a preferred language saved in their custom language field that matches one of the alternate recordings you will make in the next steps.
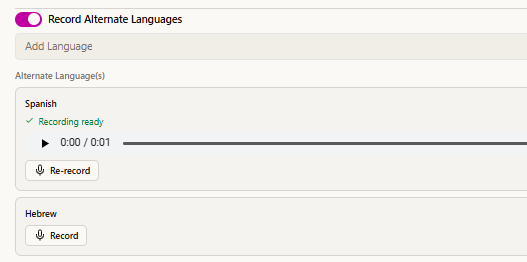
- Once your first recording is complete, the "Record Alternate Languages" toggle will appear. Turn on the toggle.
- In the Add Language drop-down, choose the language you will record next. This is what triggers BrightArrow to know which language you're recording in to match it with any recipients who have that language in their language custom field.
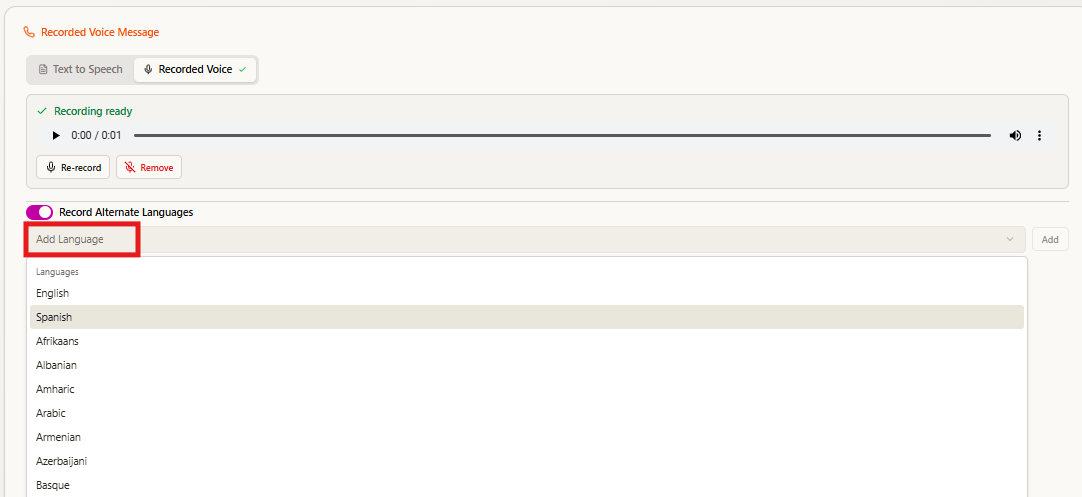
- With the alternate language selected, click the Add button located to the right of the drop-down box.
- A record button for the alternate language you selected will appear. Click the button and proceed through the steps to apply your alternate recording to the message.

- Apply the new alternate recording to your message.
- Repeat the steps above to apply recordings for as many languages as you wish.
- Once all alternate language recordings have been added to the message, add your contact lists and send, schedule, or preview, or use the My Drafts button in the upper right of your screen to save your message as a draft to come back to later.
