Creating a List that is Dedicated for Emergencies
As much as we wish emergencies wouldn't happen, unfortunately, they are inevitable. With BrightArrow, you can be prepared for these situations by planning for them in advance. We offer many options when it comes to emergency management, and having dedicated lists with pre-saved messages is one way to help your staff manage an emergency situation more easily.
The first step is to create a list that is dedicated to one specific type of emergency. Once you have the list, you can then share it with those who will need access and save a pre-written message to it. Then, when the emergency situation occurs, the staff member needs only to find the list and click "send" to get the message out right away.
Creating the list
To make sure the list stays up-to-date with your recipient's most recent contact information, the best option when creating the emergency list is to make a copy of an existing list that syncs to your Google spreadsheet or contact information system (SIS). Regardless of the method you use to create your new list, we recommend naming the list something very obvious to whomever will be sending the message. For this document, we will use the example "Emergency - Lockdown."
- If you already have a list that contains all of the contacts you would need to notify in the event of an emergency, you should create a copy of the list and rename it to something that is easy for anyone to find. For help creating a copy of a list, see here.
- If you do not already have a list that contains all of the contacts you would need to notify in the event of an emergency, you will likely want to create a superset list. A superset list is a list that contains multiple other lists. For example, you may already have lists for "All Staff" and "All Parents." By creating a superset list, you can add All Staff and All Parents to one list. For help creating a superset list, see here.
**When creating the superset list for emergency purposes, you will need to make sure that the 2 checkboxes are marked correctly. "Keep Linked to Source List" will stay checked. This is to make sure the list updates with each nightly sync. "Derived list's enabled contact state matches the source list" should stay unchecked. This is to make sure your contacts are not deselected in the list when they are deselected in the source list.

Creating the message for emergency use
Once you have the new list created that contains all the contacts you will want to message in case of an emergency, you can now create a message to save to the list.
- From the List Details page, click "Create Message."
- Choose the message types you want to send and name your message.
- Select the "Emergency" radio dial.
- Note the option in the above screenshot to "Mark as Urgent in App Until (optional)
- This option will mark the message as urgent in the ParentHub app.
- While this option can be used in a true emergency, leave it blank for now. At the time of the emergency, the user sending the message would need to go in and add the time and date to have the "urgency" expire in the app. Unfortunately, in a real true emergency, users may not have time to make this change, but it is there if they can use it at the time.
- Click Next and proceed through with creating your emergency message. Add any mail merge fields as needed.
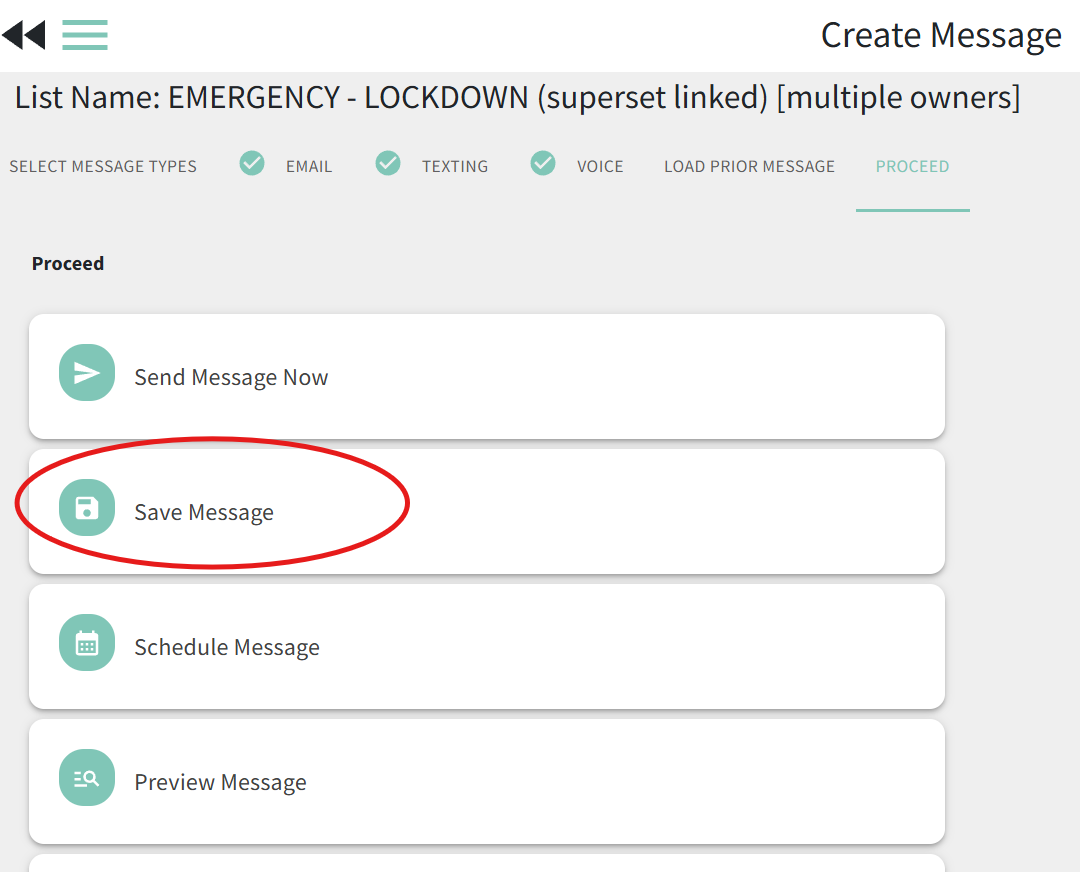
- Proceed through to the final "sending" page by clicking Next.
- On the final sending page, click SAVE.

Sending the message
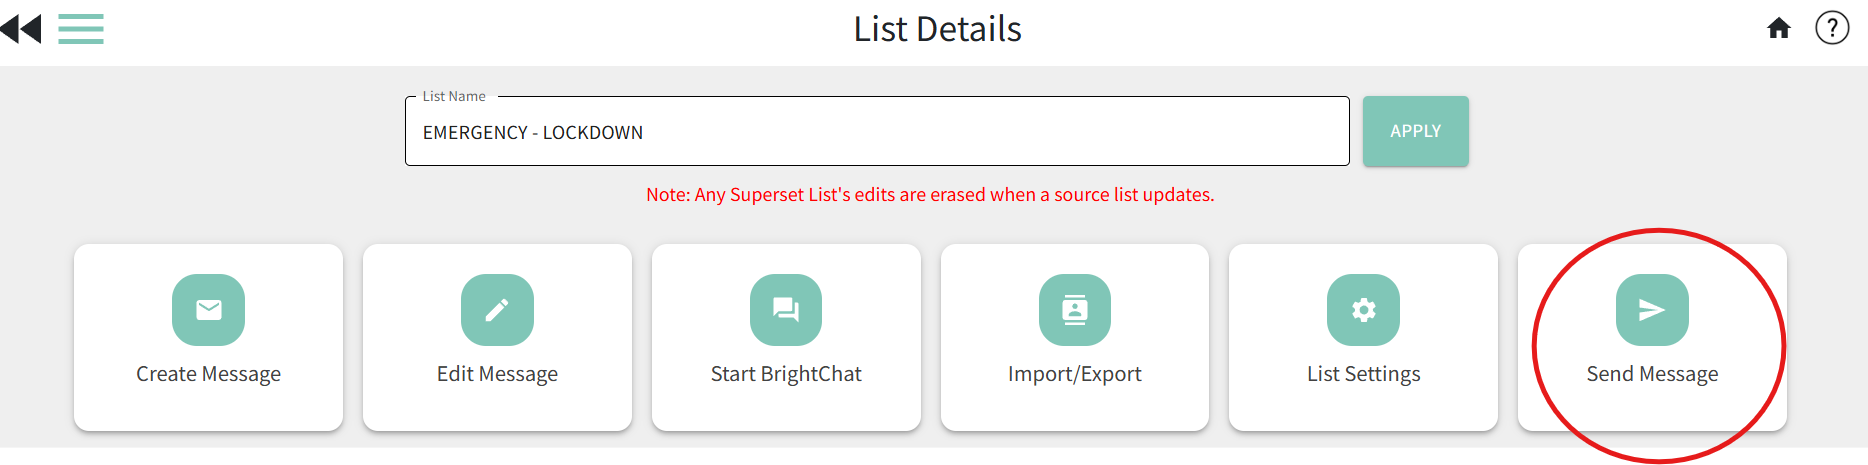
Now that your message has been created, when the emergency occurs you can easily navigate to the list and click "Send."
- Hover over the list and click the message send "arrow" icon
- Or click on the name of the list, then click the "Send Message" button

List Settings to protect and share the emergency list
Now that your new list and corresponding message are created, you can go to the list's settings to add some extra protections to the list and message to ensure they don't accidentally get deleted. Under List Settings, you can also share the list to those who will need to use it when the actual emergency arises.
- From the My Lists page, hover over the new emergency list you created. Some icons will appear to the right of the list's name. Click on the gear icon to access the list's settings.
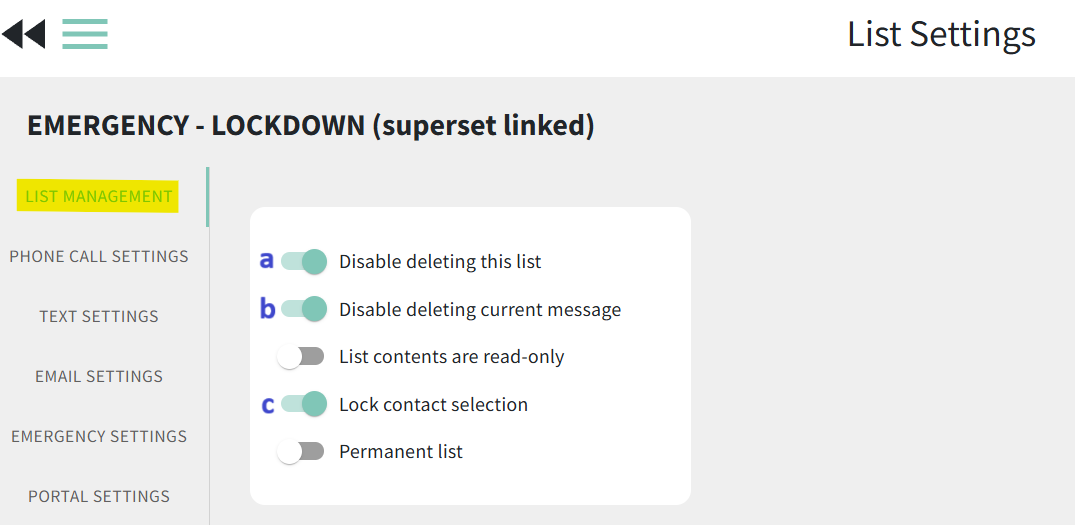
- The first tab you will start on in List Settings is the List Management tab.
- Toggle ON the following options as per the screenshot above:
- Disable deleting this list - this will prevent your list from accidentally being deleted. If there comes a time when you do want to delete the list, simply toggle off this setting then delete the list.
- Disable deleting current message - this will prevent the message that is saved to the list from accidentally being deleted or edited. If you ever need to edit the message, simply toggle this setting off, then proceed with editing your message.
- Lock contact selection (optional) - this will prevent users from accidentally deselecting contacts within the list so that you can ensure that all contacts receive the message.
List Settings to share the emergency list
Now that you have the protections in place to keep other users from accidentally making changes, it's safe to share the list with anyone who might need access.
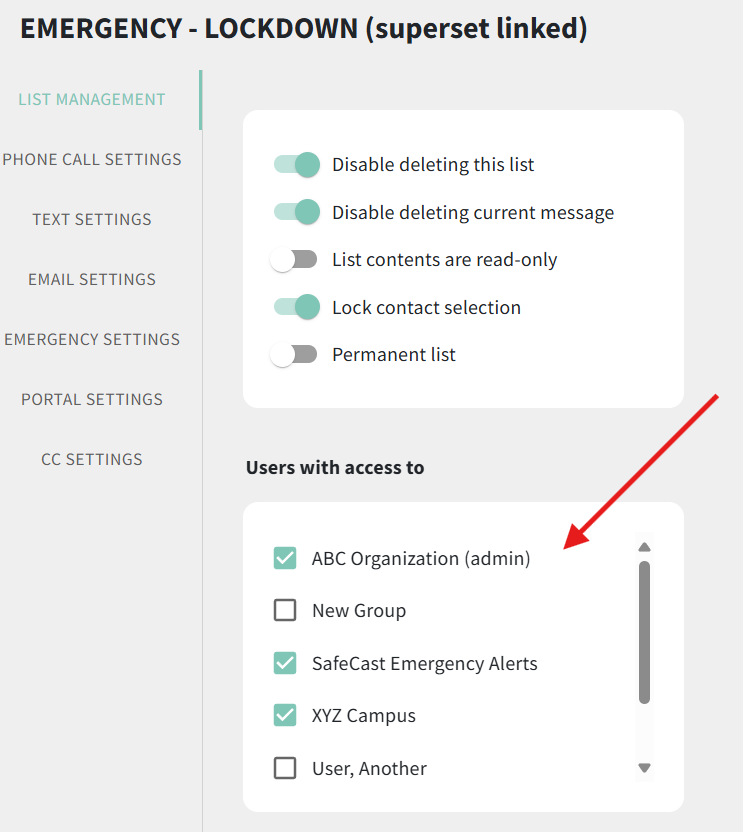
- Navigate to the List Settings > List Management tab
- In the "Users with access to" box, select each user or user group who may need to send an emergency message through the list
If you are creating multiple lists for emergency use, you may want to create a folder to group the emergency lists in and share that. See here for more help with creating groups to share lists.
Phone, Text, and Email settings for your emergency list
Take time now to review the phone, text, and email settings for your emergency list to make sure all your contacts will be reached as intended. The below settings should be reviewed and set to whatever you think is best for your intended use case.
Phone Call Settings

- Is the Caller ID a phone number that will be easily recognizable to your contacts, like your office phone number? Note: Due to new government guidelines, users can no longer set a brand new caller ID phone number without first contacting support. If it's a caller ID number you've used before, you can set it yourself. If you've never used the caller ID number for your messages, please contact us so we can set it for you.
- Setting the Caller ID phone number to your office phone number can help your recipients recognize your call so that they actually answer it, however, this can also cause a greater number of call-backs to your office.
- Setting the Caller ID phone number to one of BrightArrow's numbers will make your calls less recognizable to recipients but will also then result in less call-backs to your office. The valid phone numbers to use for this are:
855-994-0071
855-994-0059
855-994-0055
855-994-0047
855-994-0030
855-994-0026
855-994-0021
855-994-0060
- Review the "Phones to call for each contact" section to ensure your calls go out how you want them to.
- With large lists, the "call all numbers" setting can result in your list taking a longer time to process because it will call every number regardless of whether or not someone answered.
- The setting "Try first number, and then onward until delivered" will help your list process more quickly because it will call each contact, but if the contact answers the call it will not proceed to try to call the second or third phone number for that contact. However, if a voicemail answers, the system counts that as an answer and will not proceed to calling the contact's other phone.
Text Settings

- Are all phone numbers selected as "Phones to text for each contact?"
- Marking all phones here is recommended, unless you know for sure which phones are textable and which are not.
- If you know for sure that only "Phone 1" or "Phone 2" numbers are mobile numbers, you can check just that box to help improve the speed at which your text message sends. If you are not 100% sure which phone fields are for mobile phones and which are landlines (which is common for lists that sync), mark all the boxes.
Email Settings

- To make sure your email stands out to your recipients when it hits their inbox, you may want to change the default "Display Email Name As" and "Display Email Address As" fields to your name and email address.
- If a message is sent from the emergency list, the Reports page in BrightArrow will hold the message for one year. If you need to keep the record on file for more than one year, check the box and enter an email address in "Message sent reports." This will send a copy of the report to the email address entered, so your organization can retain it for a longer period of time.