Using the List Settings
In BrightArrow, you might have a number of different lists, but did you know you can have different settings for each individual list? This article will give you an overview of the various settings. You can use the links throughout the document to find more in-depth information about each topic.
Note that the settings detailed in this document apply only to the specific list you are in. If you would like to adjust settings for a large number of lists, or set default settings for your entire organization, please contact us.
Navigating to the List Settings
To access a list's settings, first navigate to your My Lists page and find the list you would like to see the settings for.
You can either:
- Hover over the list name, then click on the settings "gear" icon.
- Click on the list's name, then click the button for "List Settings."

OR

Here you will see multiple options on the left of the screen.

List Management
Under the "List Management" tab, you will find all of the options needed to protect individual lists and messages from being accidentally deleted.

- Disable deleting this list - toggle on to ensure no one accidentally deletes your list.
- Disable deleting current message - toggle on to ensure no one accidentally deletes the message that is saved to the list (message will be in read-only mode)
- List contents are read-only - toggle on to ensure no one accidentally changes contact's information that is stored in the list
- Lock contact selection - toggle on to ensure no one changes which contacts are selected within the list
- Permanent list - toggle on to stop the list from updating automatically. Using this option will stop the nightly syncs from updating your list, preventing the list's contact information from updating. Use this option with caution.
You will also be able to see which users and user groups have access to the list. You can use the checkboxes to add and/or remove access from users and user groups as well.

If your list is linked to another list, you will be able to see what it is linked to.
If your list is a superset list or a subset list that was created by applying filters to another list, you will see a button under "Linked List Settings." Click the button to view details and make any changes. See here for more help with making edits to a superset list.
 If your list is a subset list that was created by making a copy of another list, under "Linked List Settings" you will see the source list that was used to create your subset.

Phone Call Settings
Under the "Phone Call Settings" tab, you will find multiple options regarding how your calls will be delivered.

Here you can change the Caller ID phone number that recipients will receive your calls from, determine how often and how many times the call should send again if there is no answer, and which phone numbers should receive the calls. Note that if a recipient's voicemail answers, our system counts that as the call having been answered.
See here for additional information and disclaimers about changing these settings.
Through the "Phone Call Settings" tab you can also use the "Remote Dial In" feature to allow the list to be accessible by phone in case you need to send a quick message. See here for instructions on how to use the feature.
Text Settings
Under the "Text Settings" tab, you will find the option to select which phone numbers should receive text messages. Using this option, you can set up your list to only send text messages to contacts whose phone number is in a certain field. For example, if you add contacts to BrightArrow where "Phone 1" is always a landline and "Phone 2" is always a mobile phone, you can use the Text Settings to ensure no text messages send to Phone 1.
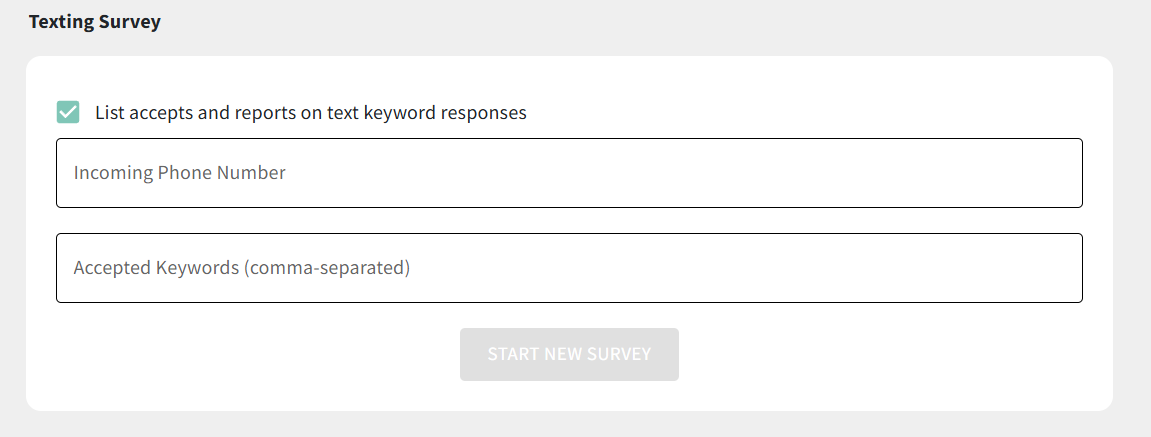
 Under the "Text Settings" tab, you will also find options for lists that you want to send a text survey from. Here you can enter/update the keywords to be included within your survey. Note that in order to set up text surveys for the first time, we will need to establish a dedicated phone number for you. Contact us to get started.
 Email Settings
 Email Settings
Under the "Email Settings" tab, there are three main options that you may use to configure emails sent from the list.
Setting the default subject line, display name, and email address
In the subject line, display name, and display email address, BrightArrow has built in "defaults" for email messages. When you create an email message, you have the ability to change those to whatever you wish. If you are often changing those defaults for a particular list, you can set your preferred defaults in the Email Settings. This way, you can set up the defaults to be whatever you most commonly use. You will still be able to change them one-off when you are creating the email message.

Message Sent Reports
Commonly used for automated messages, the "Message Sent Report" function allows you to designate as many email addresses as you'd like to receive an emailed report of the message that sent. This can be helpful for keeping important messages organized for your staff.
We recommend that this function be set up for all automated messages so that your staff can have access to the message report even if they don't have full administrator access in BrightArrow to be able to retrieve the message report from the BrightArrow Reports page.
Add as many email addresses here as necessary, comma separated, no spaces. See here for more help setting up Message Sent Reports.

Report Emailing
Unlike generic email attachments in which the same attachment is sent to all recipients, " report emailing" is used to send recipient-specific attachments, such as personal letters, report cards, and fee statements. This function works by parsing out the attachments to find a corresponding identifier (most commonly, student ID number) and sending the corresponding attachment only to those contacts who have a matching identifier in the BrightArrow list.
Report Emailing must be enabled within a list in order to make sure each attachment goes to only the corresponding recipient(s). BrightArrow customers have the option to enable this function through the list settings, however, a BrightArrow support engineer should review your list to ensure that your data is mapped properly in BrightArrow before you send attachments through this feature. Please email us before using the report emailing feature for the first time.
Note that once this feature is enabled, messages will ONLY send to your contacts if there is a corresponding document.

Emergency Settings
Under "Emergency Settings" you will find the settings related to SafeCast, a remote "panic button" in which pre-determined staff members can text a keyword to a specified phone number to send a pre-saved message to the list. In order to use this function, BrightArrow will purchase a dedicated phone number for your organization to use in case of emergency. See here for more details about SafeCast.

Portal Settings
Under the "Portal Settings" tab, you will find the options needed to have your list linked to a public portal. In all cases, we will need set this function up for you. Contact us for more details and for help setting it up.
- The Licensed (pre-authorized) portal can be used to link the list to the Parent Portal in PowerSchool.
- The Free (community) portal can be used to give your constituents the option to opt to receive messages for just this list. For example, if your constituents want to receive your monthly newsletter but no other messages from you, they can do so through the free community portal list once it is set up.

CC Settings
Under the "CC Settings" tab, you have the option to send a copy of messages to a specified contact or contacts. With the CC Settings set up, the email addresses and phone numbers added in the field will receive a copy of every message that is sent from the list. See here for more help with adding contacts to be CC'd on messages.
